
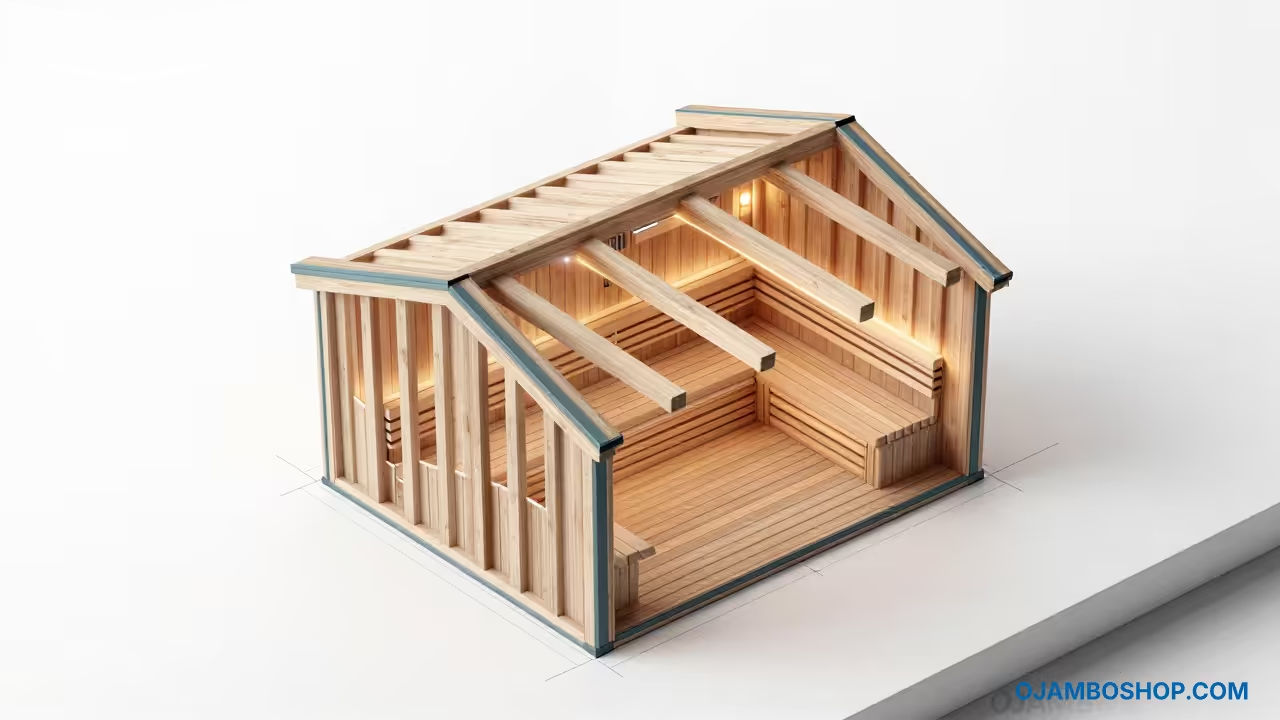
The concept of Hygge centers on creating a warm atmosphere and enjoying the good things in life with good people. Integrating a dedicated sauna and guest suite into your backyard transforms a simple plot of land into a wellness sanctuary.
This structure provides a multifunctional space that serves as both a private retreat and a welcoming area for visitors. Adding a high quality guest suite increases the overall market value of your property significantly.
It offers a versatile solution for those needing a home office or a rental unit or a dedicated space for health and recovery. The combination of a traditional Finnish style sauna and a cozy living area creates a balanced environment for relaxation.
Quick Specs
Dimensions: 14 feet by 25 feet. Estimated Cost: 18000 to 26000 USD.
Difficulty Level: Advanced. Estimated Build Time: 500 to 700 man hours.
Materials and Tools
Required Lumber and Hardware
- Western Red Cedar planks for sauna interior
- Pressure treated 4×4 skids for foundation
- Standard 2×6 kiln dried spruce for floor joists
- Standard 2×4 spruce for wall framing
- OSB or Plywood for roof and wall sheathing
- Corrugated metal roofing panels
- Aluminum foil vapor barrier for sauna walls
- R 21 Fiberglass batts for guest suite insulation
- Galvanized carriage bolts and 3 inch deck screws
- High temperature silicone sealant for sauna stove
Essential Tools
- Miter saw and table saw
- Impact driver and cordless drill
- Laser level and chalk line
- Pneumatic framing nailer
- Heavy duty staple gun
- Digital moisture meter
- Oscillating multi tool
- Safety goggles and ear protection
Material Comparison
| Material | Best Use | Pros | Cons |
|---|---|---|---|
| Cedar | Sauna Walls | Rot resistant and fragrant | Higher material cost |
| Spruce | Framing | Structural strength and availability | Susceptible to moisture |
| Pine | Interior Trim | Easy to work and paint | Higher resin content |
| Metal | Roofing | Long lifespan and low maintenance | Noise during rain |
Technical Layout
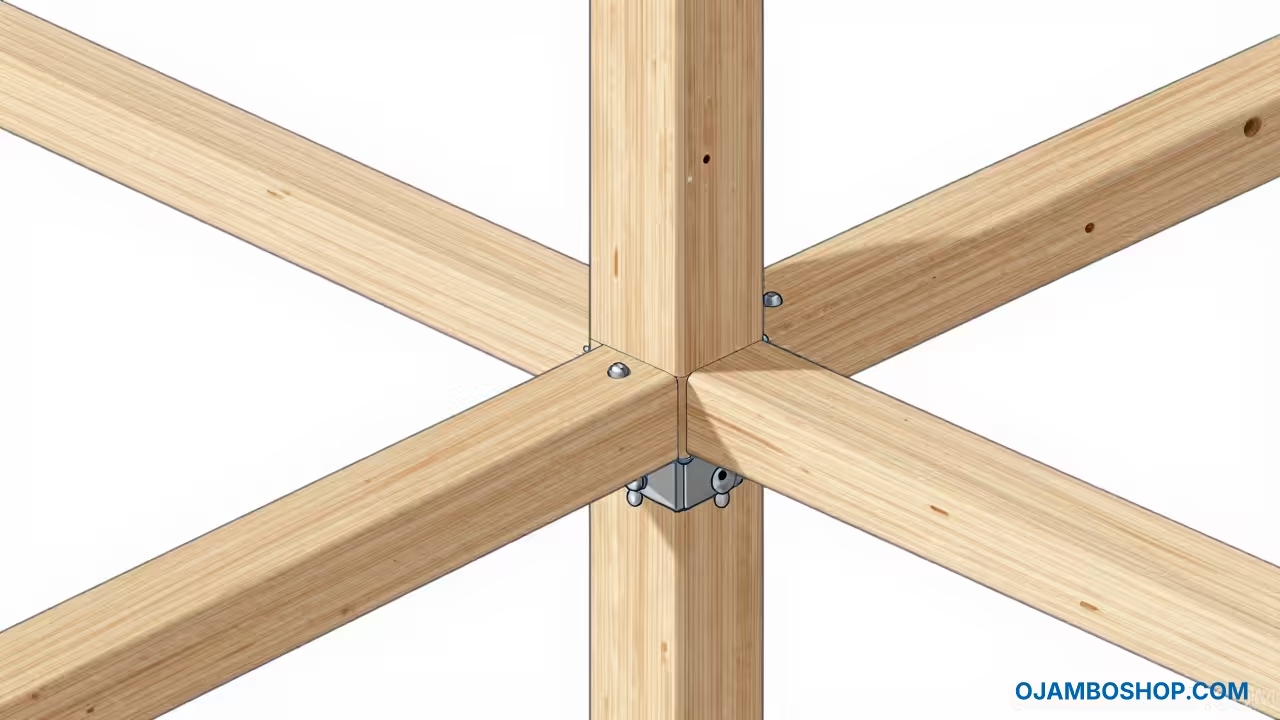
The structural integrity of this suite relies on a hybrid framing system designed to handle disparate moisture loads. The guest area utilizes standard 16 inch on center 2×4 wall studs to support the lean to roof load.
In contrast the sauna section requires a reinforced perimeter to support the weight of the heater and heavy cedar cladding. The floor system employs 2×6 joists spaced at 12 inches on center to prevent deflection under the weight of the sauna benches.
Load bearing is concentrated on the rear wall which stands 10 feet tall to allow for a steep roof pitch. This pitch ensures efficient snow shedding and water runoff which is critical for longevity in humid or cold climates.
The transition point between the guest suite and the sauna is reinforced with a double stud king post. This prevents structural shifting between the dry living zone and the high humidity sauna zone.
All connections use galvanized fasteners to prevent corrosion from the internal steam. This ensures the framework remains stable over decades of use.
Step by Step Instructions
Phase 1 Foundation and Subfloor
Begin by leveling the site and placing pressure treated 4×4 skids on concrete piers. Install 2×6 floor joists across the skids and secure them with galvanized joist hangers.
Ensure the frame is perfectly square by measuring the diagonals of the rectangle. Install 0.75 inch tongue and groove subflooring using exterior grade adhesive and deck screws.
Phase 2 Vertical Wall Framing
Construct the four exterior walls on the subfloor using 2×4 spruce studs. The rear wall must be taller than the front wall to create the required roof slope.
Install double top plates to distribute the roof load evenly across the vertical members. Use a laser level to ensure every wall is plumb before nailing them into the floor.
Phase 3 Roof Installation and Sheathing
Install a central ridge beam or a series of rafters spanning from the rear wall to the front. Secure the rafters with hurricane ties to ensure the structure withstands high wind loads.
Lay OSB sheathing across the rafters and secure it with 8d common nails. Finish the roof with corrugated metal panels and professional flashing around the edges.
Phase 4 Exterior Envelope and Siding
Apply a high quality house wrap to the exterior walls to prevent moisture infiltration. Install cedar lap siding or vertical board and batten for a traditional Scandinavian aesthetic.
Install energy efficient double pane windows to maximize natural light in the guest area. Ensure all window and door frames are flashed correctly to avoid rot.
Phase 5 Sauna Framing and Vapor Barrier
Frame the internal sauna room using 2×4 studs and a dedicated moisture resistant bottom plate. Install a continuous layer of aluminum foil vapor barrier over the studs and ceiling.
Overlap the foil seams by at least 6 inches and seal them with aluminum tape. This critical step prevents steam from entering the main wall cavities.
Phase 6 Electrical and Plumbing Rough in
Run dedicated 240 volt wiring for the sauna heater and standard 120 volt circuits for the guest suite. Install a sub panel to manage the power load and ensure all circuits are GFCI protected.
Run plumbing lines for the small bathroom and shower area using PEX piping for freeze resistance. Install a dedicated vent line for the sauna to manage air exchange.
Phase 7 Insulation and Interior Walls
Fill the guest suite wall cavities with R 21 fiberglass batts to ensure thermal efficiency. Install moisture resistant drywall in the bathroom and standard drywall in the living area.
Mud and tape the joints and apply a light neutral paint for a clean look. Leave the sauna framing exposed until the cedar cladding process begins.
Phase 8 Sauna Cladding and Bench Installation
Install Western Red Cedar tongue and groove planks horizontally across the foil vapor barrier. Use stainless steel trim nails to avoid rust streaks on the beautiful cedar wood.
Construct tiered benches using 2×4 cedar supports and 2×6 cedar tops for seating. Ensure the benches are ergonomically spaced to allow for comfortable reclining.
Phase 9 Flooring and Final Trim
Lay luxury vinyl plank flooring in the guest suite for durability and water resistance. Install cedar slat flooring in the sauna area to allow water to drain into the subfloor.
Add baseboards and window casings using clear pine trim for a polished finish. Install the sauna stove and connect the chimney pipe using a double walled insulated flue.
Phase 10 Final Sealing and Detailing
Apply a high temperature silicone sealant around the stove and chimney penetration points. Seal all exterior gaps with professional grade caulk to prevent drafts and insect entry.
Install the interior doors and ensure the sauna door opens outward for safety. Conduct a final test of the heating system and plumbing fixtures.
Common Mistakes
One frequent error is the improper installation of the sauna vapor barrier. If the foil is punctured or the seams are not taped steam will penetrate the insulation.
This leads to mold growth and structural rot within the main wall framing. It is essential to be meticulous with the aluminum tape.
Another mistake is neglecting the ventilation requirements of the sauna. Builders often forget to install a proper intake vent near the floor and an exhaust vent near the ceiling.
Without this airflow the sauna becomes oppressive and the wood cannot dry properly. This can lead to premature decay of the cedar planks.
Many DIYers also fail to properly level the foundation piers. A slight slope in the base can cause doors to stick and windows to crack over time.
Always use a transit level or laser level across the entire footprint before building. A solid level base is the most important part of the build.
Finally some builders use standard screws in the sauna area instead of stainless steel. The high humidity and heat cause galvanized screws to corrode and bleed into the cedar.
This creates permanent black streaks that ruin the aesthetic of the wood. Stainless steel is the only viable option for high heat zones.
Maintenance and Safety
Pro Tip for Longevity: Use a high quality penetrating oil specifically designed for cedar on the exterior siding every three years. This prevents the wood from turning grey and protects it from UV degradation.
Ensure you apply the oil on a dry day with temperatures between 50 and 80 degrees. This ensures the oil penetrates deep into the wood fibers.
Maintain the sauna heater by vacuuming the heating elements every six months to remove dust. Inspect the chimney flashing annually to ensure no leaks have developed during the winter freeze thaw cycles.
Check the vapor barrier seals if you notice any unusual moisture on the exterior walls. Prompt action prevents long term structural damage.
Safety is paramount when operating a high heat sauna. Always install a thermometer and a hygrometer to monitor the internal temperature and humidity.
Ensure the sauna door has no latch or lock to allow for a quick exit in an emergency. This is a standard safety requirement for all professional saunas.
Use a fire rated hearth pad beneath the sauna stove to protect the flooring from extreme heat. Keep a fire extinguisher in the guest suite and ensure all smoke detectors are functioning.
Regularly test the GFCI outlets to ensure the electrical system is operating safely. Electrical safety is critical in high moisture environments.