
The agrarian style of gardening emphasizes a return to traditional functional beauty in the backyard. This project combines a high volume raised bed with a protective cold frame for seasonal flexibility.
Integrating a cold frame allows the gardener to extend the growing season by several months. It protects delicate seedlings from late frosts while maintaining a natural aesthetic on the property.
A well built structure adds significant value to a home by increasing food self sufficiency. This blueprint ensures a professional finish that withstands the elements for many years.
Quick Specs
Dimensions are 48 inches wide by 96 inches long by 24 inches high. The estimated cost is 350 to 500 US Dollars depending on lumber selection.
Intermediate woodworking skills are required for this build. The estimated build time is 14 to 18 total labor hours.
Materials and Tools
Lumber Requirements
- Five 4×4 cedar posts at 8 feet length
- Twelve 2×6 cedar boards at 8 feet length
- Four 2×4 cedar boards at 8 feet length
- Two sheets of 1/4 inch clear polycarbonate
Hardware Requirements
- Two boxes of 3 inch stainless steel deck screws
- One box of 1.5 inch stainless steel screws
- Four heavy duty galvanized strap hinges
- Two locking cabinet latches
- One roll of galvanized hardware cloth
Required Tools
- Miter saw or circular saw
- Power drill and impact driver
- Four foot bubble level
- Speed square and tape measure
- Orbital sander with 80 grit paper
Material Comparison
| Material | Rot Resistance | Cost | Lifespan | Aesthetic |
|---|---|---|---|---|
| Cedar | High | High | 15 to 20 Years | Natural Silver |
| Redwood | Very High | Very High | 20 to 25 Years | Deep Red |
| Pressure Treated | High | Low | 10 to 15 Years | Greenish Tint |
| Pine | Low | Very Low | 3 to 5 Years | Pale Yellow |
Technical Layout
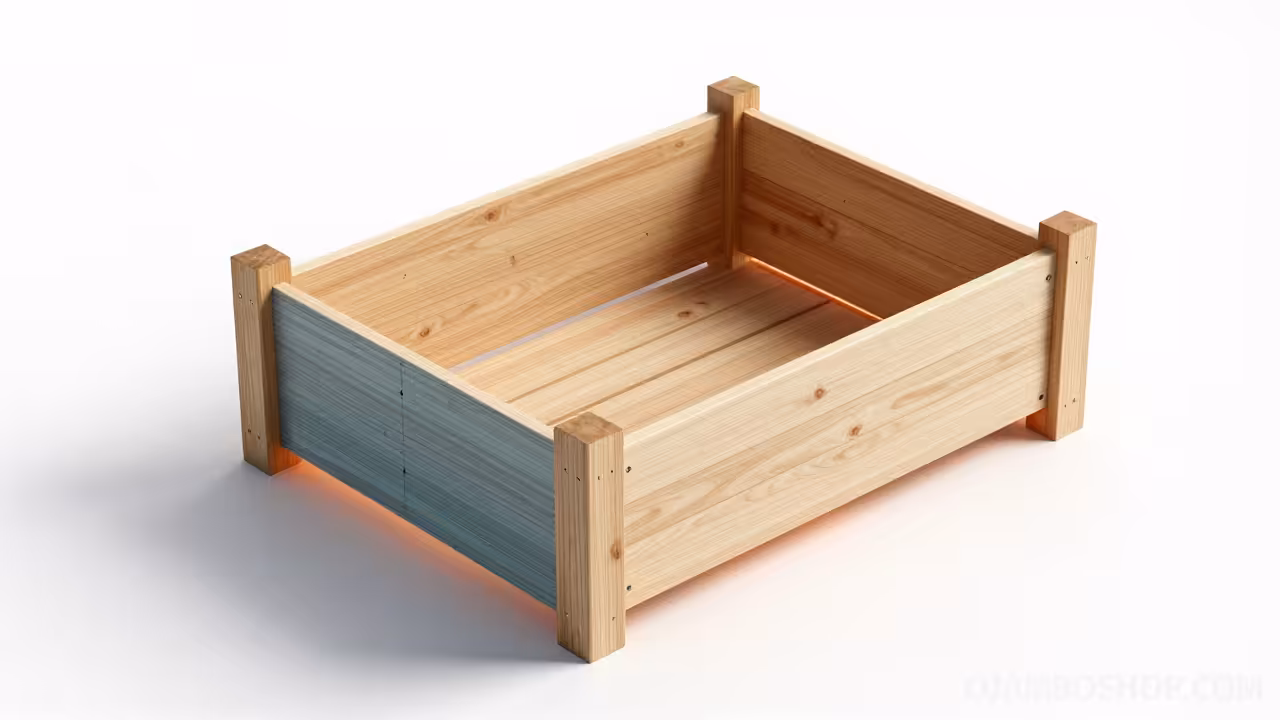
The structural integrity of the agrarian bed relies on a heavy duty post and beam framework. Four 4×4 cedar posts act as the primary load bearing anchors at each corner of the unit.
These posts are notched to accept the 2×6 horizontal walls which creates a mechanical lock that prevents bowing. The cold frame section occupies the first 48 inches of the total 96 inch length.
This section requires a reinforced upper rail to support the weight of the polycarbonate lid. The transition between the open bed and the cold frame is managed by a central 4×4 support post.
This post ensures that the long 2×6 walls do not sag under the weight of the soil. The cold frame lid is designed with a five degree slope to allow rainwater to runoff.
This slope prevents pooling and reduces the risk of leaks during heavy storms. All joints are fastened with stainless steel screws to prevent galvanic corrosion over time.
The base is lined with hardware cloth to stop burrowing pests from entering the soil. This ensures a clean and protected growing environment for all plants.
Step by Step Instructions
Phase 1 Site Preparation and Leveling
Begin by clearing a 5 by 10 foot area of all grass and debris. Use a long bubble level to ensure the ground is perfectly flat across the entire footprint.
Dig out two inches of soil if the area is uneven to avoid structural stress. Lay down a thin layer of coarse gravel to improve drainage under the bed.
This prevents the bottom boards from sitting in standing water during the winter. A level foundation is critical for the alignment of the cold frame lid.
Phase 2 Constructing the Base Frame
Cut your 4×4 posts into four 24 inch segments for the corners. Lay two 8 foot 2×6 boards parallel to each other on the ground.
Connect these boards using 48 inch 2×6 cross members at each end. Drive three stainless steel screws through the cross members into the long rails.
Ensure the frame is perfectly square by measuring the diagonals of the rectangle. This base provides the primary stability for the entire structure.
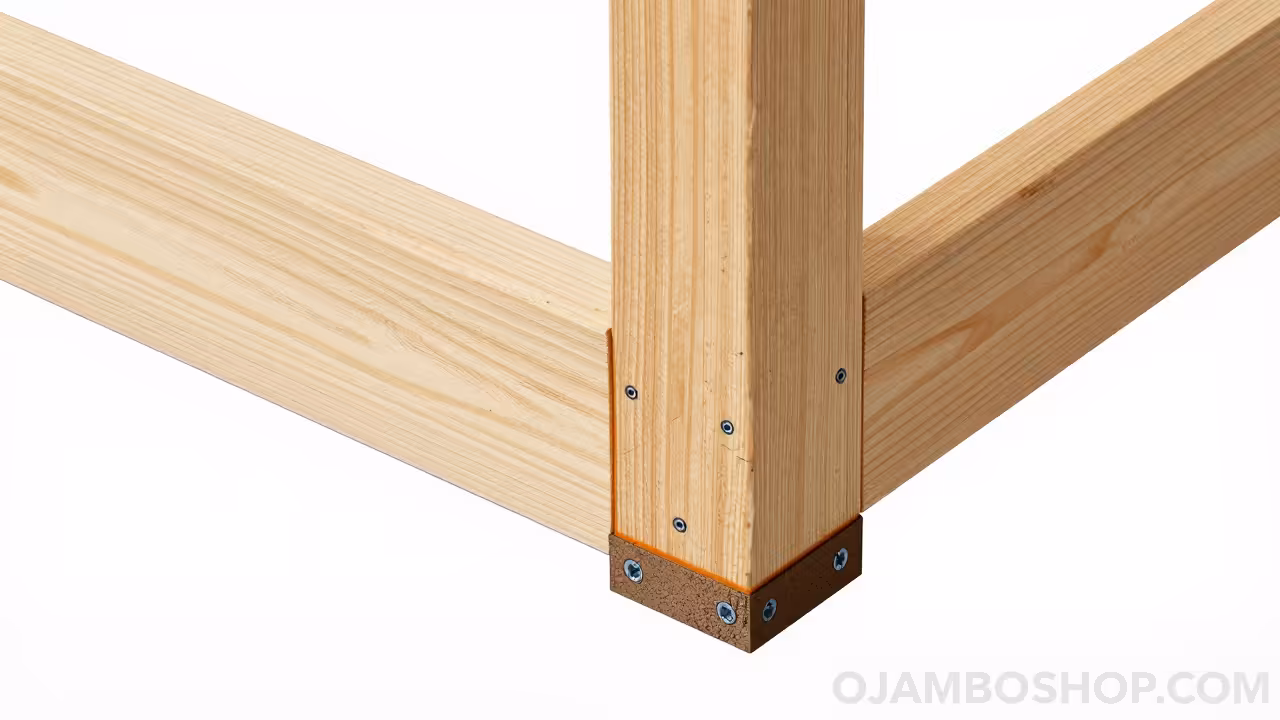
Phase 3 Vertical Wall Assembly
Stand the 4×4 posts upright at the four corners of the base frame. Attach the second layer of 2×6 boards to the exterior of the posts.
Use a speed square to ensure every board is perpendicular to the vertical post. Drive screws every 12 inches to prevent the boards from warping.
Repeat this process for the third layer until the bed reaches 24 inches. This height is ideal for ergonomic gardening and root depth.
Phase 4 Installing the Center Support
Cut a 24 inch segment of 4×4 post and place it in the center of the long walls. This post prevents the 8 foot boards from bowing outward under soil pressure.
Secure the post using heavy duty screws from the inside of the bed. This creates a hidden structural rib that maintains the linear shape.
Verify that the center post is perfectly plumb before final tightening. This prevents the walls from shifting as the wood seasons.
Phase 5 Cold Frame Base Integration
Install two 2×4 rails across the top of the first 48 inches of the bed. These rails create the seating surface for the cold frame lid.
Ensure the rails are level and flush with the top of the 2×6 walls. Use 1.5 inch screws to secure the rails into the 4×4 corner posts.
This creates a stable platform that will support the polycarbonate glazing. Proper alignment here ensures the lid closes without gaps.
Phase 6 Framing the Cold Frame Lid
Construct a 48 by 48 inch frame using 2×4 cedar boards. Cut the side rails at a slight angle to create the necessary drainage slope.
Assemble the lid using pocket holes or l brackets for maximum rigidity. Sand all edges to remove splinters and ensure a tight fit against the base.
This frame must be exactly 1/4 inch smaller than the base opening. This gap allows for the natural expansion of the wood in humid weather.
Phase 7 Polycarbonate Installation
Cut the polycarbonate sheets to fit the dimensions of the lid frame. Center the sheets over the frame and leave a small gap for thermal expansion.
Secure the plastic using stainless steel screws with rubber washers to prevent leaks. The washers create a watertight seal that keeps the interior warm.
Ensure the plastic is taut to avoid rattling during high winds. This transparency allows maximum sunlight to reach the seedlings.
Phase 8 Hinge and Latch Attachment
Mount the galvanized strap hinges to the rear 4×4 post and the lid frame. Align the hinges so the lid opens smoothly without binding against the rails.
Install the locking cabinet latches on the front edge of the lid. These latches keep the lid closed during storms and trap heat inside.
Test the movement several times to ensure the lid seats fully. A tight seal is essential for the greenhouse effect to work.
Phase 9 Pest Barrier and Soil Filling
Staple galvanized hardware cloth to the bottom of the bed before adding soil. This mesh prevents gophers and moles from destroying the root systems.
Fill the bed with a high quality mix of compost peat moss and vermiculite. Fill the bed to within two inches of the top edge to allow for watering.
Tamp the soil lightly to remove large air pockets. This ensures that roots have direct contact with the nutrients in the mix.
Phase 10 Finishing and Weatherproofing
Sand any rough edges on the exterior of the bed to prevent injury. Apply a food safe linseed oil or beeswax finish to the cedar boards.
This protects the wood from UV rays and slows the silvering process. Check all screws one last time to ensure they are fully seated.
Clear away all construction debris from the surrounding garden area. Your agrarian garden bed is now ready for planting.
Common Mistakes to Avoid
- Using pressure treated lumber is a frequent error for home gardeners. Chemicals can leach into the soil and contaminate organic vegetables.
- Failure to level the site leads to uneven soil distribution and structural leaning. This creates gaps in the cold frame lid that allow heat to escape.
- Over tightening screws into the end grain of the cedar can cause the wood to split. Always pre drill pilot holes to ensure a secure connection.
- Forgetting the drainage slope on the cold frame lid causes water to pool on top. A minimum slope of five degrees is essential for proper runoff.
Maintenance and Safety
Wear safety glasses and hearing protection when operating the miter saw and power drill. Use a dust mask when sanding cedar to avoid inhaling fine particulates.
Keep the work area clear of trip hazards during the assembly process. Always double check the stability of the lid before leaving it unattended.
Apply a fresh coat of linseed oil every two years to maintain the wood color. Inspect the hinges and latches every spring for signs of rust or wear.
Tighten any screws that have backed out due to the natural expansion of the wood. Clear dead leaves and debris from the cold frame rails to prevent rot.
Ensure the polycarbonate sheets are cleaned with a soft cloth and mild soap. Replace any cracked polycarbonate panels immediately to maintain the thermal seal.