
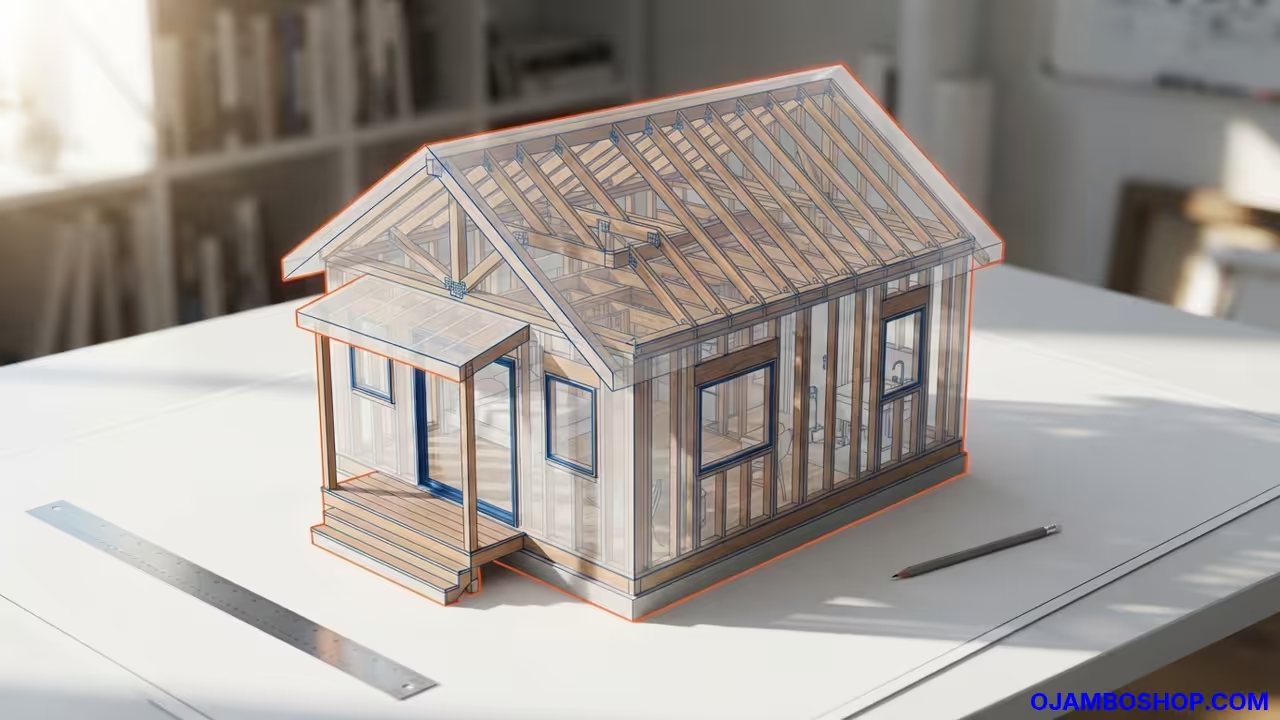
Building a 350 square foot backyard guest suite is a transformative project that adds significant value to your property while providing versatile living space. This accessory dwelling unit serves multiple purposes, from housing aging parents to generating rental income or offering a quiet workspace.
The compact footprint fits comfortably in most standard backyards without overwhelming the existing landscape. Homeowners appreciate the independence these units provide, creating a sense of privacy while maintaining proximity to the main house.
The construction process for a 350 square foot ADU requires careful planning and precise execution. You will need to navigate local zoning laws and building codes to ensure compliance with safety regulations. Proper foundation work is critical to prevent settling and structural issues over time.
The framing must support the roof load and withstand environmental stresses like wind and snow. Attention to insulation and weatherproofing ensures energy efficiency and comfort for the occupants.
Disclosure: article includes affiliate links.

Quick Specs
Dimensions: 20 feet wide by 17.5 feet deep with an 8-foot ceiling height. Estimated Cost: $45,000 to $65,000 for materials and basic finishes.
Difficulty Level: Advanced DIY requiring framing and roofing experience. Estimated Build Time: 3 to 4 months for a solo builder or small team.
Materials & Tools
You will need 2×4 and 2×6 pressure-treated lumber for the foundation and framing. Plywood or OSB sheathing covers the walls and roof structure. Exterior siding such as fiber cement or vinyl protects the building envelope.
Windows and doors must meet energy efficiency standards for residential use. Insulation batts or spray foam maintain thermal comfort year-round. Essential tools include a circular saw, drill/driver, and impact driver for assembly.
A chalk line and level ensure accuracy during framing and layout. Safety gear like goggles, gloves, and hearing protection is mandatory. A ladder and scaffolding provide access to the roof and upper walls.
A tape measure and square are used constantly for layout verification. Pro Grade Paint Brushes, Paint Brush Set for Walls, Trim & Stain, 5-Piece https://amzn.to/4qeaP20
Technical Layout
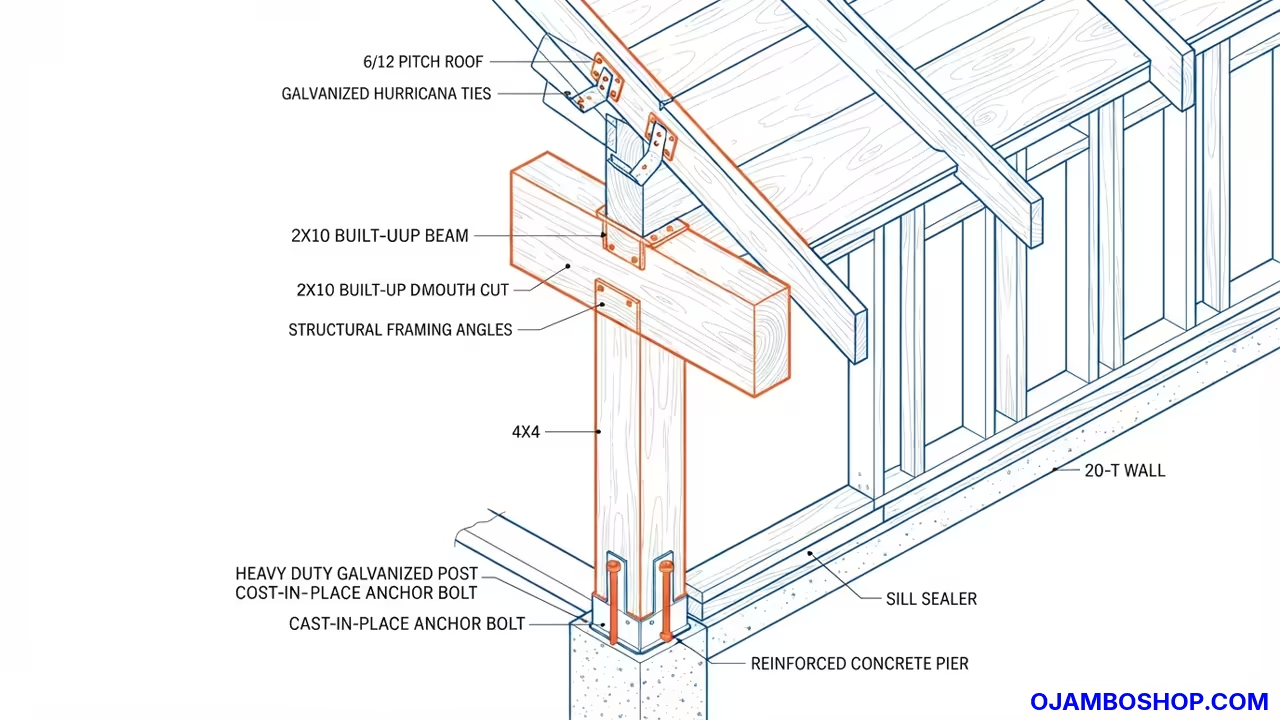
The structural integrity of this guest suite relies on a robust post-and-beam foundation system. Concrete piers support pressure-treated 4×4 posts that transfer the load to the ground. A 2×10 beam spans between posts to create a stable platform for the floor joists.
This elevation prevents moisture damage and allows for ventilation underneath the structure. The floor joists are spaced 16 inches on center to support the subfloor and living loads. The wall framing utilizes standard 2×4 studs spaced 16 inches on center.
Top and bottom plates tie the studs together and distribute the roof load. Headers are installed over door and window openings to maintain structural continuity. The roof structure features a gable design with 2×6 rafters pitched at 6/12.
This pitch allows for adequate water runoff and attic ventilation. Ridge beams and purlins provide additional support for the roof sheathing.
Step-by-Step Instructions
Phase 1: Site Preparation
Phase one involves site preparation and layout verification. Clear the area of vegetation and debris to create a level working surface. Use stakes and string lines to mark the exact footprint of the structure.
Check local setback requirements to ensure the placement is legal. Compact the soil within the footprint to prevent future settling issues.
Phase 2: Foundation Piers
Phase two focuses on constructing the foundation piers. Dig holes for the concrete piers at the marked corner and mid-point locations. Place sonotubes and pour concrete to the required depth below the frost line.
Insert rebar and anchor bolts into the wet concrete for structural connection. Allow the concrete to cure for at least 48 hours before proceeding.
Phase 3: Floor Frame
Phase three covers the assembly of the floor frame. Cut and assemble the perimeter beams using structural connectors. Lift the beams onto the foundation posts and secure them with bolts.
Install the floor joists between the beams at 16-inch spacing. Nail the joists to the beams using structural nails or screws. Lay down the plywood subfloor and screw it into the joists.
Phase 4: Wall Framing
Phase four involves framing the exterior walls. Build the wall sections on the subfloor using studs and plates. Lift the walls into place and brace them temporarily.
Secure the walls to the subfloor with nails or screws. Check for plumb and square before permanent bracing. Install headers over openings for doors and windows.
Phase 5: Roof Structure
Phase five details the installation of the roof structure. Erect the gable ends and secure them to the top plates. Install the ridge beam and attach the rafters at the specified pitch.
Nail the rafters to the top plates and ridge beam. Install collar ties to prevent rafter spreading. Sheathe the roof with plywood or OSB panels.
Phase 6: Sheathing & Weatherproofing
Phase six focuses on sheathing and weatherproofing the walls. Install plywood or OSB sheathing on the exterior walls. Wrap the structure with a weather-resistant barrier like house wrap.
Tape the seams of the wrap to create a continuous moisture barrier. Install flashing around window and door openings. Apply siding according to the manufacturer instructions.
Phase 7: Utilities & Insulation
Phase seven covers the installation of utilities and insulation. Run electrical wiring and plumbing lines through the wall cavities. Install insulation batts between the studs for thermal performance.
Seal all gaps with caulk or foam to prevent air leaks. Install drywall on the interior walls and tape the seams. Prime and paint the interior surfaces.
Phase 8: Exterior Finish
Phase eight involves finishing the exterior and adding details. Install the roofing material over the sheathing and flashing. Add trim and fascia to the roof edges for a clean look.
Install gutters and downspouts for water management. Paint or stain the exterior siding for protection. Add exterior lighting and landscaping to complete the project.
Common Mistakes
Builders often neglect proper site drainage, leading to water accumulation around the foundation. Failing to check local zoning codes can result in fines or forced demolition. Inadequate insulation causes energy inefficiency and comfort issues.
Skipping structural connectors compromises the integrity of the frame.
Maintenance & Safety
Inspect the roof and gutters annually to prevent water damage. Clean and reseal exterior siding every five years. Check for pest activity in the foundation and framing.
Use safety gear when operating power tools and working at heights. Ensure electrical and plumbing work meets code standards.