
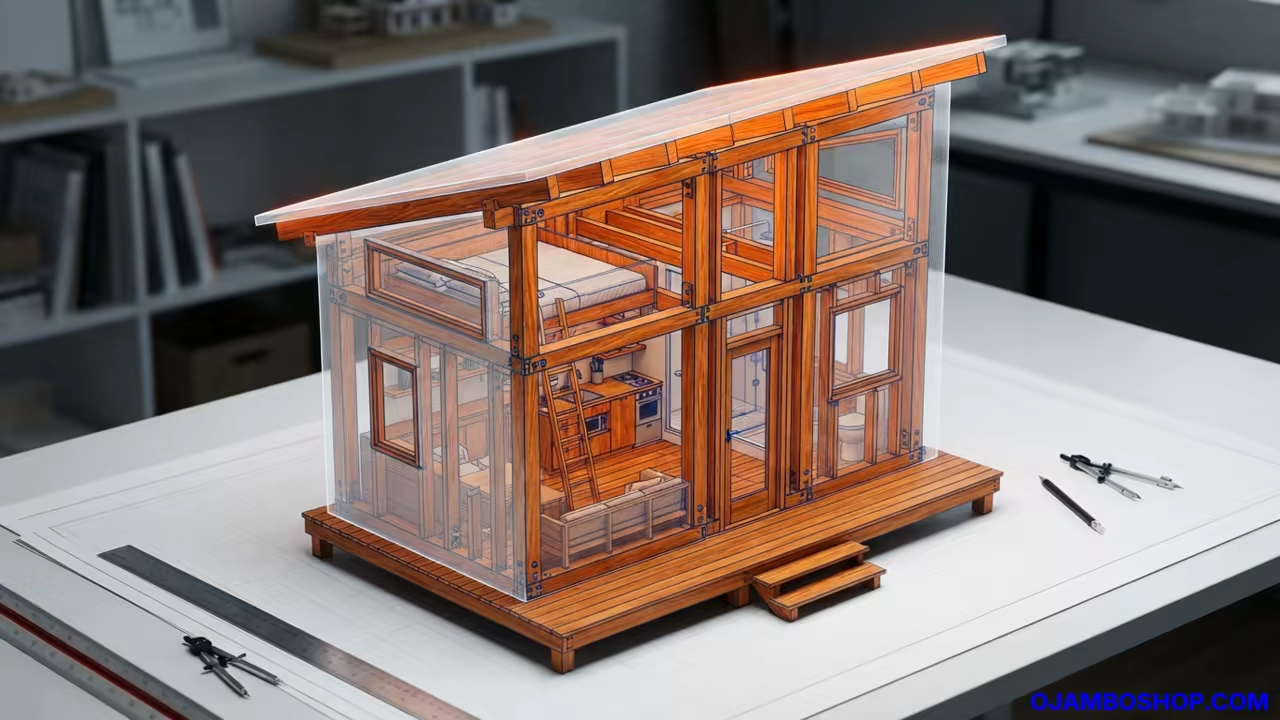
Adding a detached accessory dwelling unit transforms a standard backyard into a versatile asset for homeowners. These structures provide immediate value through rental income or dedicated space for aging family members.
A well designed five hundred square foot unit blends modern aesthetics with functional efficiency. This guide provides the technical framework to execute a professional grade build from the ground up.
Quick Specs
Dimensions are 20 feet by 25 feet. Estimated cost ranges from 65,000 to 115,000 dollars.
The difficulty level is advanced. Estimated build time is 6 to 10 months.
Disclaimer: I may earn a commission from purchases made through these links at no extra cost to you.


Materials and Tools
The structural frame requires premium grade 2×6 kiln dried studs for exterior walls. You will need 2×10 pressure treated joists for the floor system to ensure long term stability.
Exterior sheathing should consist of 7/16 inch OSB panels with a high quality house wrap. For the roof, use standing seam metal panels and a synthetic underlayment for maximum weatherproofing.
Cedar lap siding provides a modern look while offering natural resistance to decay. High efficiency double pane aluminum windows are essential for maintaining thermal boundaries in small living spaces.
Essential tools include a compound miter saw and a heavy duty framing nailer. You will also need a laser level and a pneumatic compressor for efficient assembly.
A high torque impact driver and a variety of framing squares are mandatory for precision. Ensure you have a reliable table saw for ripping wide sheets of exterior sheathing.
| Parameter | Description | Value |
|---|---|---|
| Fasteners | Common Nails versus GRK Structural Screws | Higher Shear Strength |
| Framing | 2×4 Studs versus 2×6 Studs | Better Insulation Space |
| Flooring | T&G Plywood versus Advantech Subfloor | Zero Squeak Stability |
| Roofing | Asphalt Shingles versus Standing Seam Metal | 50 Year Lifespan |
| Vapor Barrier | Plastic Poly versus Smart Vapor Membrane | Moisture Management |
| Parameter | Description | Value |
Technical Layout
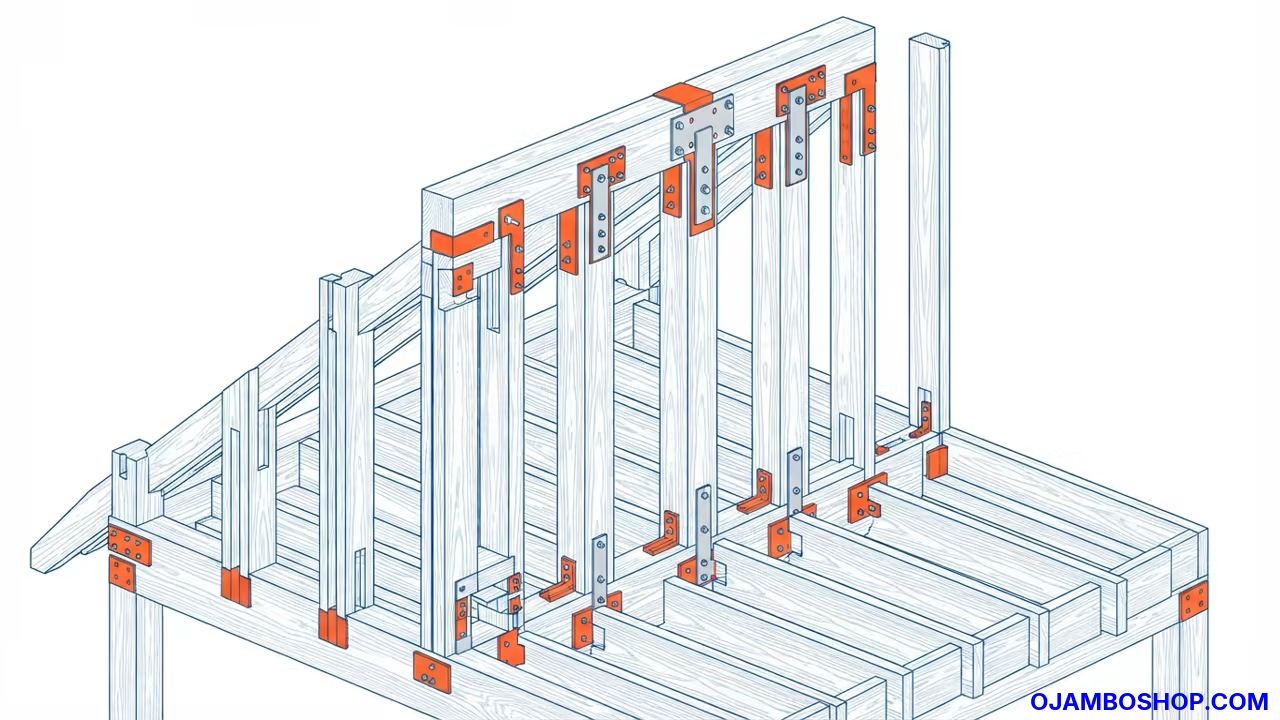
The structural integrity of this modern ADU relies on a shed roof design with a two in twelve pitch. This slope directs all water runoff to the rear of the structure while allowing for higher ceilings at the front.
Load bearing walls are spaced to distribute the roof weight evenly across the 20 foot span. The primary ridge beam is a laminated veneer lumber member that prevents sagging over the open floor plan.
Exterior wall studs are placed 16 inches on center to meet strict residential building codes. This spacing allows for standard 4×8 sheathing sheets to be installed without wasteful cutting or structural gaps.
A reinforced rim joist wraps the entire perimeter to tie the floor system into the foundation. This creates a rigid box that resists twisting forces during high wind events or soil shifting.
The floor joists are notched only at the ends to maintain their full structural depth across the span. This ensures the floor remains stiff and supports the interior partitions without excessive deflection or bouncing.
Step by Step Instructions
Phase 1 involves securing all necessary zoning permits and preparing the building site. Clear the vegetation and excavate the footprint to reach stable load bearing soil.
Install a crushed stone base and level it with a laser transit for perfect accuracy. Pour a reinforced concrete slab with a thickened edge to support the exterior wall loads.
Phase 2 focuses on the installation of the floor framing if using a pier system. Lay pressure treated 4×4 skids on concrete pads and install 2×10 joists perpendicular to the skids.
Apply construction adhesive to the top of each joist before laying the subfloor. Use 3 inch galvanized nails to secure the subfloor panels with a 1/8 inch gap for expansion.
Phase 3 is the vertical framing stage where the exterior walls take shape. Construct the wall plates first and lay them out on the subfloor to ensure the footprint is square.
Erect the 2×6 wall studs and install double top plates for added structural rigidity. Use a plumb bob to ensure every wall is perfectly vertical before nailing them into the floor.
Phase 4 requires the installation of the shed roof rafters. Cut the rafters with a birdsmouth notch to sit securely atop the top plate of the walls.
Install the ridge beam at the highest point and secure the rafters with hurricane ties. Nail the roof sheathing across the rafters to create a solid diaphragm for the structure.
Phase 5 covers the exterior envelope and weatherproofing. Apply the OSB sheathing to the walls and immediately wrap the building in a breathable moisture barrier.
Install the windows and doors using high quality flashing tape around every opening. This prevents water from penetrating the wall cavity and causing hidden rot in the studs.
Phase 6 is the installation of the exterior finishes. Mount the cedar siding starting from the bottom and work upward to ensure proper water shedding.
Install the standing seam metal roofing and secure it with specialized rubber gaskets. Add a wide drip edge around the perimeter to protect the fascia boards from rain.
Phase 7 involves the rough in process for electrical and plumbing systems. Run the main power line from the primary house to a new subpanel inside the ADU.
Install PEX piping for water and PVC for the waste lines before closing the walls. Ensure all wiring is stapled securely and all plumbing joints are pressure tested for leaks.
Phase 8 focuses on insulation and interior wall assembly. Fill the wall cavities with closed cell spray foam or high density mineral wool batts.
Install a vapor retarder over the insulation before hanging the 1/2 inch drywall panels. Mud and tape the seams to create a smooth surface for final painting.
Phase 9 is the finishing stage where the interior becomes livable. Install the luxury vinyl plank flooring across the entire open floor area for durability.
Paint the walls in neutral tones and install the trim around the windows and baseboards. Mount the kitchen cabinets and bathroom fixtures to complete the functional living space.
Phase 10 is the final walkthrough and site restoration. Test every electrical outlet and faucet to ensure the systems are operating perfectly.
Grade the soil around the exterior to slope away from the foundation. Plant native shrubs to blend the new structure into the existing backyard landscape.
Common Mistakes
Many builders fail to implement proper site drainage which leads to water pooling around the foundation. This mistake often causes slab cracking or moisture intrusion through the bottom plates.
Incorrect stud spacing or missing header supports can lead to structural sagging over time. Always verify that window and door headers are sized for the specific load of the roof.
Neglecting the installation of a proper vapor barrier leads to condensation inside the wall cavities. This creates an ideal environment for mold growth and degrades the quality of the interior air.
Using standard nails in pressure treated lumber causes premature fastener failure due to chemical corrosion. Always use hot dipped galvanized or stainless steel fasteners for all ground contact wood.
Maintenance and Safety
Apply a high quality UV protective sealant to the cedar siding every three years. This prevents the wood from turning gray and protects it from fungal attacks.
Inspect the roof flashing and gutters every six months to remove debris and check for leaks. Ensure the drainage pipes are clear to prevent water from backing up under the eaves.
Always wear a respirator when cutting OSB or applying spray foam insulation in enclosed spaces. Use safety glasses and hearing protection when operating the miter saw or framing nailer.
Check the electrical subpanel for any signs of overheating or loose connections annually. Keep a dedicated fire extinguisher inside the ADU near the kitchen area for emergency safety.
Pro Tip: Install a redundant moisture barrier by adding a secondary flashing layer under the window sills. This prevents water from seeping into the wall plates during extreme wind driven rain events.