
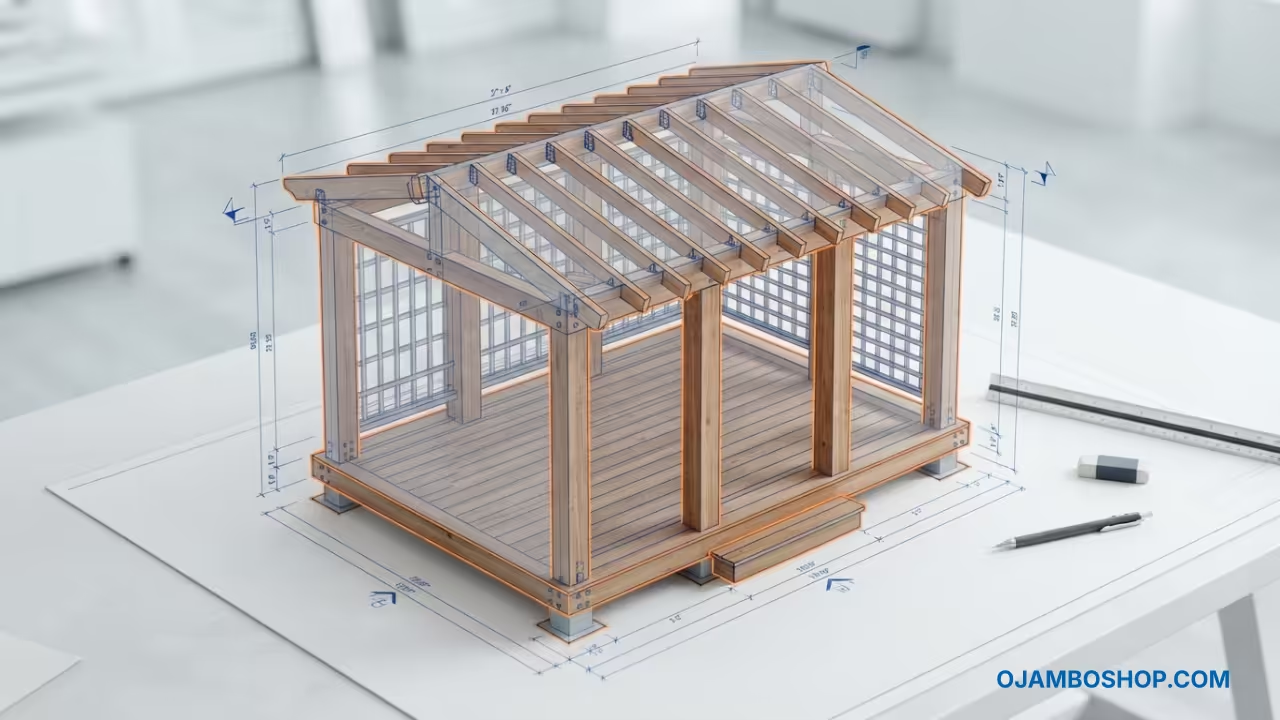
Introduction
Vertical gardening transforms a simple backyard into a productive sanctuary by maximizing every available square inch of soil. A raised cedar planter box provides the perfect foundation for this growth while reducing physical strain on the gardener.
Adding an integrated trellis allows climbing plants to thrive without the need for separate freestanding supports that often lean over time. This structural synergy creates a visually stunning focal point that increases property value and food yield.
The combination of aromatic Western Red Cedar and a sturdy vertical grid ensures your garden remains healthy for many years. This guide provides the professional blueprints required to build a lasting piece of backyard architecture.
Quick Specs
This project features a primary planting area measuring four feet wide by eight feet long with an eighteen inch depth. The integrated trellis rises an additional six feet above the rim for a total height of nearly eight feet.
Estimated material costs range between one hundred fifty and two hundred fifty dollars depending on local cedar pricing. This budget accounts for premium rot resistant lumber and high grade stainless steel fasteners.
The difficulty level is categorized as intermediate because it requires precise miter cuts and structural alignment for the vertical supports. Most homeowners with basic power tools can successfully complete this build.
The estimated build time is approximately twelve to sixteen labor hours over a single weekend. This includes time for site preparation and the final assembly of the trellis grid.
Materials and Tools
The primary lumber choice is Western Red Red Cedar due to its natural oils that repel insects and resist decay. You will need four 2×6 boards at eight feet for the long walls and four 2×6 boards at four feet for the short walls.
For the structural corners and trellis supports you will require four 4×4 cedar posts cut to the desired total height. The trellis grid itself is best constructed using 1×2 cedar strips for a lightweight yet strong lattice.
Hardware must be high quality to avoid streaks and structural failure caused by corrosion. Use three inch stainless steel deck screws for the main frame and one and a half inch screws for the trellis lattice.
You will also need a heavy duty roll of permeable landscape fabric to line the interior walls of the planter. This prevents soil from leaching through the gaps and protects the wood from direct constant moisture contact.
The essential tool kit includes a miter saw for clean crosscuts and a cordless drill with a set of driver bits. A four foot bubble level is critical to ensure the bed does not lean and the trellis remains perfectly plumb.
A measuring tape and a speed square are necessary for maintaining ninety degree angles across all joints. You should also have a rubber mallet and a few clamps to hold boards in place during the fastening process.
| Parameter | Description | Value |
|---|---|---|
| Fasteners | Galvanized Steel | Stainless Steel |
| Cedar Grade | Utility Grade | Select Grade |
| Lining | Plastic Sheeting | Landscape Fabric |
| Finish | Clear Sealant | Natural Aging |
| Parameter | Description | Value |
Technical Layout
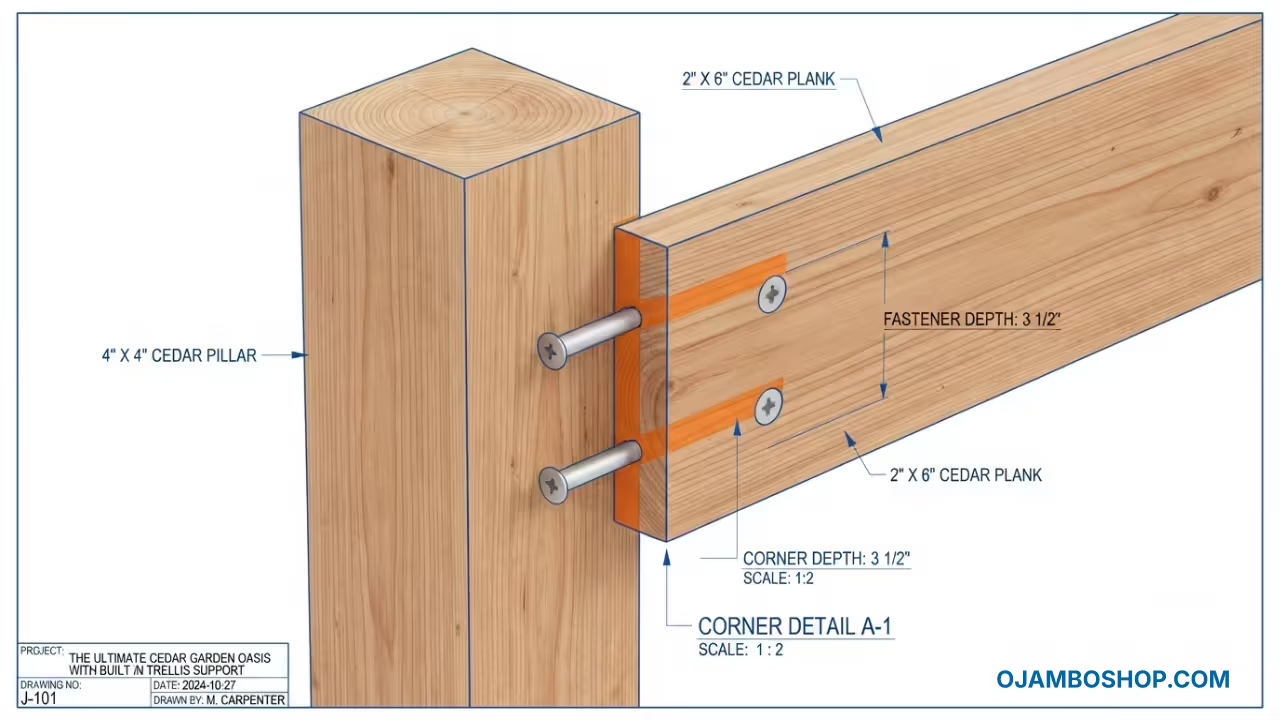
The structural integrity of this planter box relies on the intersection of the 4×4 corner posts and the horizontal 2×6 wall members. Each corner post acts as the primary load bearing pillar that prevents the walls from bowing under the immense weight of damp soil. By fastening the 2×6 boards directly into the center of the 4×4 posts you create a mechanical lock that resists lateral pressure.
The trellis system is integrated directly into the rear two corner posts to ensure it does not tip over during high winds. These posts extend vertically from the base of the planter all the way to the top of the trellis grid. This continuous vertical member transfers the weight of climbing vines directly into the ground rather than relying on the rim of the box.
The floor of the planter remains open to the earth to allow for natural drainage and the movement of beneficial soil organisms. To prevent the lumber from rotting prematurely at the soil line we utilize a recessed base design. This ensures that the most critical structural joints are elevated slightly above the highest moisture point.
The trellis lattice is designed with a six inch on center spacing to provide ample support for heavy crops like cucumbers or pole beans. Each 1×2 strip is fastened with a pre drilled hole to prevent the cedar from splitting along the grain. This geometric arrangement distributes the weight of the foliage evenly across the entire rear support structure.
Step by Step Instructions
Phase one begins with site preparation to ensure the planter sits on a level and stable surface. Clear all vegetation from a four foot by eight foot area and remove any large rocks or debris. Use your bubble level to verify that the ground is flat or dig out high spots until the area is perfectly level.
Phase two involves the assembly of the base frame using your 2×6 cedar boards. Lay out the long walls and short walls in a rectangle and square the corners by measuring the diagonals. Once the diagonals are equal fasten the boards together using the stainless steel deck screws at each corner.
Phase three focuses on the installation of the 4×4 corner posts which provide the vertical strength for the entire unit. Position one post in each corner and ensure they are perfectly plumb using your level. Drive three inch screws through the 2×6 frame and deep into the center of each 4×4 post.
Phase four requires the construction of the remaining wall heights to reach the eighteen inch depth. Stack the remaining 2×6 boards horizontally and fasten them to the corner posts using a staggered screw pattern. This staggering prevents the wood from splitting and increases the overall shear strength of the walls.
Phase five is the most critical part of the build where you extend the rear posts for the trellis. Ensure the two rear posts extend exactly six feet above the top rim of the planter box. Double check that these posts are perfectly vertical so the trellis does not lean toward the garden.
Phase six involves creating the trellis lattice by cutting your 1×2 cedar strips into equal lengths. Lay the strips across the two rear posts in a grid pattern with six inch spacing between each member. Pre drill every hole before driving the screws to maintain the structural integrity of the thin cedar strips.
Phase seven requires the installation of the landscape fabric to line the interior of the planter box. Staple the fabric to the upper inside rim of the walls and allow it to drape loosely across the bottom. This barrier prevents soil from escaping through the gaps between the boards while still allowing water to drain.
Phase eight focuses on the finishing touches and the application of a professional wood treatment. Sand any rough edges or splinters around the rim and the trellis to prevent injuries during gardening. Apply a food safe cedar sealant to the exterior surfaces to preserve the golden hue of the wood.
Phase nine is the process of filling the planter with a high quality organic soil mix. Use a combination of compost and topsoil to provide the nutrients necessary for your vegetables to thrive. Fill the box in layers and lightly pack the soil to remove large air pockets.
Phase ten concludes the project with the integration of your climbing plants along the trellis grid. Plant your vines at the base of the trellis and gently guide the first shoots upward. Secure the plants with soft garden twine to ensure they follow the grid as they grow.
Common Mistakes
One of the most frequent errors is the use of pressure treated lumber for the planter walls. These boards contain chemicals that can leach into the soil and contaminate the vegetables you intend to eat. Always stick to naturally rot resistant woods like cedar or redwood for edible garden projects.
Another common mistake is failing to properly level the site before assembling the frame. A slight tilt in the base can lead to uneven water distribution and may cause the trellis to lean over time. This puts undue stress on the fasteners and can lead to premature structural failure.
Many builders forget to pre drill the holes in the 1×2 trellis strips which leads to immediate splitting. Cedar is a soft wood that cracks easily when screws are driven in without a pilot hole. Taking an extra ten minutes to drill prevents the need to replace split boards.
Some gardeners omit the landscape fabric which allows the soil to wash out during heavy rainstorms. This not only wastes expensive organic soil but also creates a muddy mess around the perimeter of the planter. A simple layer of permeable fabric solves this problem permanently.
Maintenance and Safety
To maintain the structural integrity of your planter box you should inspect the fasteners every spring. Tighten any screws that may have loosened due to the natural expansion and contraction of the wood. Reapply a clear cedar sealant every two to three years to prevent the wood from turning gray.
Always wear appropriate safety gear during the construction process including safety goggles and a dust mask. Cutting cedar releases fine particles that can irritate the lungs and eyes of the builder. Work in a well ventilated area and keep your workspace clean to avoid tripping hazards.
Weatherproofing your garden is essential for longevity especially in regions with harsh winter freezes. Ensure that the soil has adequate drainage so that water does not pool and freeze inside the wood walls. This prevents the wood from heaving and warping during the winter months.
Pro Tip for structural longevity involves the use of a moisture barrier at the very bottom of the walls. Placing a thin strip of rubber flashing between the bottom board and the soil prevents capillary action from drawing moisture upward. This simple addition can extend the life of your cedar planter by several years.