
Introduction
The modern home often struggles to balance the needs of pets with a sophisticated interior design aesthetic. A litter box is a functional necessity for cat owners but rarely complements the visual flow of a living room or bathroom.
By enclosing the litter area within a high quality wooden cabinet, you eliminate unsightly plastic bins and reduce the spread of tracking litter. This project adds significant value to a home by creating a custom piece of furniture that serves as both a pet station and a side table.
The result is a seamless integration of pet care and professional woodworking.
Quick Specs
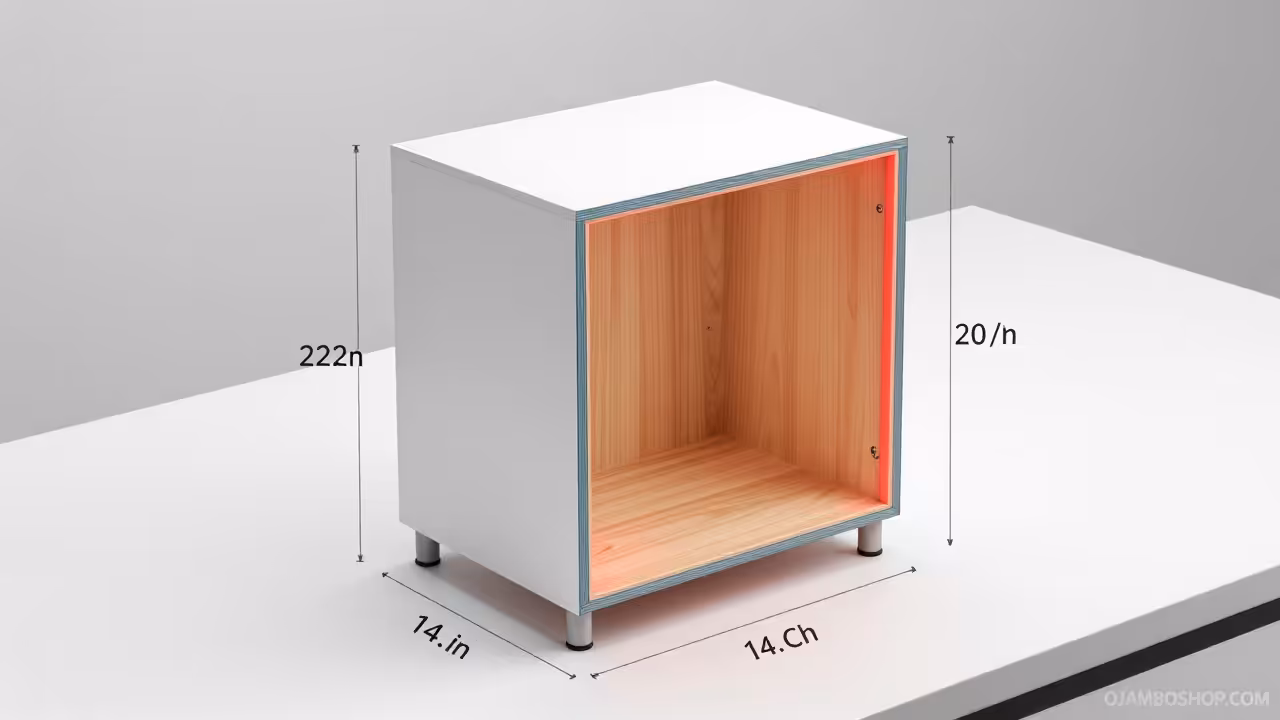
- Dimensions: 24 inches Wide by 20 inches Deep by 22 inches High
- Estimated Cost: 120 to 180 US Dollars
- Difficulty Level: Intermediate
- Estimated Build Time: 14 to 16 hours
Materials and Tools
Lumber requirements include one 4 by 8 foot sheet of 3/4 inch maple plywood for the primary carcass. You will also need six linear feet of 1 by 2 solid maple for the decorative trim and tapered legs.
Hardware consists of 1 1/4 inch pocket hole screws, heavy duty soft close hinges, and a waterproof vinyl liner.
Essential tools include a table saw for ripping plywood and a miter saw for crosscutting trim. A pocket hole jig is necessary for strong hidden joints throughout the frame.
You will also need a cordless drill, an orbital sander with 120 and 220 grit paper, and several 24 inch parallel clamps.
Hardware Comparison Table
| Component | Standard Option | Professional Option | Benefit of Pro Upgrade |
|---|---|---|---|
| Hinges | Basic Butt Hinges | Soft Close European | Prevents door slamming |
| Fasteners | Standard Nails | Pocket Hole Screws | Superior joint strength |
| Finish | Water Based Stain | Polyurethane Sealant | Maximum moisture resist |
| Liner | Plastic Sheet | Custom Vinyl Insert | Easier cleaning process |
Technical Layout
The structural integrity of the hideaway relies on a reinforced base frame that distributes the weight of the litter and the animal. The carcass is designed as a rigid box using 3/4 inch plywood joined with pocket screws and wood glue for maximum shear strength.
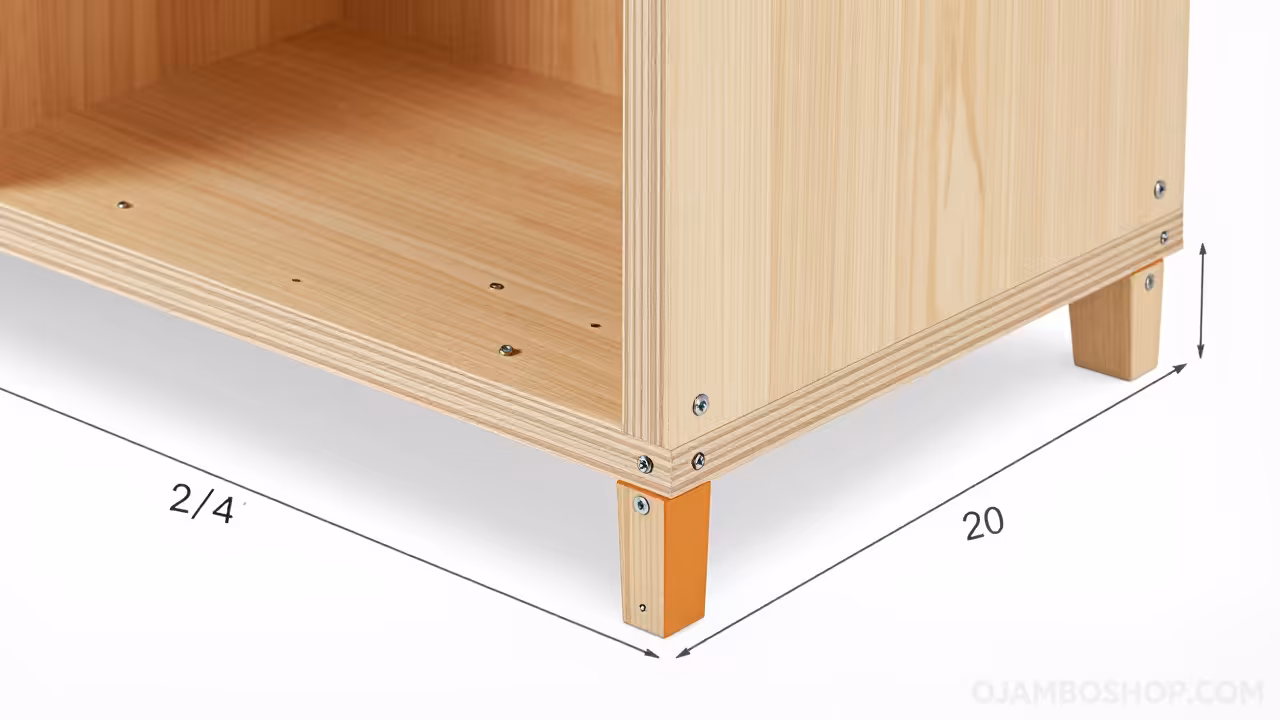
A recessed toe kick is integrated into the bottom to provide a traditional Craftsman profile while allowing the cabinet to sit flush against a wall.
The internal cavity is oversized to ensure the litter box fits comfortably without touching the side walls. This gap allows for a removable moisture barrier that protects the raw wood from ammonia and dampness.
The load bearing top is reinforced with solid maple cleats to prevent sagging over time. This engineering approach ensures the cabinet remains square and stable even with frequent use.
Step by Step Instructions
Phase 1: Milling and Preparation
Phase 1 begins with the precise milling of all plywood components according to the cut list. Use a high tooth count blade on your table saw to prevent tear out on the maple veneer.
Ensure all panels are cut perfectly square to avoid gaps in the final assembly. Sand the edges of each piece before assembly to make the final finishing process much faster.
Phase 2: Base and Leg Construction
Phase 2 focuses on the construction of the base and the tapered legs. Cut four legs from the solid maple and taper them from 1.5 inches at the top to 1 inch at the bottom.
Attach these legs to the bottom panel using heavy duty wood screws and glue. This creates a stable foundation that elevates the cabinet and provides a classic architectural look.
Phase 3: Carcass Assembly
Phase 3 involves assembling the main carcass using the side panels and the back panel. Drill pocket holes on the interior faces of the side walls to hide the fasteners from view.
Apply a thin bead of wood glue to every joint before driving the screws home. Check for squareness by measuring the diagonals of the box before the glue sets.
Phase 4: Entry Portal Integration
Phase 4 requires the creation of the cat entry portal on one of the side panels. Use a jigsaw to cut a 8 inch by 8 inch circular or arched opening.
Smooth the edges of the hole with a sanding block to ensure the cat does not snag its fur. This opening should be positioned centrally to allow the pet easy access from any angle.
Phase 5: Front Access Door
Phase 5 is the construction of the front access door for cleaning purposes. Create a shaker style frame using the 1 by 2 maple and a 1/4 inch plywood center panel.
Ensure the door is slightly smaller than the opening to allow for a 1/8 inch reveal on all sides. This door allows the owner to slide the litter box out without lifting the entire cabinet.
Phase 6: Moisture Barrier Installation
Phase 6 involves the installation of the interior moisture barrier. Cut a piece of waterproof vinyl or heavy duty plastic to line the bottom and lower sides of the cabinet.
Secure the liner with a few staples or a small amount of adhesive at the corners. This critical step prevents odors from soaking into the wood and protects the structure from spills.
Phase 7: Decorative Trim
Phase 7 adds the Craftsman trim and decorative detailing to the exterior. Attach the 1 by 2 maple trim to the top edges and the base of the cabinet.
Use a miter saw to create clean 45 degree angles at the corners for a professional finish. These details transform a simple box into a piece of handcrafted furniture.
Phase 8: Hardware and Final Sanding
Phase 8 is the final sanding and assembly of the door hardware. Install the soft close hinges to the door and the interior side wall.
Ensure the door swings freely and closes flush against the cabinet face. Use a fine grit sandpaper to remove any remaining glue residue or rough spots on the wood.
Phase 9: Finishing and Sealing
Phase 9 is the application of the finish to protect the wood and enhance the grain. Apply a high quality polyurethane sealant in three thin coats, sanding lightly between each layer.
This creates a hard water resistant shell that is easy to wipe clean. Allow the final coat to cure for 48 hours before placing the litter box inside.
Common Mistakes
- Failing to account for the actual dimensions of the litter box including the rim which leads to a cavity that is too tight.
- Neglecting the interior moisture barrier which causes plywood to warp and traps permanent odors.
- Poor door alignment during hinge installation resulting in gaps or rubbing against the frame.
Maintenance and Safety
To maintain the cabinet, wipe the exterior with a damp cloth and a mild detergent every two weeks. Check the interior liner for tears or leaks and replace it if the wood becomes exposed.
Periodically refresh the polyurethane finish on the top surface if it develops scratches from household items.
Always wear a dust mask and safety glasses when cutting plywood to avoid inhaling fine particulates. Use a vacuum system or a shop vac to keep your workspace clear of sawdust.
Ensure the cabinet is placed in a well ventilated area to prevent moisture buildup inside the enclosure.
Avoid placing the cabinet in direct sunlight or near a radiator. Extreme temperature swings can cause the solid maple trim to expand and contract, potentially cracking the joints.
A stable environment ensures the furniture remains a permanent fixture in your home.
Pro Tip: To maximize the longevity of the cabinet, use stainless steel pocket screws instead of zinc. Stainless steel resists corrosion from the ammonia found in cat urine, ensuring the joints never weaken over time.