
Introduction
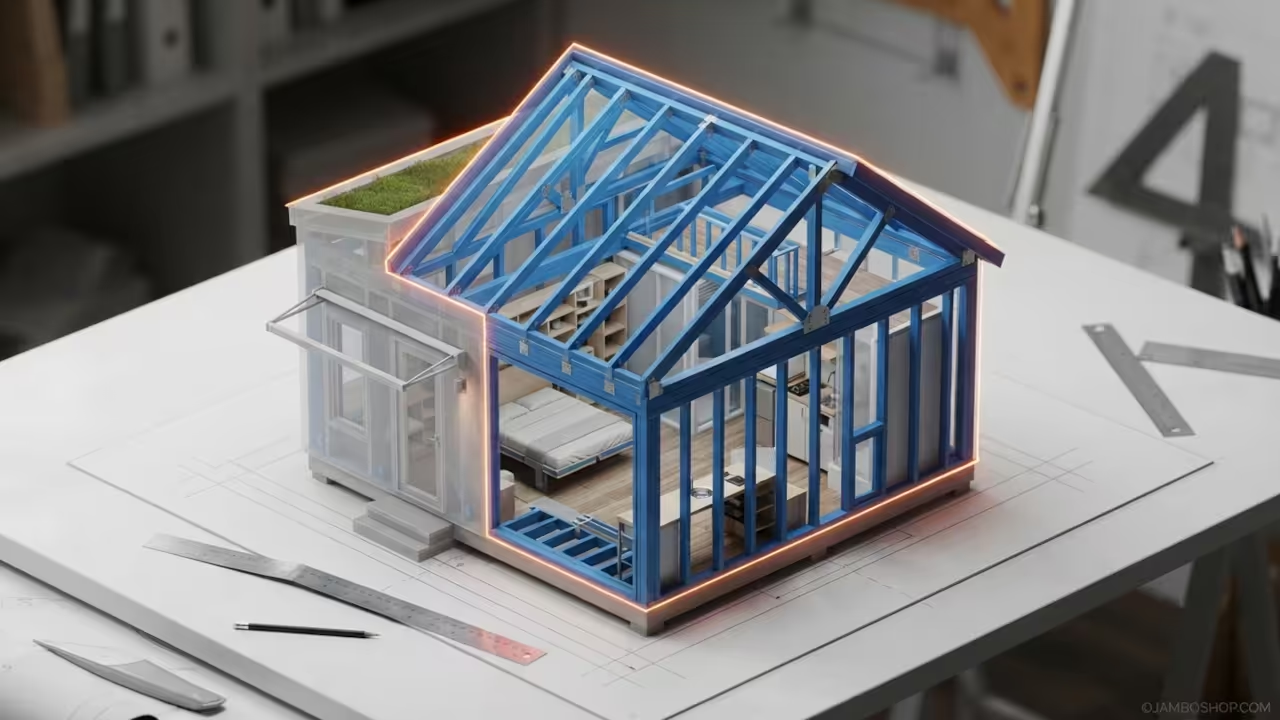
A compact greenhouse living studio can turn a modest 400 square foot footprint into a year round oasis of fresh produce, natural light, and serene green space. By integrating climate control, efficient shelving, and a flexible layout this design offers the benefits of a traditional greenhouse while retaining the intimacy of a small living area. The result is a self sustaining micro garden that serves as both a functional kitchen and a restorative retreat.
Quick Specs
Dimensions 20 feet by 20 feet. Estimated cost eighteen thousand to twenty two thousand dollars. Difficulty level advanced DIY. Estimated build time eight to twelve weeks including permits and curing.
Materials & Tools
Wood and framing lumber 2 x 4 OSB sheathing 2 x 4 lumber for framing 4 x 4 posts for support. Hardware 3 in. steel angle brackets 1 in. lag bolts 3/16 in. self drilling screws 4 in. hurricane ties. Tools circular saw miter saw drill press level measuring tape stud finder HVAC unit water filtration kit.
Technical Layout
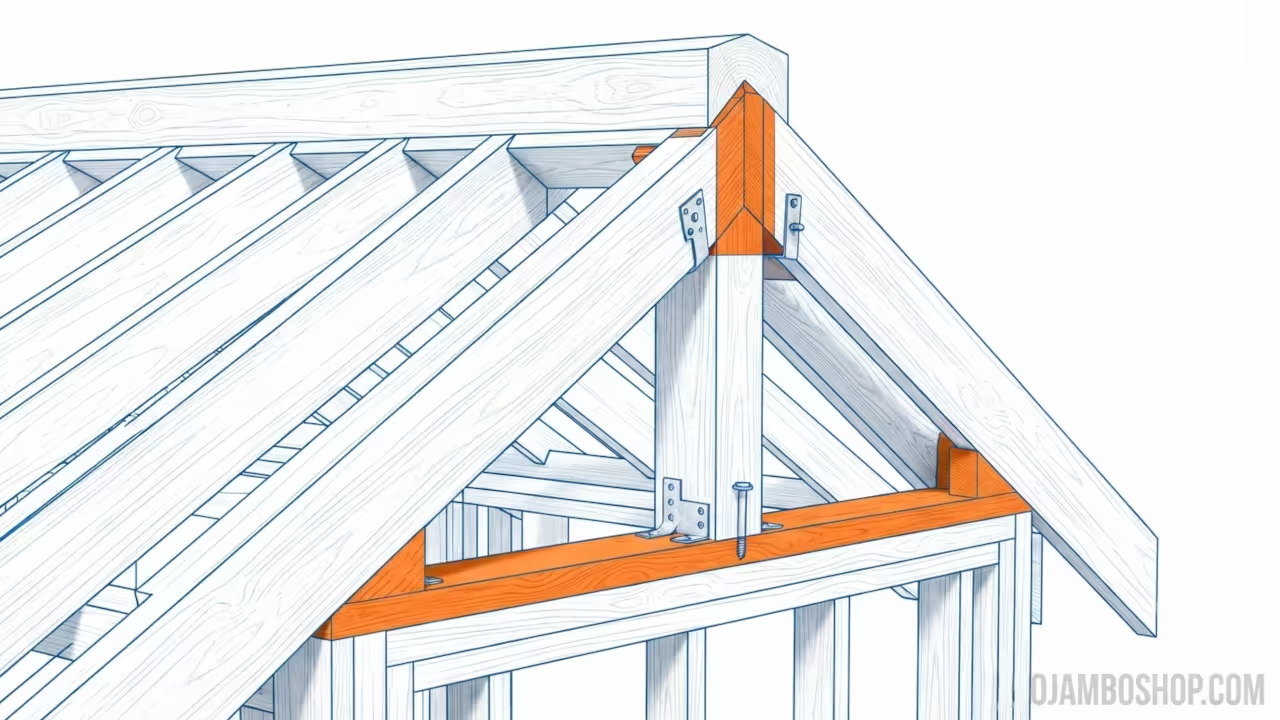
The greenhouse employs a post frame structure with 4 x 4 timber columns spaced four feet apart supporting a continuous 2 x 4 truss system that forms the roof and side panels. The roof trusses are engineered with a 30 degree pitch providing ample headroom while directing rainwater to the gutter system. Each truss is secured to the posts with 3 in. steel angle brackets and 1 in. lag bolts ensuring rigidity against wind loads. The interior walls double layered OSB sheathing with a 1 in. PVC moisture barrier sandwiched between creating a sealed environment that mitigates mold growth. A central HVAC unit rated at ten thousand BTU positioned on the north side avoids direct sunlight while a 2 in. water recirculation pump feeds the drip irrigation lines. Ventilation achieved through two 8 in. roof top vents that can be motorized for temperature control. The foundation consists of poured concrete footings set at two feet depth with a 4 in. gravel layer beneath for drainage. Pro tip using 4 in. hurricane ties at each junction where the roof trusses meet the side panels dramatically increases the structure’s wind resistance extending its lifespan in stormy climates.
Step‑by‑Step Instructions
1 Foundation & Skid Placement
Excavate a four foot square at each corner set concrete footings lay a two inch gravel base. Install four x 4 post anchors into the footings ensuring they are plumb. Attach four inch steel plates to each anchor for extra stability.
2 Frame the Posts
Cut four x 4 posts to eight foot height. Drill pilot holes insert one inch lag bolts to attach the posts to the footing plates. Verify levelness with a laser level adjusting shims as needed.
3 Construct the Roof Trusses
Measure and cut 2 x 4 lumber to form 30 degree pitched trusses. Use a miter saw to create 30 degree angles at each end. Fasten trusses with three inch steel brackets and one inch lag bolts spacing each truss four feet apart.
4 Erect the Side Panels
Lay OSB sheathing on the exterior side panels securing each sheet with three sixteenth inch self drilling screws. Apply a one inch PVC moisture barrier over the OSB sealing seams with waterproof tape.
5 Install the Roof
Attach the pre assembled trusses to the side panels using hurricane ties at each intersection. Secure the roof decking with three inch self drilling screws ensuring a tight seal. Install roof vents at the apex wiring them to the HVAC vent motor.
6 Hang the Interior Shelving
Measure and cut 2 x 4 lumber for shelving rails spacing twelve inch apart. Anchor each rail to the interior posts with one inch lag bolts. Mount adjustable shelving units adding four inch brackets for added support.
7 Set Up HVAC & Irrigation
Mount the HVAC unit on the north wall connecting ductwork to the roof vents. Install a two inch pump at the base of the shelving running irrigation tubing to each planter box. Test pressure and flow rates adjusting valves as necessary.
8 Finish with Sealants & Finishes
Apply a breathable paint to the exterior panels using a color that reflects heat. Seal all interior seams with a UV stable sealant. Install a digital thermostat linking it to the HVAC for automated temperature control.
Common Mistakes
Ignoring the moisture barrier leads to mold and rot. Using screws instead of lag bolts on load bearing joints reduces structural integrity. Failure to motorize roof vents can cause overheating and plant stress.
Maintenance & Safety
Monthly inspect roof seams and sealants clear gutters of debris. Bi annually re seal interior joints check HVAC filters test irrigation valves. Annually conduct a full structural audit tighten all fasteners and re apply weatherproofing. Safety gear wear gloves goggles and dust mask when cutting wood or sanding. Wood treatment apply a natural oil finish to all exposed timber to protect against moisture.