
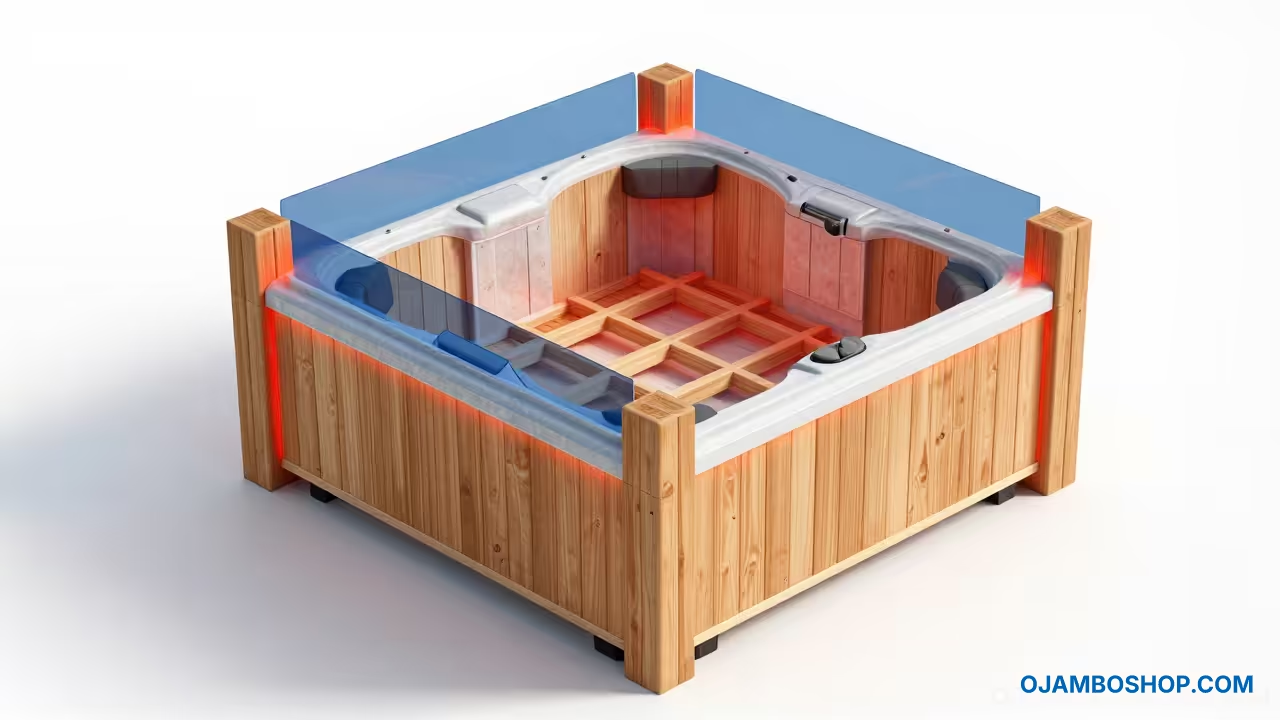
Building a custom cedar surround transforms a standard hot tub into a seamless architectural feature of your backyard. This structure provides a clean transition from your patio to the water while shielding you from prying eyes.
A well designed surround adds significant property value and improves the overall safety of the area. It eliminates the awkward plastic edges of the tub and creates a dedicated space for towels and drinks.
The use of Western Red Cedar ensures that the structure withstands the high moisture levels inherent to spa environments. This project blends luxury aesthetics with rugged durability to create a private sanctuary.
Quick Specs
Dimensions 10 feet by 10 feet total footprint. Estimated Cost 800 to 1,200 USD.
Difficulty Level Intermediate. Estimated Build Time 24 to 32 labor hours.
Materials and Tools
For the framing and decking you will need several lengths of Western Red Cedar. Purchase 4×4 posts for the privacy screen and 2×4 boards for the main joist system.
The surface decking requires 5/4 inch x 6 inch cedar decking boards for a professional finish. Use 1×6 cedar slats for the privacy screen to allow for slight airflow and wind reduction.
Hardware must be high grade stainless steel to prevent the black streaks often caused by galvanized nails in cedar. Use 2.5 inch screws for framing and 2 inch trim screws for the slats.
Required tools include a miter saw for precise angles and a cordless drill with a torque setting. A 4 foot level and a speed square are essential for ensuring the deck remains perfectly flat.
You will also need a random orbital sander with 80 and 120 grit sandpaper. A high quality UV resistant cedar sealer will protect the wood from premature graying.
Hardware Comparison Table
| Material | Best Use | Durability | Cost |
|---|---|---|---|
| Stainless Steel | All Cedar Connections | Highest | High |
| Galvanized Steel | General Framing | Medium | Low |
| Ceramic Coated | Exterior Trim | High | Medium |
| Zinc Plated | Interior Only | Low | Low |
Technical Layout
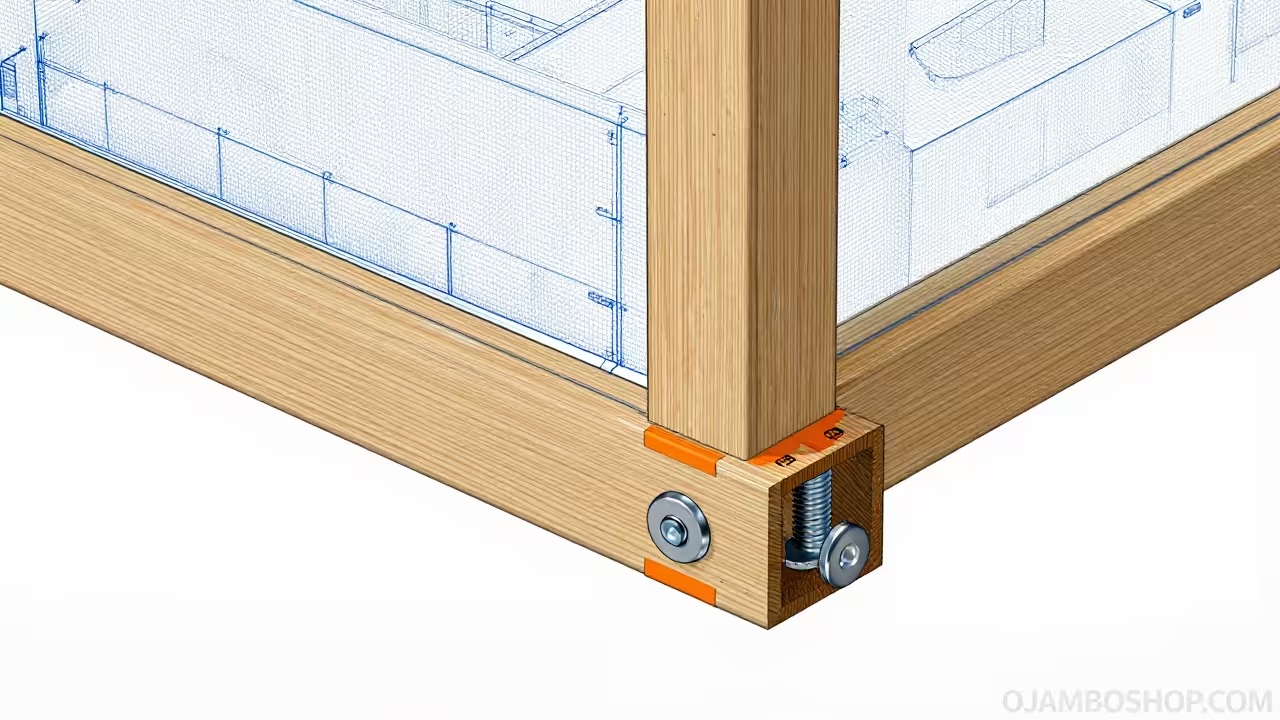
The structural integrity of this surround relies on a floating joist system that distributes weight evenly across the ground. The base consists of 2×4 cedar joists spaced 16 inches on center to prevent the decking from sagging over time.
Because the hot tub is an immense load the surround is designed to wrap around the unit rather than support it. The framing creates a perimeter box that maintains a two inch air gap between the tub shell and the wood.
This gap is critical for ventilation and allows you to access the hot tub internal components for future maintenance. The privacy screen is anchored into the main deck frame using 4×4 posts that extend vertically.
These posts are secured with heavy duty carriage bolts to resist lateral wind loads that can push against a solid screen. The geometry ensures that the weight of the screen is transferred directly into the foundation of the deck.
Step by Step Instructions
Phase 1 Foundation
The first phase involves site preparation and leveling the ground around the hot tub. Clear all debris and lay down a professional grade weed barrier to prevent growth under the deck.
Use a layer of crushed stone or leveling pavers to create a stable base for the joists. Ensure the ground slopes slightly away from the tub to prevent water from pooling under the structure.
Check the perimeter measurements three times to ensure the surround is perfectly square. A deviation of even one inch at the start can lead to significant gaps during the final decking phase.
Phase 2 Framing
The second phase is the assembly of the outer framing box. Construct a perimeter frame using 2×4 cedar beams ensuring all corners are joined with lap joints for maximum strength.
Install the interior joists every 16 inches using stainless steel screws. These joists should be blocked off near the hot tub shell to create a stable ledge for the decking.
Verify that the frame is level across both axes using a 4 foot level. Any dip in the frame will be magnified once the decking boards are installed.
Phase 3 Decking
The third phase focuses on the installation of the cedar decking. Lay the 5/4 inch boards across the joists leaving a 1/8 inch gap between each board for drainage.
Overhang the boards by one inch past the frame to create a clean professional edge. Secure each board with two screws at every joist intersection to prevent cupping.
Trim the outer edges of the decking using a circular saw for a perfectly flush finish. Sand any rough edges or splinters to ensure the surface is safe for bare feet.
Phase 4 Posts
The fourth phase involves the installation of the privacy screen posts. Position the 4×4 cedar posts at the corners of the desired privacy wall.
Use carriage bolts to secure the posts to the main deck frame. Ensure the posts are perfectly plumb using a level before tightening the hardware.
If the screen is longer than six feet add a center support post to prevent the horizontal rails from sagging. This adds structural rigidity and a balanced look to the wall.
Phase 5 Rails
The fifth phase is the construction of the horizontal screen rails. Cut 2×4 rails to fit between the 4×4 posts creating a top and bottom track.
Install the bottom rail six inches above the deck surface to allow for easy cleaning and airflow. The top rail should be set at your desired height typically 6 feet.
Use a speed square to ensure the rails are perpendicular to the posts. Secure them with stainless steel pocket screws for a hidden clean appearance.
Phase 6 Slats
The sixth phase is the attachment of the privacy slats. Measure and cut the 1×6 cedar slats to fit snugly between the horizontal rails.
Install the slats with a 1/4 inch gap between them to create a contemporary look and reduce wind resistance. Use a spacer block to maintain consistent gaps across the entire wall.
Fasten each slat with two trim screws at each end. Be careful not to over drive the screws as this can crack the cedar grain.
Phase 7 Trim
The seventh phase involves adding the finishing trim and accents. Install a 2×6 cap rail across the top of the privacy screen to hide the end grain of the slats.
This cap rail not only looks professional but also protects the end grain from absorbing rainwater. Mitre the corners of the cap rail at 45 degrees for a seamless transition.
Add any optional corner molding to the deck edges to hide the framing. This creates a polished high end furniture look for the entire structure.
Phase 8 Finishing
The eighth phase is the final sanding and sealing process. Use an orbital sander to smooth out any remaining imperfections on the deck and screen.
Apply a high quality clear UV resistant sealer to all surfaces. This prevents the cedar from turning a silvery gray and protects it from fungal decay.
Allow the sealer to cure for 24 to 48 hours before placing furniture or towels on the surface. This ensures the finish is fully bonded to the wood fibers.
Common Mistakes
One of the most frequent errors is using galvanized fasteners instead of stainless steel. Galvanized screws react with the tannins in cedar causing permanent black streaks to bleed into the wood.
Another mistake is building the surround too tight against the hot tub shell. This traps moisture and prevents technicians from accessing the equipment panel during repairs.
Some builders forget to leave gaps between the decking boards. Without these gaps water will sit on the surface and rot the joists from the top down.
Finally failing to level the base properly leads to a sloping deck. A slope of even one degree can make the entire structure feel unstable and look unprofessional.
Maintenance and Safety
To maintain the structural integrity of the cedar apply a fresh coat of sealer every two years. This prevents the wood from drying out and cracking under intense sun exposure.
Inspect the stainless steel fasteners annually to ensure none have backed out due to the natural expansion and contraction of the wood. Tighten any loose bolts immediately.
Keep the area under the deck clear of organic debris like leaves and pine needles. Accumulated debris traps moisture and can accelerate the decay of the lower joists.
Always wear safety goggles and a dust mask when sanding cedar. The fine dust produced by cedar can be an irritant to the respiratory system and eyes.
Pro Tip for Longevity
To maximize the lifespan of your surround apply a generous layer of joist tape to the top of every 2×4 before installing the decking. This waterproof membrane prevents water from seeping into the screw holes and rotting the joists.
By isolating the decking from the framing you effectively double the life of the substructure. This is a small investment that prevents a costly full deck replacement in five to ten years.