
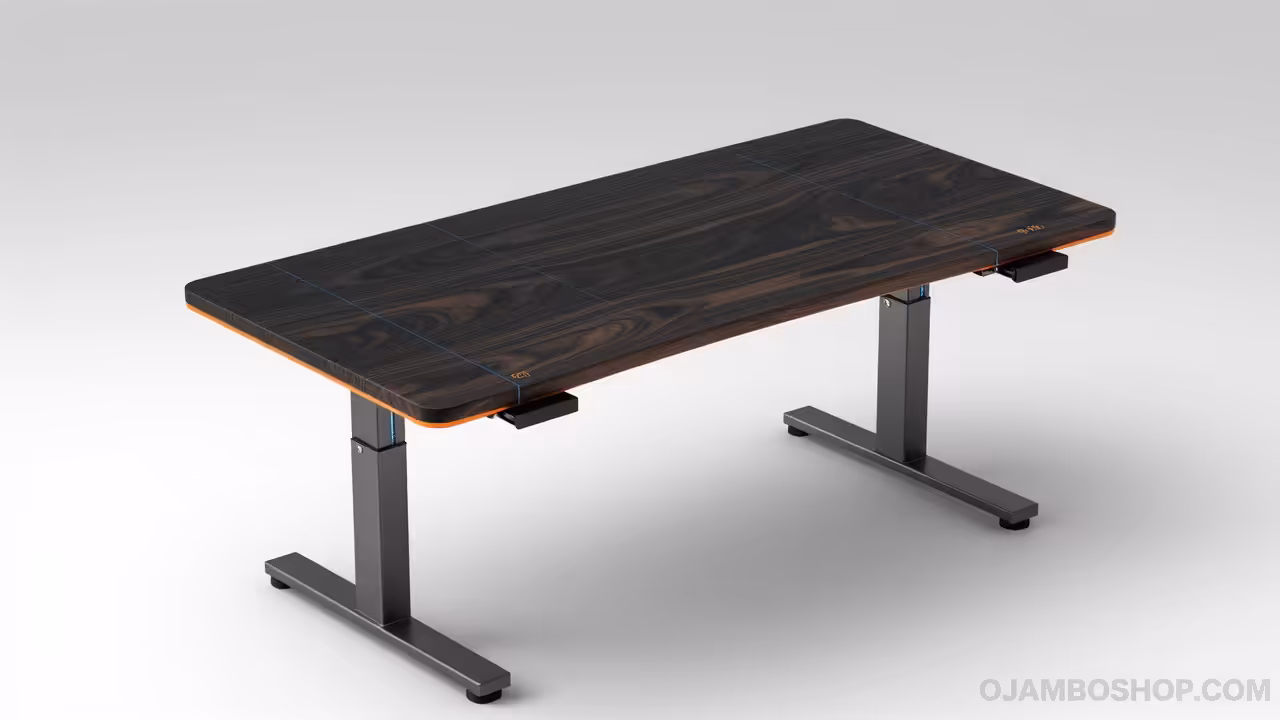
Creating a high-quality workspace is one of the most significant investments you can make in your personal productivity and long-term health. The rise of the remote professional has shifted the focus from temporary setups to permanent, ergonomic furniture that serves as a focal point of the home. A solid wood standing desk offers a tactile connection to nature while providing the modern functionality required for an eight-hour workday.
By choosing to build your own adjustable desk rather than purchasing a mass-produced alternative, you ensure structural integrity and aesthetic superiority. This project combines the timeless beauty of solid Black Walnut with the precision of a dual-motor industrial lifting frame. The result is a piece of furniture that increases your property value and enhances your daily physical well-being through improved posture.
Building this desk is not merely a weekend task but a professional-grade woodworking project that teaches essential skills in timber selection and finishing. You will learn how to manage wide-panel glue-ups and how to integrate mechanical hardware into natural materials. This guide provides the technical foundation necessary to execute a flawless build that will last for generations.
Quick Specs
The finished desk measures 60 inches in width, 30 inches in depth, and features a height range from 24 inches to 50 inches. This allows for full ergonomic compliance for users of varying heights, ensuring the elbows remain at a 90-degree angle. The solid wood top is 1.5 inches thick, providing a substantial feel and preventing any bowing over time.
The estimated cost for materials, including the high-end electric frame and premium Black Walnut lumber, ranges between 800 and 1,200 dollars. This represents a significant saving compared to retail versions of similar quality which often exceed 2,500 dollars. The difficulty level is intermediate, requiring some experience with table saws and surface finishing.
Expect a total build time of approximately 15 to 20 hours spread across several days to allow for glue curing and finish drying. Most of the technical labor is concentrated in the preparation of the wood slab and the precision mounting of the motorized legs. Following the drying cycles is critical to achieving a professional-grade surface.
Materials and Tools
Lumber and Hardware:
60 board feet of 8/4 Black Walnut (S3S preferred)
Dual-motor electric standing desk frame (350 lb capacity)
Threaded inserts (1/4-20 internal thread)
Hex head bolts (1/4-20 x 3/4 inch)
Wood glue (Type II or III water-resistant)
Table top fasteners (Z-clips or expansion brackets)
Rubio Monocoat or high-quality Osmo oil finish
Sandpaper grits (80, 120, 150, 180, 220)
Required Tools:
Table saw with a high-tooth-count finishing blade
Random orbital sander
Jointer and thickness planer (or access to a mill)
Power drill and impact driver
Parallel jaw clamps (minimum of four 48-inch clamps)
Digital calipers and a 48-inch metal straight edge
Biscuit joiner or Domino joiner (optional for alignment)
Microfiber cloths and tack rags
Technical Layout
The load-bearing capacity of an adjustable desk relies entirely on the relationship between the steel sub-frame and the wood’s internal fiber strength. For a 60-inch span, the solid walnut top must be constructed using boards with alternating grain patterns to negate the natural tendency of the wood to cup or warp. By flipping every other board during the layout process, the internal stresses of the wood fibers pull against each other, creating a balanced and flat surface. The sub-frame acts as a structural spine, but the wood itself must be allowed to move independently of the steel.
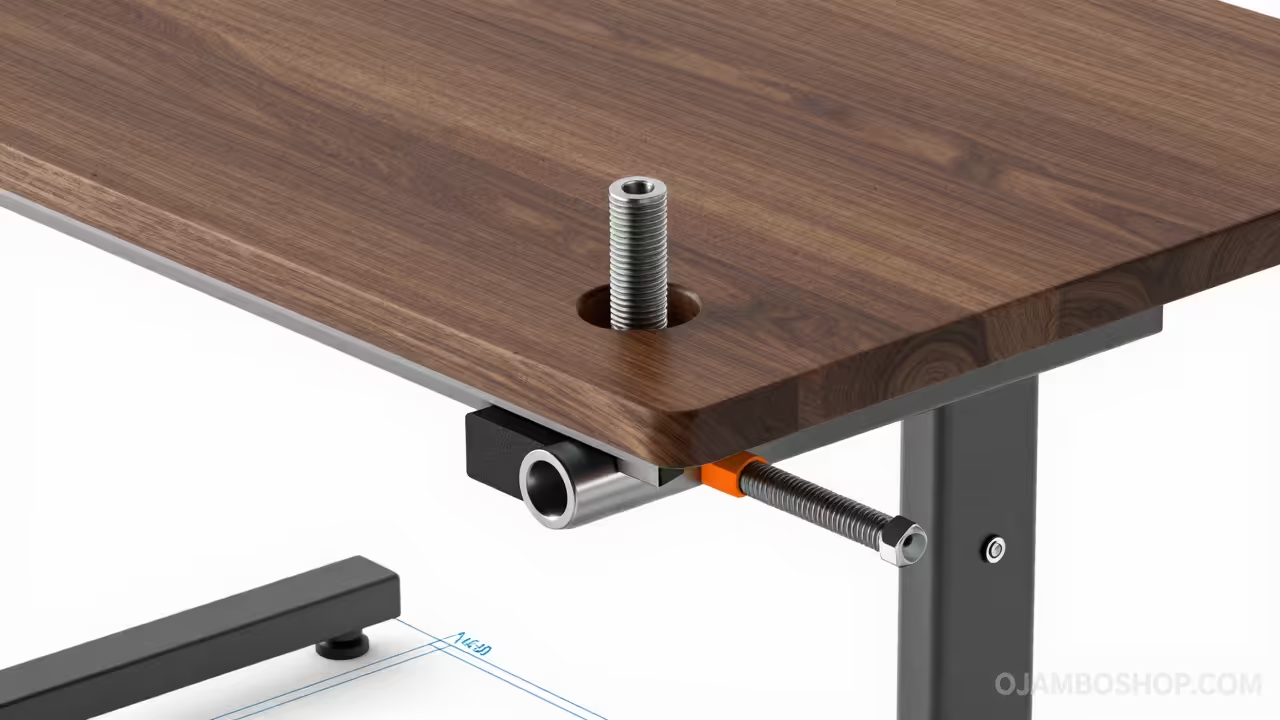
We use threaded inserts instead of traditional wood screws to secure the top to the frame. This technical choice is vital for long-term durability because it allows the wood to expand and contract with seasonal humidity changes without stripping the grain. The frame’s mounting holes are typically elongated; by using machine bolts into metal inserts, we ensure that the desk remains rock-solid while the walnut “breathes.” This prevents the wood from cracking over the years and allows for easy disassembly if the desk ever needs to be moved to a different room or home.
Step-by-Step Instructions
Phase 1: Material Selection and Milling
Begin by inspecting your Black Walnut boards for moisture content and grain direction. You want to select boards that are relatively straight and free of large knots that might compromise the structural area where the frame mounts. Use a jointer to create one perfectly flat face and one square edge on each board. Then, pass them through the thickness planer until all boards reach a uniform thickness of 1.5 inches. This ensures that the glue-up will be level and require minimal sanding later in the process.
Phase 2: The Glue-Up Process
Arrange your boards on a flat work surface, alternating the end-grain growth rings to prevent warping. Apply an even layer of wood glue to the edges and use parallel jaw clamps to pull the boards together. Do not over-tighten the clamps, as this can starve the joint of glue and lead to failure. Check for flatness across the width using your straight edge and allow the assembly to cure for at least 24 hours in a climate-controlled environment.
Phase 3: Squaring the Desktop
Once the glue is dry, remove the clamps and scrape off any excess dried glue from the surface. Use a track saw or a circular saw with a straight-edge guide to cut the desktop to its final dimensions of 60 by 30 inches. Ensure that all four corners are perfectly square by measuring the diagonals; they should be exactly equal. This precision is necessary so the lifting frame remains centered and the desk looks balanced in your office space.
Phase 4: Surface Refinement and Sanding
Sanding is the most critical phase for a professional appearance and tactile feel. Start with 80-grit sandpaper to remove any ridges from the glue-up and move progressively through 120, 150, and 180 grits. Always sand in the direction of the grain to avoid swirl marks that will be highlighted by the finish. Before the final 220-grit pass, “pop the grain” by wiping the wood with a damp cloth, letting it dry, and then sanding back the raised fibers for a glass-smooth surface.
Phase 5: Edge Profiling
Decide on the edge profile that best fits your aesthetic, whether it is a modern square edge, a slight round-over, or a sophisticated chamfer. Use a router with a fresh bit to apply the profile to all four top edges and the underside edges as well. A small 1/8-inch round-over is often preferred for ergonomic comfort, as it prevents the wood from digging into your forearms during long typing sessions. Sand the routed edges by hand to match the smoothness of the desktop.
Phase 6: Installing Threaded Inserts
Flip the desktop over so the bottom side is facing up and position your assembled steel frame on the wood. Mark the exact center of every mounting hole using a transfer punch or a sharp pencil. Remove the frame and drill holes to the specific depth required for your 1/4-20 threaded inserts. Use a drill guide to ensure the holes are perfectly vertical, then drive the inserts into the wood using a bit of epoxy for extra security.
Phase 7: Applying the Hardwax Oil Finish
Clean the entire surface thoroughly with a vacuum and a tack rag to remove every speck of dust. Apply your chosen hardwax oil, such as Rubio Monocoat, following the manufacturer’s instructions precisely. These finishes are excellent for Walnut because they bond with the fibers rather than sitting on top, preserving the natural feel of the wood. Buff away all excess oil after a few minutes; the wood should look rich and hydrated without feeling greasy or tacky.
Phase 8: Final Assembly and Cable Management
Once the finish has cured, place the desktop back onto the frame and align the holes with your installed inserts. Thread the machine bolts through the frame and into the inserts, tightening them firmly but allowing for the frame’s built-in expansion room. Install the control box and the handset on the underside of the desk, ensuring all wires are tucked away using adhesive clips or a cable tray. Perform a full calibration of the motor system by running the desk to its highest and lowest points.
Common Mistakes
The most frequent error in standing desk construction is failing to account for wood movement. If you screw the desktop directly to a steel frame without allowing for expansion, the walnut will inevitably crack or the screws will shear off during a change in seasons. Always use the elongated slots in the frame and avoid glue or rigid fasteners in those specific areas.
Another common mistake is neglecting the underside of the desktop when applying the finish. Many builders only finish the visible top surface, but this creates an imbalance in moisture absorption between the top and bottom. This imbalance leads to bowing or “cupping” over time as one side of the wood dries faster than the other. Always apply the same number of coats to the bottom as you do to the top.
Insufficient sanding between grits is a technical oversight that ruins the look of premium Black Walnut. If you skip from 80 grit directly to 180 grit, the deep scratches from the coarse paper will remain visible under the finish. Patience in the sanding phase is what separates a DIY project from a piece of professional furniture. Ensure every grit has removed the marks from the previous one before moving forward.
Maintenance and Safety
Pro-Tip: To ensure the longevity of your solid walnut top, maintain a consistent indoor humidity level between 35 and 55 percent. Drastic swings in moisture can cause the wood to shrink or expand rapidly, which puts unnecessary stress on the glue joints. Applying a fresh coat of maintenance oil every two to three years will keep the wood protected and prevent it from looking dull or “thirsty.”
When operating the motorized frame, always ensure that no cables or objects are obstructing the path of movement. Modern frames have anti-collision sensors, but it is still best practice to keep the area under the desk clear of trash cans or chairs. Wear a high-quality respirator during the sanding process, as Black Walnut dust is a known irritant and can cause respiratory distress if inhaled in large quantities.
| Material Feature | Standard Pine | Solid Black Walnut |
|---|---|---|
| Janka Hardness | 380 – 420 lbf | 1,010 lbf |
| Durability | Low | Very High |
| Grain Density | Open/Soft | Tight/Hardwood |
| Finish Response | Blotchy | Excellent/Even |
| Market Value | Budget | Premium/Luxury |