
Introduction
Building a custom insulated dog house is a rewarding project that provides lasting comfort for your pet. This structure protects against extreme weather conditions while adding value to your property. The design focuses on thermal efficiency and structural durability for year-round use.
Disclosure: article includes affiliate links.

Quick Specs
Dimensions: 48 inches wide by 48 inches deep by 40 inches high. Estimated Cost: $150 to $200. Difficulty Level: Intermediate. Estimated Build Time: 8 to 10 hours.
Materials & Tools
Lumber Requirements
- 4×4 pressure-treated posts (4 pieces, 24 inches long)
- 2×4 pressure-treated lumber (8 pieces, 8 feet long)
- 2×4 standard pine lumber (12 pieces, 8 feet long)
- 1/2 inch exterior grade plywood (4 sheets)
- 1/2 inch foam board insulation (4 sheets)
Hardware and Fasteners
- 2-inch exterior wood screws (200 count box)
- 3-inch exterior wood screws (50 count box)
- Roofing nails (50 count box)
- Metal roof flashing (1 roll)
- Exterior grade caulk (1 tube)
Required Tools
- Circular saw or miter saw
- Drill/driver
- Speed square
- Tape measure
- Level
- Safety glasses and ear protection
Technical Layout
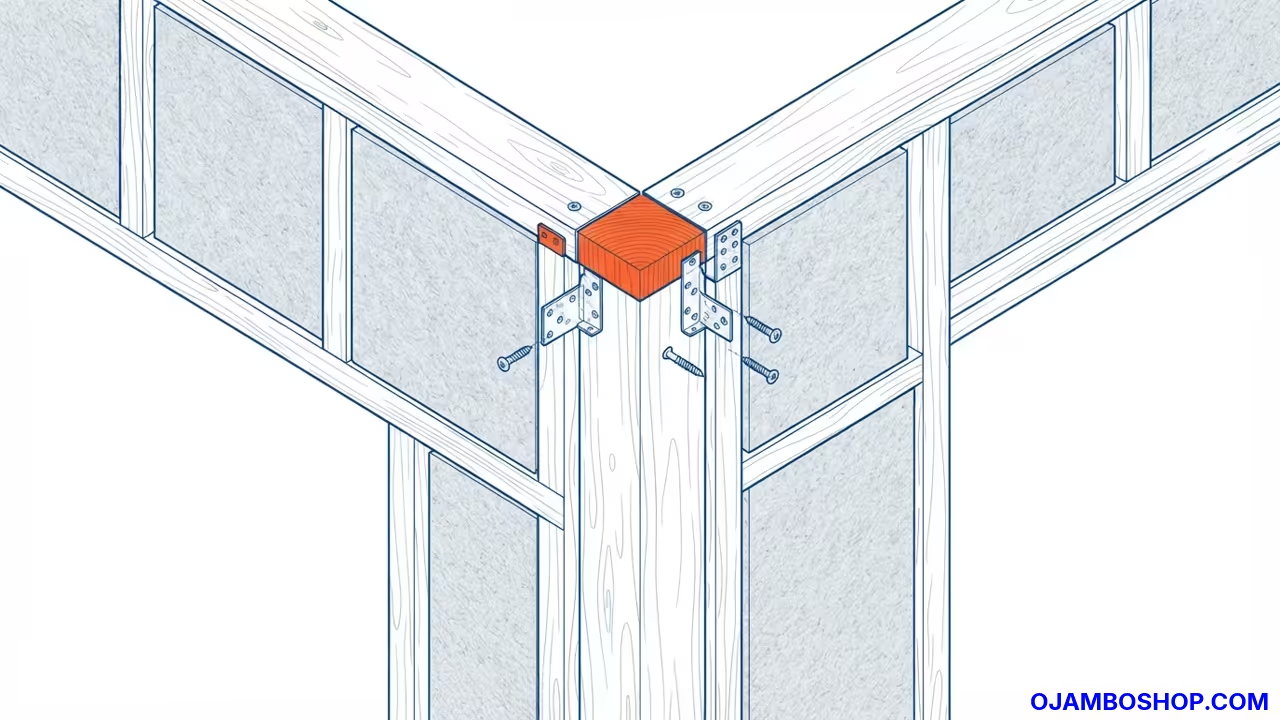
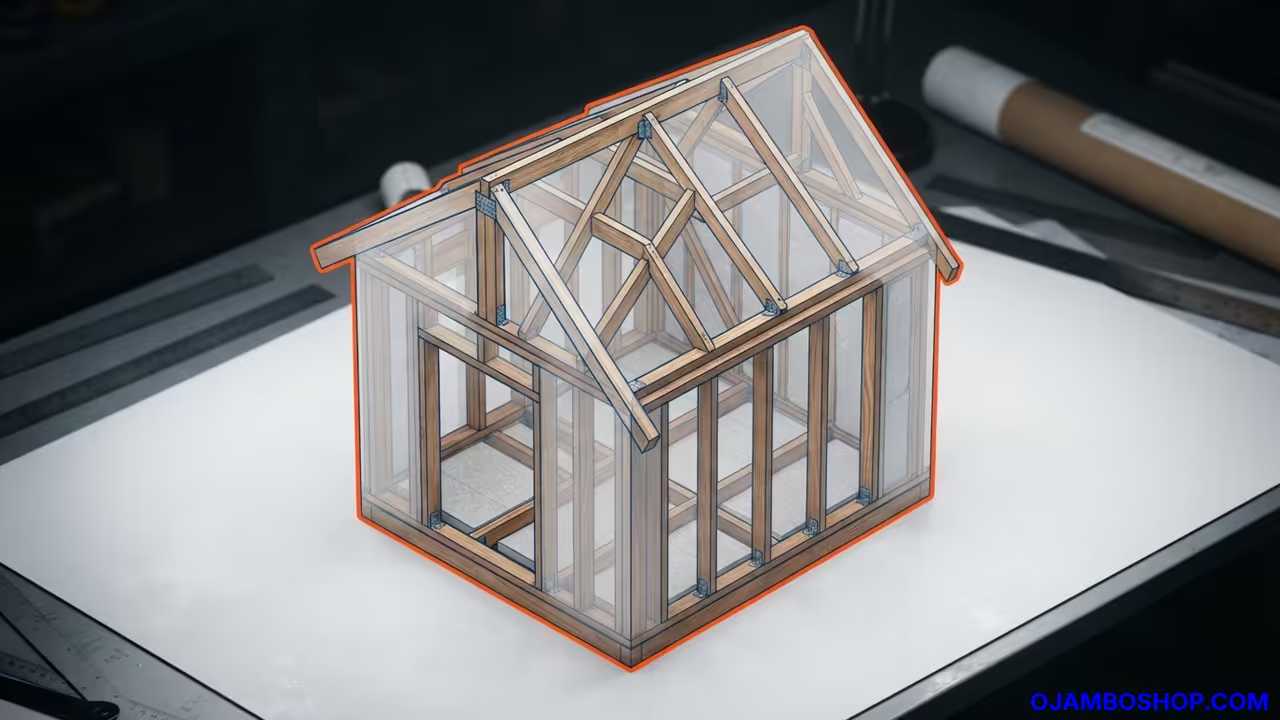
The structural integrity of this insulated dog house relies on a rigid box frame construction. The base utilizes 4×4 posts embedded in concrete or anchored to a solid surface to prevent shifting. Vertical 2×4 studs are spaced 16 inches on center to provide mounting points for the sheathing. The roof system features a 6/12 pitch to ensure proper water runoff and snow shedding. R-5 foam board insulation is sandwiched between the inner and outer plywood layers to create a thermal break. This double-wall design significantly reduces heat transfer and maintains a stable internal temperature. The floor assembly includes a vapor barrier to protect against ground moisture. All exterior joints are sealed with caulk to prevent air infiltration.
Step-by-Step Instructions
Phase 1: Foundation Assembly
Begin by cutting four 4×4 posts to 24 inches in length. Arrange them in a square pattern measuring 48 inches by 48 inches on the outside. Attach two 2×4 pressure-treated skids to the inside of each post using 3-inch screws. Ensure the top of the skids are level and flush with the top of the posts. This creates a raised base that protects the lower structure from ground moisture.
Phase 2: Floor Framing
Cut two 2×4 pressure-treated joists to 44 inches in length. Lay them across the skids at the center of the base frame. Screw the joists to the skids using 2-inch screws. Cut a 48-inch by 48-inch piece of exterior grade plywood for the subfloor. Place the subfloor on top of the joists and secure it with 2-inch screws spaced every 6 inches along the edges.
Phase 3: Wall Framing
Construct four wall frames on a flat surface. Each wall consists of a bottom plate, two corner studs, and a top plate. The front wall studs should be 32 inches long to accommodate the door opening. The rear and side wall studs should be 36 inches long. Assemble the frames using 2-inch screws at each joint. Raise the walls and attach them to the floor frame using 3-inch screws through the bottom plates.
Phase 4: Insulation Installation
Cut foam board insulation to fit between the wall studs. Apply exterior grade caulk to the edges of the insulation panels. Press the insulation firmly into the wall cavities. Cover the insulated walls with 1/2 inch plywood sheathing on the exterior side. Secure the sheathing with 2-inch screws. Repeat this process for the floor and ceiling areas.
Phase 5: Roof Framing
Cut four 2×4 rafters to 28 inches in length. Notch the bottom ends of the rafters to fit over the top plates of the front and rear walls. Attach the rafters to the top plates using 3-inch screws. Install a ridge board at the peak of the roof to connect the rafter pairs. Cut a 48-inch by 48-inch piece of plywood for the roof sheathing. Nail the sheathing to the rafters using roofing nails.
Phase 6: Door and Ventilation
Cut a rectangular opening in the front wall measuring 18 inches wide by 20 inches high. Install a wooden door frame around the opening. Attach a heavy-duty vinyl flap to the frame using metal eyelets and screws. Cut two small ventilation holes in the rear wall near the top plate. Cover the holes with wire mesh to prevent pest entry while allowing airflow.
Phase 7: Exterior Finishing
Apply a water-resistant sealant to all exterior wood surfaces. Install metal roof flashing over the plywood roof sheathing. Secure the flashing with roofing nails and seal the seams with caulk. Attach trim boards around the base and roof edges for a finished look. Paint or stain the exterior wood to match your home decor.
Phase 8: Final Inspection
Check all fasteners for tightness and security. Ensure the door flap hangs freely and seals the opening properly. Verify that the ventilation holes are unobstructed. Place bedding material inside the house for your pet. Monitor the structure for any settling or shifting during the first few weeks of use.
Common Mistakes
Builders often neglect to seal the insulation edges properly. This allows air to bypass the thermal barrier and reduces efficiency. Another frequent error is using interior grade plywood for the exterior sheathing. This material will rot quickly when exposed to moisture. Failing to elevate the base sufficiently can lead to water damage and mold growth. Incorrect roof pitch calculation may result in poor drainage and leaks.
Maintenance & Safety
Inspect the structure monthly for signs of wear or damage. Reapply sealant to the exterior wood every two years. Check the insulation for moisture intrusion and replace if necessary. Ensure the ventilation holes remain clear of debris. Use safety glasses and ear protection when operating power tools. Keep the work area clean and organized to prevent accidents.