
Project Overview and Value
A two-story playhouse is more than just a backyard toy for your children. It represents a significant architectural addition to your property that fosters independence and creative physical play. By utilizing a vertical footprint, you maximize your available yard space while providing a multi-zone environment for different age groups.
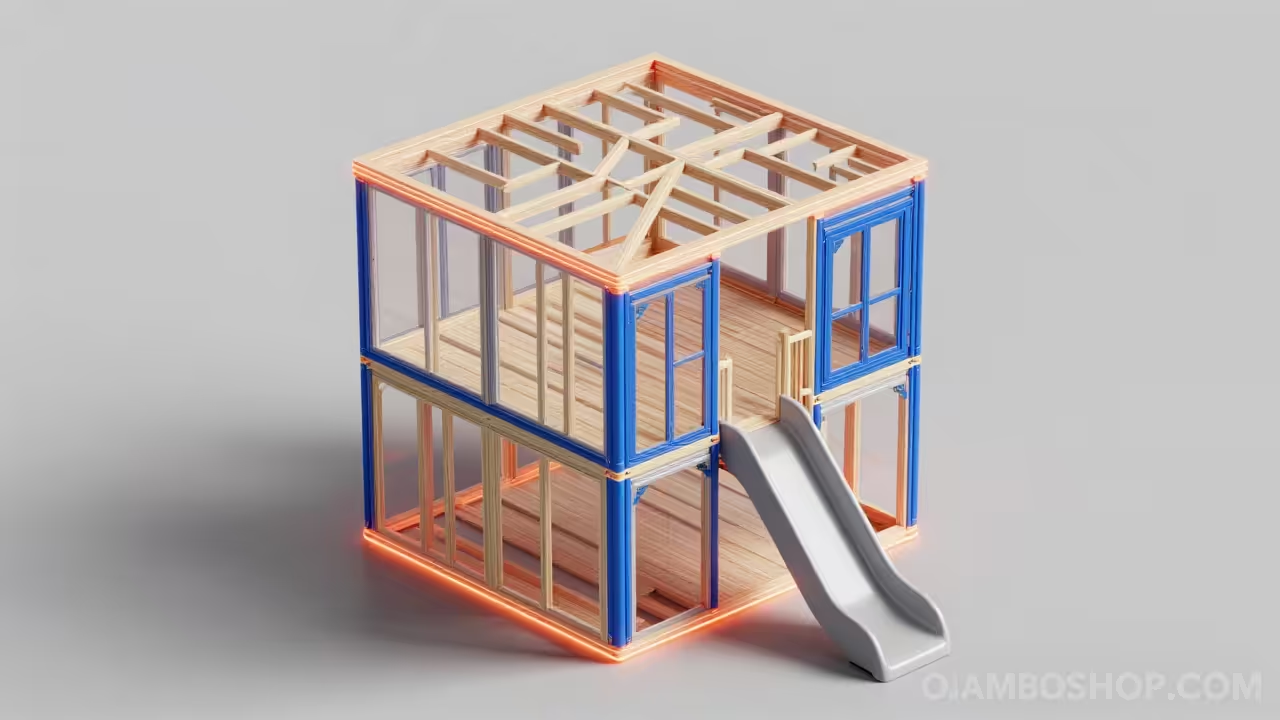
The ground level serves as a shaded “clubhouse” or sandbox area, while the upper deck offers a vantage point and access to the high-energy slide. Building this structure yourself ensures superior material quality compared to store-bought plastic kits. This professional-grade build uses dimensional lumber to create a legacy structure that can last for decades with proper maintenance.
Beyond the immediate joy it brings to your family, a well-constructed backyard structure can actually enhance property appeal. Potential buyers often see these high-quality builds as ready-made amenities for their own families. This guide provides the exact geometry and structural requirements to ensure your project is safe, level, and aesthetically pleasing.
Quick Specs
Dimensions: 8ft x 8ft Base Footprint with 12ft Total Height
Estimated Cost: $1,200 – $1,800 (Subject to local lumber pricing)
Difficulty Level: Intermediate to Advanced
Estimated Build Time: 3 to 4 Full Weekends
Materials and Tools
Lumber Requirements: 4×4 Pressure-Treated Posts (Main Supports), 2×6 Pressure-Treated Joists (Floor Framing), 2×4 Kiln-Dried Studs (Wall Framing), 5/4×6 Cedar or Pressure-Treated Decking (Flooring), 4×8 Sheets of T1-11 or Plywood Siding, 2×4 Rafters (Roof System).
Hardware and Fasteners: 3-inch Deck Screws (Primary Assembly), 5-inch Ledger Bolts (Main Support Beams), Joist Hangers (Floor Support), Hurricane Ties (Roof to Wall Connection), Heavy-Duty Slide Attachment Brackets, Asphalt Shingles or Corrugated Metal Roofing.
Required Tools: Miter Saw and Circular Saw, Impact Driver and Power Drill, 4-foot Level and Laser Level, Speed Square and Framing Square, Post Hole Digger or Auger, Pneumatic Framing Nailer (Optional but Recommended).
Technical Layout and Structural Integrity
The structural integrity of a two-story playhouse relies entirely on the transfer of live and dead loads through the 4×4 vertical posts to the ground. For an 8×8 footprint, we utilize a four-post “tower” configuration where the 2×6 floor joists are notched into or bolted directly to the main pillars. This creates a rigid frame that resists lateral movement, which is crucial when children are running on the upper deck or descending the slide. We implement a 16-inch on-center spacing for all floor joists to prevent “bouncy” floors and ensure the platform can support adult weight for maintenance.
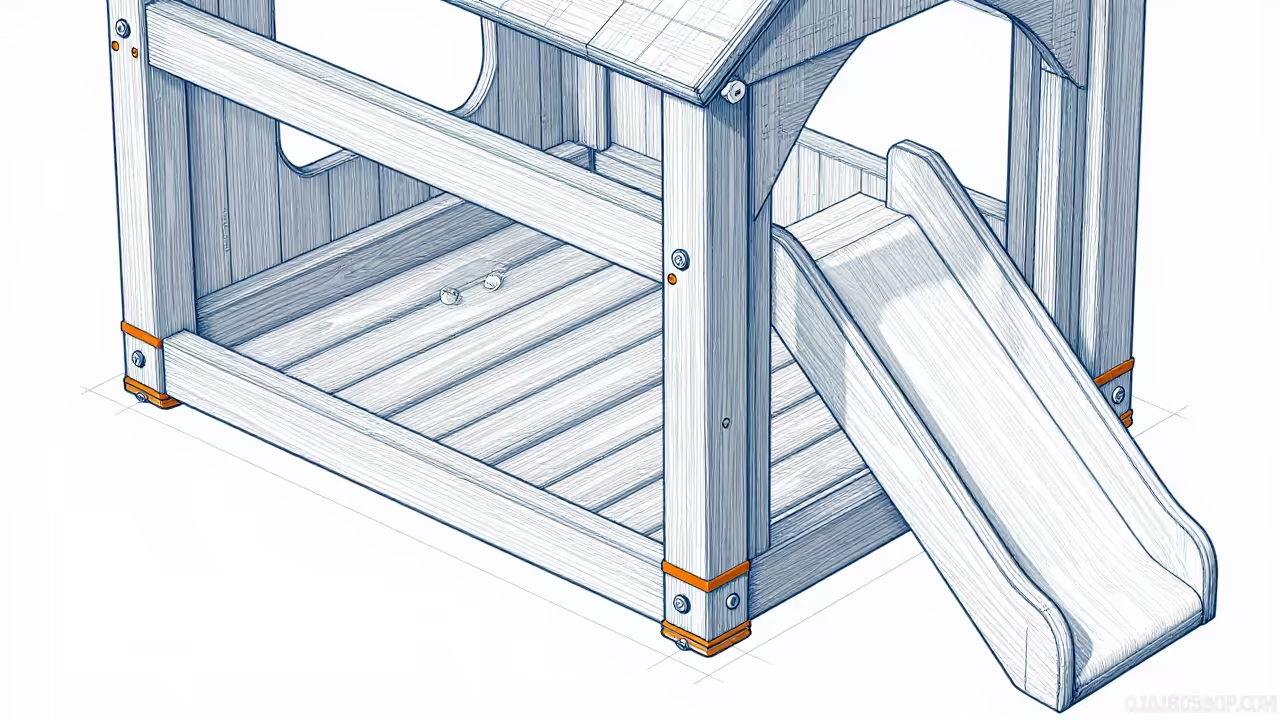
The slide platform extends 4 feet beyond the main cabin wall, requiring its own dedicated support system to prevent leverage-based pulling on the main structure. We utilize 2×6 double-headers at the exit point to distribute the weight of the slide and the child. Cross-bracing with 2×4 lumber on the lower level creates “K-braces” that lock the geometry of the structure against wind shear. This technical approach mimics residential housing standards, scaled down for a play environment, ensuring that the 8×8 base remains perfectly square even as the ground settles over time.
Step-by-Step Instructions
Phase 1: Site Preparation and Foundation
Begin by marking your 8×8 footprint using batter boards and masonry string to ensure the corners are perfectly square. Dig four holes at the corners to a depth of 24 inches or below your local frost line to prevent shifting. Set your 4×4 pressure-treated posts in concrete, ensuring they are perfectly plumb and aligned with one another. Allow the concrete to cure for at least 24 hours before attempting to attach the horizontal framing members.
Phase 2: Lower Floor Framing
Measure 12 inches from the ground and mark your 4×4 posts to establish the height of the lower deck or sandbox border. Install your 2×6 perimeter joists using 5-inch lag bolts, ensuring the entire frame is level across all four sides. Install interior joists at 16-inch intervals using galvanized joist hangers for maximum shear strength. Lay your decking boards with a 1/8-inch gap between them to allow for wood expansion and water drainage.
Phase 3: Upper Platform and Slide Extension
Measure 5 feet up from the lower deck to establish the height of the second-story floor, which is the ideal height for a standard 10-foot slide. Repeat the 2×6 framing process, but extend the joists on one side by 4 feet to create the dedicated slide platform. Double-up the joists that will support the slide’s weight to ensure there is zero deflection when in use. Ensure the outer edge of the slide platform is supported by secondary 4×4 posts if the cantilever exceeds 2 feet.
Phase 4: Wall Framing for the Cabin
Construct your 2×4 wall frames on a flat surface before hoisting them onto the second-story platform. The walls should be 5 feet tall to provide ample interior headroom for children while keeping the overall height manageable. Space your studs at 16 inches on center and include “rough openings” for at least two windows and one door. Secure the wall plates through the decking and directly into the floor joists using 3-inch timber screws.
Phase 5: Roof Rafters and Sheathing
Calculate a 4:12 roof pitch to allow for easy water runoff without making the peak excessively high or difficult to shingle. Cut your 2×4 rafters with a birdsmouth notch so they sit securely on the top plates of your cabin walls. Install a 2×6 ridge board at the peak to tie the rafters together and provide a straight roofline. Cover the rafters with 1/2-inch exterior grade plywood or OSB, followed by a layer of roofing felt or synthetic underlayment.
Phase 6: Siding and Exterior Trim
Install your T1-11 siding or individual cedar pickets, ensuring you leave a small gap at the bottom to prevent moisture wicking. Cut out the window and door openings using a jigsaw or a spiral saw after the siding is mounted for a cleaner finish. Apply 1×4 trim boards around the corners, windows, and doors to hide the raw edges of the siding and provide a professional look. This trim also serves as an extra layer of weatherproofing for the sensitive end-grain of the wood.
Phase 7: Slide and Safety Railing Installation
Attach the slide to the extended platform using the manufacturer-provided hardware, ensuring the transition from wood to plastic is flush. Construct safety railings around the entire upper deck and the slide platform using 2×4 rails and 2×2 balusters. The gap between balusters must be less than 4 inches to prevent a child’s head from becoming stuck, adhering to standard playground safety codes. Verify that the railings are rock-solid and do not wobble when 50 pounds of lateral force is applied.
Phase 8: Finishing and Weatherproofing
Sand all surfaces, especially the railings and floor boards, to remove any splinters or sharp edges that could injure children. Apply a high-quality exterior stain or “deck over” paint to protect the lumber from UV damage and rot. Pro-Tip: Use a penetrating oil-based stain for the first coat because it soaks into the wood fibers rather than just sitting on the surface. Seal the roof with asphalt shingles or metal panels, ensuring all flashing is properly tucked under the ridge cap.
Common Mistakes to Avoid
The most frequent error in playhouse construction is neglecting to use a level at every single stage of the build. Even a 1/4-inch deviation at the foundation can result in a 2-inch lean by the time you reach the roofline. Another common mistake is using interior-grade fasteners or untreated lumber for the structural skeleton of the playhouse. This leads to rapid wood rot and structural failure within three to five years, creating a major safety hazard for children.
Finally, many DIYers fail to account for the “swing” or “exit” zone of the slide, placing the structure too close to fences or trees. Ensure there is at least 6 feet of clear, soft landing space at the bottom of the slide to prevent injuries during high-speed exits. Always verify your local zoning laws regarding structure height and setback requirements before you begin your excavation or post-setting.
Maintenance and Safety
Perform a “shakedown” test every spring by physically grabbing the posts and railings to check for looseness or wood degradation. Inspect all hardware for rust and tighten any bolts that may have vibrated loose due to the natural movement of the wood and active play. To maximize longevity, re-apply a UV-resistant sealer every two years, focusing specifically on the floor boards and the tops of the railings.
Keep the area under the playhouse clear of debris and standing water to prevent the 4×4 posts from rotting prematurely at the ground level. Always supervise young children during play and ensure the ladder or stairs leading to the second story are kept dry and free of moss. Implementing a “no shoes” policy on the upper deck can significantly reduce the amount of grit and moisture tracked into the cabin, preserving the floor’s finish.