
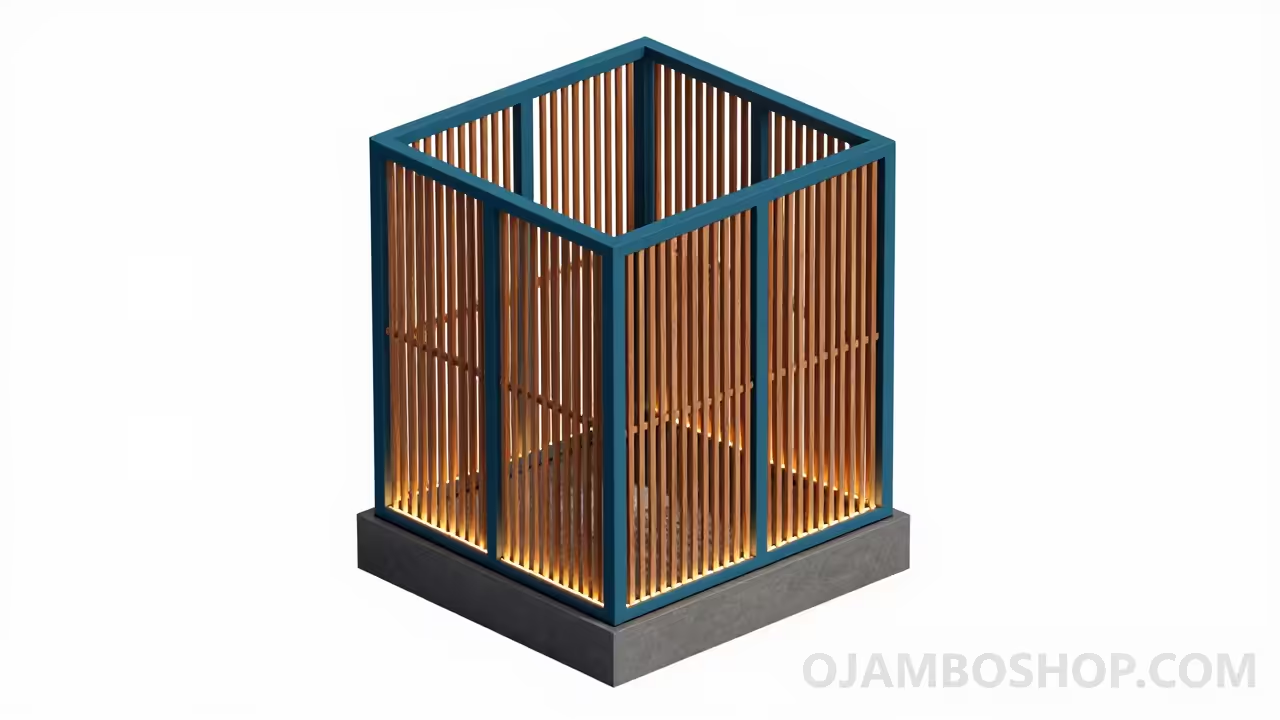
Adding a structural focal point to your backyard does more than just define your property lines. A modern slatted privacy screen serves as a sophisticated architectural element that balances airflow with visual seclusion.
This specific 8×8 design is engineered to provide a substantial footprint that remains stable under wind loads while offering an integrated gardening solution. By combining a heavy-duty planter base with a towering vertical screen, you create a self-ballasting system that looks intentional and high-end.
Homeowners often struggle with the “fishbowl” feeling of modern suburban lots, but a well-executed privacy structure restores the sanctuary of the home. This project is designed for longevity, using premium joinery techniques that prevent the sagging commonly seen in retail-grade lattice panels.
Quick Specs
Dimensions: 8 Feet Wide by 8 Feet Tall with a 24-Inch Deep Planter
Estimated Cost: $450 to $700 depending on lumber grade and hardware selection
Difficulty Level: Intermediate – Requires precise measuring and basic power tool proficiency
Estimated Build Time: 12 to 16 hours over a standard two-day weekend
Materials and Tools
Building a structure of this scale requires a specific inventory of pressure-treated lumber and corrosion-resistant fasteners. For the best aesthetic results, we recommend using Appearance Grade Western Red Cedar for the slats and Ground Contact Rated Pressure Treated Pine for the structural framing members.
Lumber List
- 4 pieces – 4×4 x 10′ Pressure Treated Posts (Structural Uprights)
- 6 pieces – 2×4 x 8′ Pressure Treated Boards (Internal Planter Framing)
- 8 pieces – 2×6 x 8′ Cedar or Treated Pine (Planter Exterior Walls)
- 32 pieces – 1×2 x 8′ Cedar Balusters (Modern Slats)
- 2 pieces – 2×4 x 8′ Cedar (Top Cap and Side Trim)
- 1 piece – 3/4″ Exterior Grade Plywood (Planter Base Plate)
Hardware and Fasteners
| Hardware Item | Purpose | Specification |
|---|---|---|
| Structural Screws | Post-to-Frame Joinery | 5-inch TimberLOK or LedgerBoard |
| Exterior Deck Screws | Planter Assembly | 2.5-inch Ceramic Coated |
| Stainless Brad Nails | Slat Attachment | 1.5-inch 16-Gauge |
| Post Bases | Ground Anchoring | Heavy Duty Galvanized Steel |
| Landscape Liner | Planter Protection | 6-mil Polyethylene or Geotextile |
Required Tool Kit
- Miter Saw or Circular Saw
- Cordless Impact Driver and Drill
- 4-Foot Level and String Line
- Speed Square and Tape Measure
- Pocket Hole Jig (Optional for Hidden Joinery)
- Safety Glasses and Hearing Protection
Technical Layout
The structural integrity of an 8×8 vertical surface depends entirely on how the wind load is transferred to the ground. In this design, the planter box acts as a massive horizontal ballast that prevents the screen from acting like a sail and tipping over during high-wind events. We utilize four 4×4 posts as the primary vertical members, which are notched into the interior 2×4 framing of the planter box for a rigid, unified connection.
The slats are spaced at exactly 3/4 inch intervals, which is the thickness of a standard 1×2 board used as a spacer during the installation phase. This specific gap ratio allows for approximately 60 percent wind passthrough while maintaining 90 percent visual opacity from a standard viewing angle of 10 feet. By securing the slats to the rear of the 4×4 posts, we create a shadow-box effect that adds depth and hides the primary structural fasteners from the front view of the assembly.
Step-by-Step Instructions
Phase 1: Site Preparation and Foundation
Begin by clearing a level 9-foot by 3-foot area where the structure will reside. Use a 4-foot level and a straight 2×4 to ensure the ground is flat, as any slope will cause the 8-foot tall screen to lean visibly. If you are placing this on a patio, ensure the surface can support the weight of approximately 800 pounds of wet soil. For soil-based installations, dig four 12-inch deep holes for the 4×4 posts and fill the bottom with 3 inches of compacted gravel for drainage.
Phase 2: Framing the Planter Base
Construct the inner skeleton of the planter box using your 2×4 pressure-treated lumber. Create two rectangular frames measuring 96 inches long and 24 inches wide, joined with 3-inch exterior screws at every corner. Connect these two frames with 18-inch vertical 2×4 studs spaced every 16 inches on center to create a rigid box structure. This internal frame will provide the “meat” for your exterior cedar cladding and the structural anchor points for the tall vertical posts.
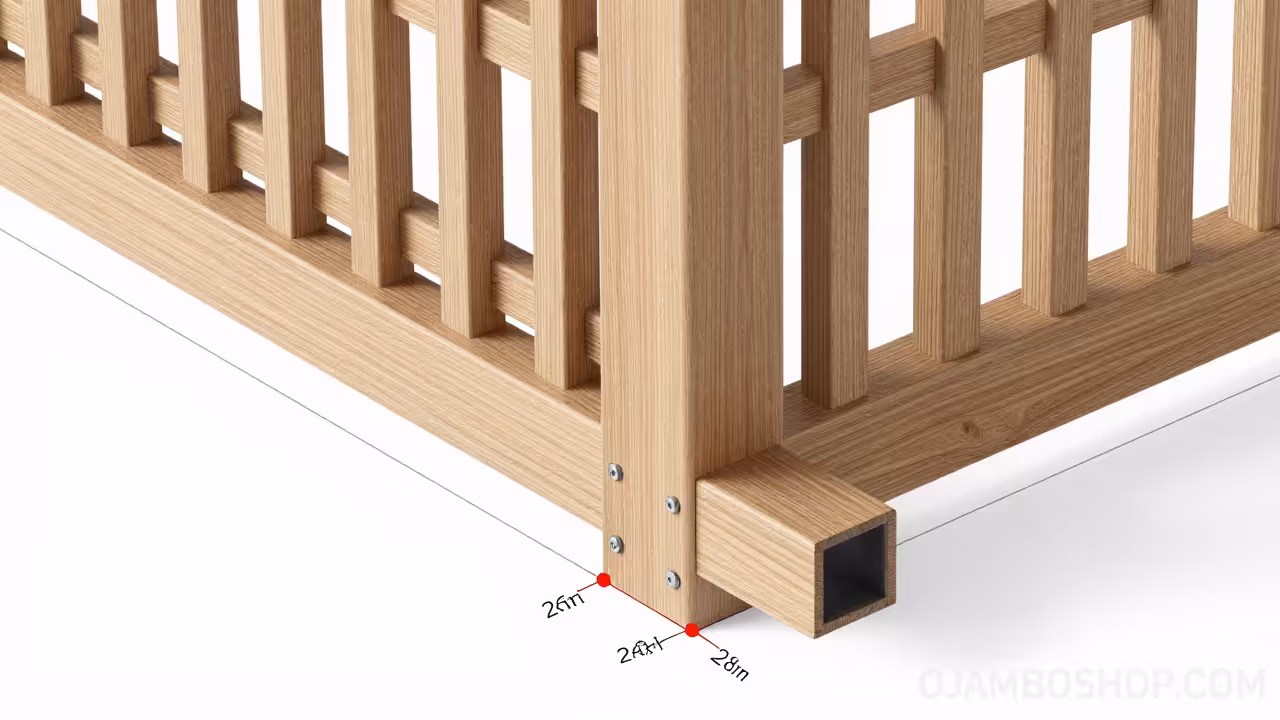
Phase 3: Vertical Post Installation
Set your 4×4 posts into the planter frame, ensuring they are perfectly plumb using a post level. Each post should extend 8 feet above the top of the finished planter box height. Secure the posts to the internal 2×4 framing using two 5-inch structural timber screws per connection point to prevent any wobbling. It is critical at this stage to measure the diagonal distance between the tops of the posts to ensure the entire structure is perfectly square.
Phase 4: Exterior Planter Cladding
Wrap the internal 2×4 frame with your 2×6 cedar or treated pine boards. Start from the bottom and work your way up, ensuring the corners are mitered at 45 degrees for a professional, seamless appearance. Use 2.5-inch ceramic-coated screws, pre-drilling every hole to prevent the cedar from splitting near the ends of the boards. Leave a 1/8-inch gap between the bottom board and the ground to allow for moisture evaporation and to prevent rot.
Phase 5: Installing the Planter Floor
Cut your 3/4-inch exterior grade plywood to fit the inside dimensions of the planter box. Drill 1-inch drainage holes every 12 inches across the entire surface of the plywood to prevent water from pooling at the root level of your plants. Support the plywood floor by screwing 2×4 cleats to the inside of the planter frame approximately 6 inches from the bottom. Line the interior of the box with heavy-duty landscape fabric to protect the wood from direct soil contact.
Phase 6: Slatted Screen Layout
Determine the starting point for your first 1×2 slat at the top of the planter box. Use a 3/4-inch spacer block to ensure consistent gaps between every horizontal slat as you move up the 4×4 posts. This consistency is the difference between a professional-looking build and a messy DIY attempt. Check for level every five slats, as small errors in spacing can accumulate over the 8-foot height of the screen.
Phase 7: Slat Attachment
Secure each 1×2 slat using 1.5-inch stainless steel brad nails or trim screws. We highly recommend using two fasteners per post to prevent the thin slats from cupping or twisting as they season in the sun. If you are using cedar, stainless steel is mandatory because standard galvanized nails will react with the tannins in the wood and create permanent black streaks. Work your way all the way to the top of the 8-foot posts until the screen is fully enclosed.
Phase 8: Finishing the Top Cap
To protect the end grain of the 4×4 posts and the slats, install a 2×4 cedar cap across the very top of the structure. This cap should overhang the screen by 1 inch on all sides to shed rainwater away from the structural joints. Secure the cap with 3-inch screws driven vertically into the 4×4 posts. This simple addition significantly extends the lifespan of the project by preventing water from sitting on top of the vertical wood fibers.
Phase 9: Sanding and Surface Prep
Use a random orbital sander with 80-grit sandpaper to smooth out any rough edges or stamps on the lumber. Pay special attention to the corners of the planter box where people might walk past and snag their clothing. Once the 80-grit pass is complete, follow up with 120-grit sandpaper for a touch-friendly finish. Remove all sawdust with a tack cloth or a leaf blower before applying any stain or sealant.
Phase 10: Sealing and Planting
Apply a high-quality UV-rated exterior stain or clear sealant to all exposed wood surfaces. If you used cedar, a clear coat will preserve the natural red hues, while a semi-transparent stain will offer better protection against graying. Fill the planter box with a high-quality potting mix specifically designed for containers, which is lighter and drains better than standard topsoil. Add your favorite climbing vines or tall grasses to complete the privacy effect.
Pro-Tip for Longevity
The most common point of failure in outdoor structures is “ground rot” caused by trapped moisture at the base of the posts. To prevent this, apply a thick coat of copper naphthenate or a bitumen-based flashing tape to the bottom 18 inches of your 4×4 posts before they are installed. This creates an impenetrable moisture barrier that can double the lifespan of your structural framing, ensuring your privacy screen remains standing for decades rather than years.
Common Mistakes
The first common error is failing to pre-drill holes in cedar or thin 1×2 slats. Cedar is a brittle wood, and driving a screw near the end of a board without a pilot hole will almost certainly cause a structural split.
Secondly, many builders ignore the weight of wet soil when designing the planter base. A full 8-foot planter can hold hundreds of pounds of soil, and without the internal 2×4 framing and plywood cleats described here, the bottom of the planter will eventually blow out or sag.
Finally, skipping the use of stainless steel fasteners is a mistake you will regret within six months. Standard zinc or low-grade galvanized screws will corrode and leave ugly “bleeding” marks down the face of your beautiful modern slats.
Maintenance and Safety
Always wear a dust mask when cutting pressure-treated lumber, as the chemical preservatives can be harmful if inhaled. Use safety glasses during the slat installation phase, as brad nailers are prone to occasional ricochets if they hit a knot in the wood.
Inspect your privacy screen every spring for any loose slats or signs of wood movement. Wood is a natural material that expands and contracts with the seasons, so you may need to tighten a few screws or apply a fresh coat of sealant every two to three years.
Keep the drainage holes in the planter box clear of debris to ensure water doesn’t pool against the interior framing. If you live in a climate with heavy snow, clear the snow away from the base of the planter to prevent prolonged moisture exposure during the spring thaw.