
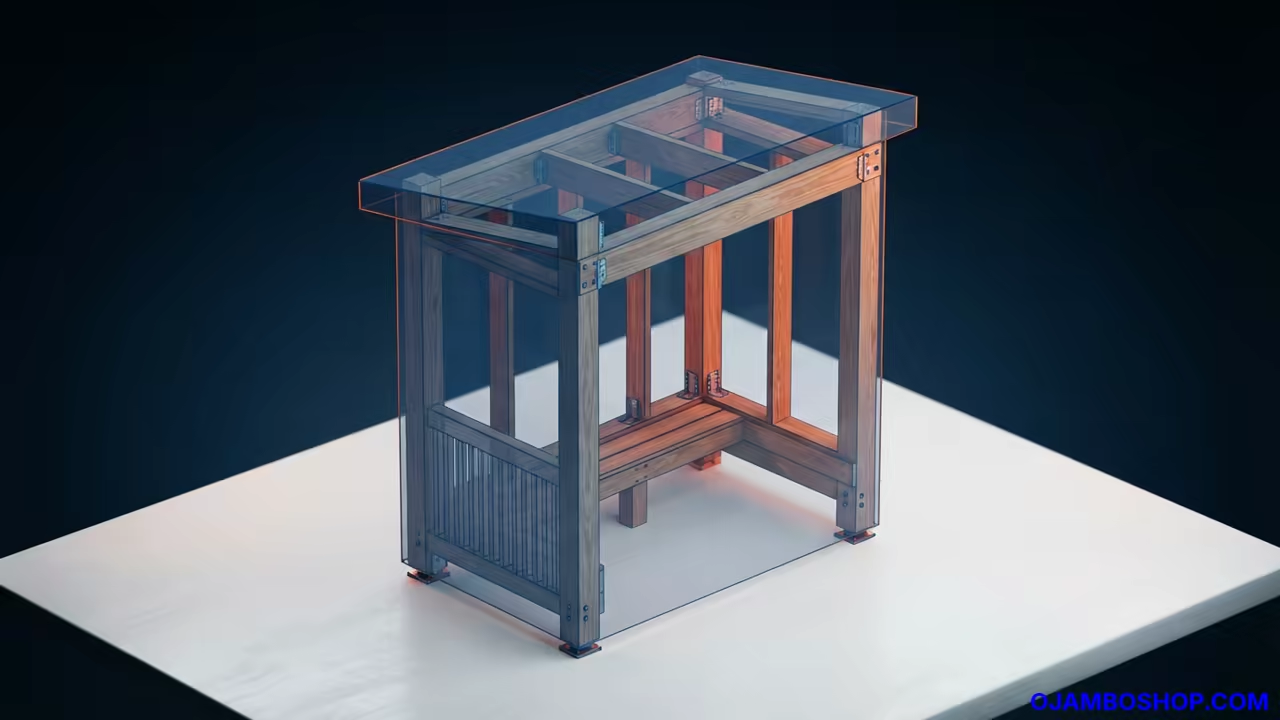
Weatherproof Entry Boot Station Blueprints
An outdoor mudroom boot bench is more than just a piece of furniture. It serves as a critical transition zone that prevents dirt and moisture from entering the main living areas of a home.
Adding a dedicated boot station to a porch or entryway increases the functional utility of the exterior space. It provides a comfortable spot for changing shoes while keeping the entryway organized and clean.
Disclaimer: I may earn a commission from purchases made through these links at no extra cost to you.


A well constructed bench also adds perceived value to a property by demonstrating a commitment to organization and maintenance. This project focuses on a compact design that maximizes storage without overcrowding the porch.
Quick Specs
Overall Dimensions: 48 inches wide by 18 inches deep by 72 inches total height.
Estimated Cost: 120 to 180 US Dollars depending on lumber selection.
Difficulty Level: Intermediate.
Estimated Build Time: 12 to 16 total labor hours.
Materials and Tools
Lumber Requirements
- Four 4×4 pressure treated posts at 8 feet length for main supports.
- Six 2×4 pressure treated boards at 8 feet length for framing and bracing.
- Eight 1×4 cedar boards at 8 feet length for slatting and shelving.
- One 4×8 sheet of 3/4 inch exterior grade plywood for the bench top.
Hardware Requirements
- One box of 2.5 inch stainless steel deck screws.
- One box of 1.5 inch stainless steel trim screws.
- Four 3 inch heavy duty galvanized lag bolts for base anchoring.
- Two quarts of high quality exterior clear sealant or UV resistant stain.
Required Tools
- Miter saw for precise cross cuts.
- Power drill and impact driver.
- Kreg jig for pocket hole joinery.
- Orbital sander with 80 and 120 grit sandpaper.
- Speed square and 4 foot bubble level.
- Clamps and a measuring tape.
| Parameter | Description | Value |
|---|---|---|
| Pressure Treated | Durability | High |
| Western Red Cedar | Aesthetic | Natural |
| Redwood | Cost | High |
| Exterior Plywood | Best Use | Bench Surface |
| Parameter | Description | Value |
Technical Layout
The structural integrity of the boot station relies on a reinforced box frame that distributes weight evenly across the ground. The base consists of two 4×4 skids that act as the foundation, preventing the 2×4 floor joists from direct contact with the concrete or soil.
The load bearing capacity is concentrated in the vertical 4×4 corner posts which are tied together with 2×4 aprons using pocket hole joinery. This configuration prevents racking and ensures the bench does not sway when a person sits down.
The upper shelving unit utilizes a cantilevered support system where the 1×4 shelves are supported by 2×4 cleats screwed directly into the main posts. By utilizing stainless steel fasteners, the structure avoids the unsightly black streaks caused by zinc corrosion over time.
The spacing between the lower slats is set at 1.5 inches to allow for maximum airflow and debris drainage.
Step by Step Instructions
Phase 1 Foundation Preparation
Begin by clearing a level area of your porch or patio where the bench will reside. Lay down two 4×4 skids measuring 18 inches long to serve as the ground contact points.
Ensure these are perfectly parallel and square to each other. These skids raise the main frame off the ground to prevent rot.
Phase 2 Base Frame Assembly
Construct a 48 inch by 18 inch rectangle using 2×4 pressure treated lumber. Use a speed square to ensure all four corners are exactly 90 degrees.
Install center joists every 16 inches to prevent the bench top from sagging. Secure all joints with 2.5 inch stainless steel screws.
Phase 3 Vertical Support Installation
Cut four 4×4 posts to a total height of 72 inches for the back and 22 inches for the front. Attach the front posts to the base frame using heavy duty lag bolts.
The back posts should extend upward to support the overhead shelving. Ensure the posts are plumb using a bubble level.
Phase 4 Bench Surface Attachment
Cut the 3/4 inch exterior plywood to fit the 48 inch by 18 inch top. Sand the edges thoroughly to prevent splinters.
Apply a bead of exterior wood glue to the top of the 2×4 frame. Secure the plywood using 1.5 inch trim screws recessed into the wood.
Phase 5 Lower Boot Slats
Cut 1×4 cedar boards into 18 inch lengths to create the boot storage area. Space these slats 1.5 inches apart across the width of the frame.
This gap allows mud and water to fall through rather than pooling. Fasten them using trim screws from the underside for a clean look.
Phase 6 Upper Shelf Framing
Install 2×4 cleats to the inside of the back 4×4 posts at 36 and 54 inches high. These cleats provide the primary support for the upper storage shelves.
Ensure the cleats are level across the width of the structure. Use pocket holes for a seamless transition between the cleat and the post.
Phase 7 Upper Shelf Installation
Cut 1×4 cedar boards to create shelves that are 12 inches deep. Lay them across the cleats and secure them with stainless steel screws.
Leave a small gap between the boards to allow for moisture evaporation. This area is ideal for storing hats, gloves, or cleaning supplies.
Phase 8 Structural Bracing
Install 2×4 diagonal braces at the rear corners of the bench. These braces should run from the bench seat up to the first shelf.
This creates a triangle that eliminates lateral movement. Use 2.5 inch screws to lock these braces firmly in place.
Phase 9 Sanding and Surface Prep
Use the orbital sander to smooth all rough edges and joints. Start with 80 grit sandpaper to remove mill marks and move to 120 grit for a professional finish.
Pay close attention to the bench top and the edges of the slats. Wipe the entire structure down with a tack cloth to remove all dust.
Phase 10 Finishing and Weatherproofing
Apply a high quality UV resistant clear sealant to all wooden surfaces. Use a natural bristle brush to work the sealant deep into the wood grain.
Allow the first coat to dry for 24 hours before applying a second coat. This protects the wood from sun bleaching and water penetration.
Common Mistakes
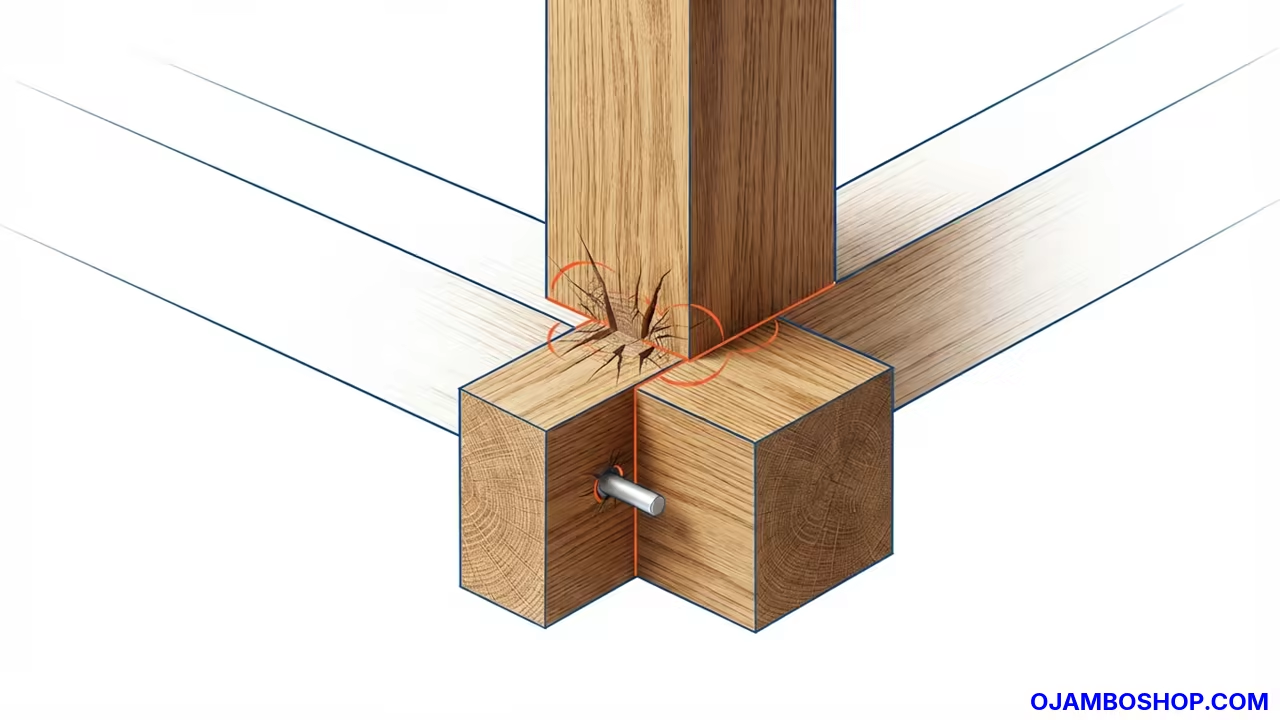
One frequent error is over tightening screws into the end grain of the cedar slats. This often causes the wood to split along the grain line.
Always pre drill pilot holes to ensure a tight fit without compromising the lumber.
Another mistake is failing to account for ground drainage. Placing the bench directly on concrete without skids leads to moisture trapping.
This creates a breeding ground for mold and accelerates the rot of the bottom joists.
Some builders forget to use stainless steel fasteners in outdoor environments. Standard galvanized screws can still rust when exposed to salt and heavy rain.
Investing in 304 or 316 grade stainless steel ensures the structure remains clean for years.
Maintenance and Safety
Always wear safety glasses and hearing protection when operating the miter saw or impact driver. Use a dust mask when sanding pressure treated lumber to avoid inhaling chemical fumes.
Keep all power cords clear of the cutting path to prevent accidents.
To maintain the structure, inspect the fasteners every six months. Tighten any screws that may have loosened due to the natural expansion and contraction of the wood.
Check the base skids for any signs of softening or decay.
Re apply the exterior sealant or stain every two years. This prevents the cedar from turning gray and maintains the structural integrity of the fibers.
Use a light sanding between coats to ensure the new finish adheres properly.
Pro Tip for Longevity: Install a thin sheet of rubber flashing between the 4×4 skids and the concrete floor. This creates a capillary break that prevents moisture from wicking up into the wood.
This simple addition can extend the life of the base frame by several years.