
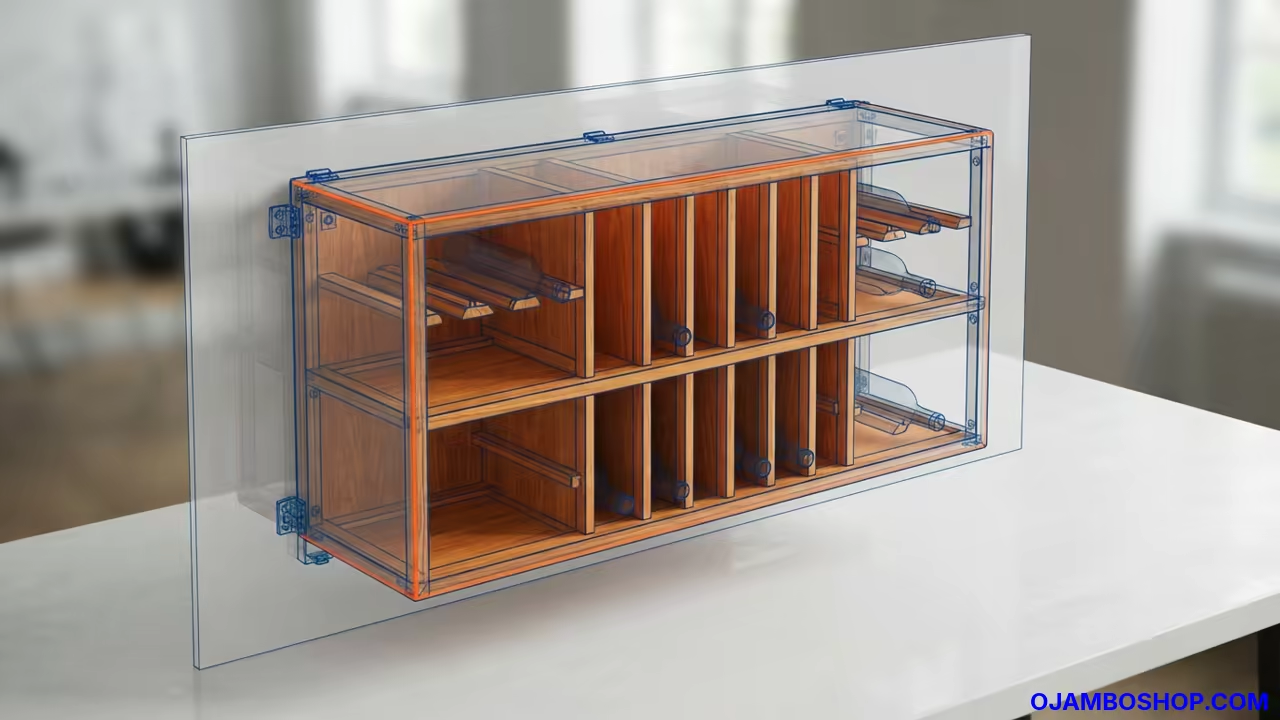
Elegant Wall Mounted Twelve Bottle Wine Display
The addition of a dedicated wine storage unit transforms a standard kitchen or dining area into a sophisticated space. A vertical wall unit maximizes available square footage while showcasing a curated collection of fine vintages.
This specific design focuses on structural stability and aesthetic elegance to increase the overall value of any residential property. It provides a seamless blend of utility and high end interior design for the modern homeowner.
Disclaimer: I may earn a commission from purchases made through these links at no extra cost to you.


Quick Specs
Overall Dimensions: 12 inches wide by 28 inches high by 7 inches deep. Estimated Build Cost: 60 to 90 dollars depending on the wood species selected.
Difficulty Level: Intermediate woodworking skills are required for this project. Estimated Build Time: 6 to 8 hours including sanding and drying time.
Materials and Tools
Selecting the right lumber is critical for ensuring the rack supports the weight of twelve full bottles. Hardwoods like white oak or black walnut offer the best longevity and structural rigidity for this application.
Avoid using standard construction pine if you intend to store heavy bottles for many years. The density of a hardwood prevents sagging and ensures the unit remains square against the wall.
Lumber List
- Three 1×6 hardwood boards at 8 feet length
- One 1 4 inch hardwood plywood sheet for the back panel
- Box of 1.25 inch pocket hole screws
- High strength PVA wood glue
- Polyurethane sanding discs from 80 to 220 grit
- Clear satin polyurethane or beeswax finish
Tool List
- Miter saw for precise cross cuts
- Pocket hole jig for hidden joinery
- Power drill and driver set
- Orbital sander for smooth surfaces
- Speed square and tape measure
- Stud finder and level
- Clamps of varying lengths
| Parameter | Description | Value |
|---|---|---|
| Pocket Screws | Holding Power | High |
| Finish Nails | Holding Power | Medium |
| Wood Screws | Holding Power | High |
| Dowels | Holding Power | Medium |
| Parameter | Description | Value |
Technical Layout
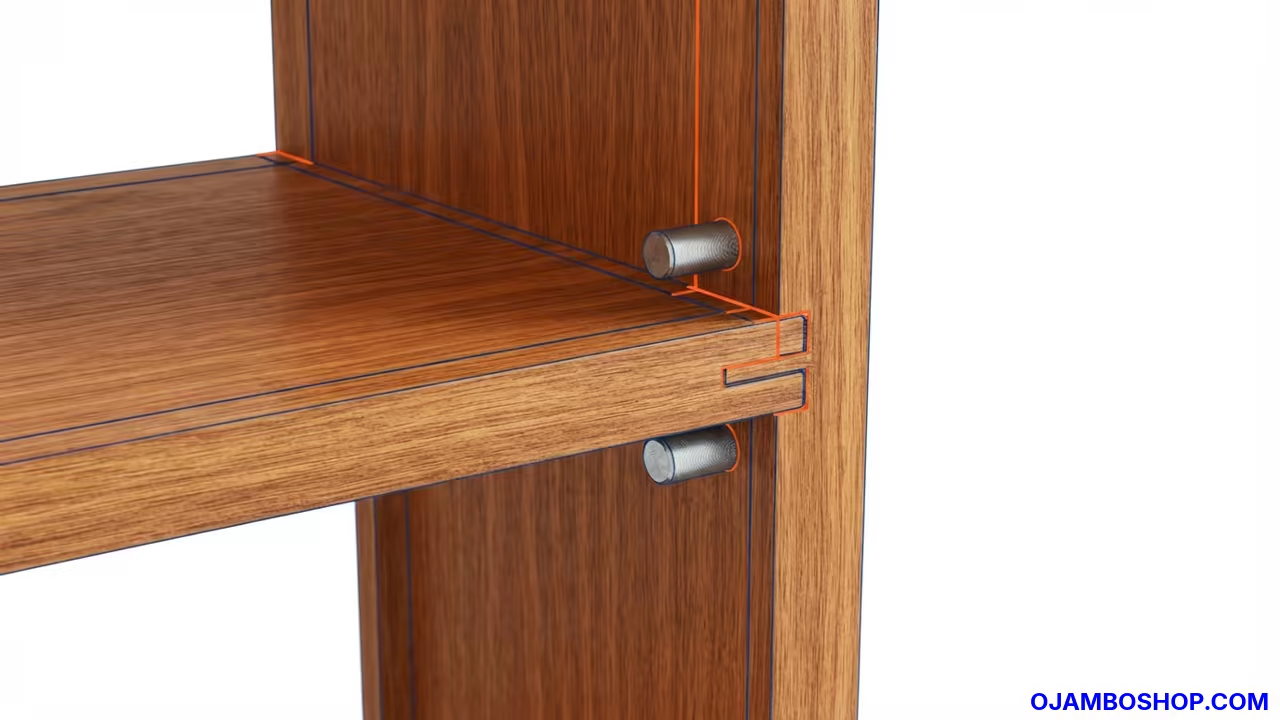
The structural integrity of this rack relies on a vertical compression system combined with a rigid rear diaphragm. Each bottle rests on a horizontal shelf that transfers the weight directly into the two primary vertical side rails.
This configuration ensures that the gravitational load is distributed evenly across the wood fibers of the vertical members. To prevent the rack from bowing under the combined weight of approximately 45 pounds of wine the back panel is glued and fastened.
This panel acts as a shear wall which prevents the unit from racking or leaning to one side over time. The use of pocket holes creates a mechanical lock that resists pulling forces during the installation process.
The spacing between the shelves is calculated to accommodate standard Bordeaux and Burgundy bottles without excessive movement. This precise geometry prevents bottles from sliding while maintaining a compact footprint on the wall.
Every joint is reinforced with a combination of chemical bonding via glue and mechanical fastening via screws. This ensures the entire assembly remains stable under load.
Step by Step Instructions
Phase 1 involves the careful selection and milling of the hardwood boards to ensure every edge is perfectly square. You must check each board for warping or cupping before making any cuts with the miter saw. Use a speed square to mark the lines accurately across the face of the timber. Sand the raw boards lightly to remove any mill marks that could interfere with the joinery.
Phase 2 focuses on cutting the two main vertical supports to a final length of 28 inches. These members serve as the backbone of the entire unit and must be identical in length. Ensure the ends are cut at a perfect 90 degree angle to maintain verticality. Double check the measurements before cutting to avoid wasting expensive hardwood material.
Phase 3 requires cutting the internal shelf dividers and the top and bottom plates to 10 inches. These pieces will fit between the vertical supports to create the bottle slots. Use a stop block on your saw to ensure every shelf is exactly the same width. Consistent dimensions are the secret to a professional look and a tight fit.
Phase 4 is the drilling phase where you utilize the pocket hole jig on the underside of each shelf. Drill two holes into each end of every horizontal member to allow for a hidden connection. Set the jig depth specifically for the thickness of your 1×6 hardwood boards. This ensures the screws do not break through the exterior face of the vertical rails.
Phase 5 begins the assembly by joining the bottom plate to the two vertical side rails using wood glue. Apply a thin bead of glue to the mating surfaces before driving the pocket screws home. Use clamps to pull the joints tight and ensure the base is perfectly square. Wipe away any excess glue immediately with a damp cloth to avoid finish blotches.
Phase 6 involves installing the four internal shelves at 6 inch intervals to create the bottle tiers. Place each shelf into its designated position and verify the spacing with a tape measure. Drive the pocket screws in securely while the unit is clamped to a flat work surface. This ensures the shelves remain level and the overall structure stays aligned.
Phase 7 requires the attachment of the top cap and the installation of the 1 4 inch back panel. Apply glue to the rear edges of the frame before laying the plywood panel on top. Secure the panel with small finish nails or staples every 6 inches along the perimeter. The back panel transforms the rack from a loose frame into a rigid structural box.
Phase 8 is the refinement stage where you sand the entire unit starting with 80 grit sandpaper. Progress through 120 and 180 grit to remove all scratches and tool marks. Pay special attention to the edges and corners to give them a slight radius. A smooth surface is essential for a professional finish and a tactilely pleasing product.
Phase 9 is the finishing process where you apply a clear satin polyurethane to protect the wood. Use a lint free cloth to apply the finish in thin and even coats. Allow the first coat to dry completely before lightly sanding with 220 grit paper. This process removes any raised grain and creates a glass smooth surface.
Phase 10 is the final installation where you use a stud finder to locate the wall framing. Drill pilot holes through the back panel and directly into the wooden wall studs for maximum support. Drive heavy duty 3 inch screws through the rack and into the studs to prevent collapse. Use a level to ensure the unit is perfectly vertical before the final tightening.
Common Mistakes
One frequent error is the failure to pre drill pilot holes when using hardwoods like oak or walnut. This often leads to the wood splitting along the grain line when the screw is driven in. Always use a drill bit that matches the diameter of the screw shank.
Another common mistake is relying solely on screws without applying a high quality wood glue to the joints. Screws provide the clamping force but the glue provides the long term structural bond. A joint with both glue and screws is significantly stronger than one with either alone.
Many builders also overlook the importance of checking for square during the assembly of the base and top. If the unit is even a few degrees off square the back panel will not fit properly. Use a machinist square to verify every corner is exactly 90 degrees before fastening.
Finally some homeowners use incorrect wall anchors by relying on drywall plugs for a heavy wine rack. Twelve bottles of wine create a significant amount of leverage and downward force on the wall. Always fasten the unit directly into the wall studs using structural screws.
Maintenance and Safety
Pro Tip: To ensure the long term structural integrity of the rack use stainless steel fasteners and a moisture resistant sealant. Wine bottles can sometimes develop slow leaks or condensation which can degrade standard steel screws and cause wood rot over time.
Always wear a dust mask and safety glasses when sanding hardwood or cutting lumber with power tools. Some hardwoods produce fine dust that can irritate the respiratory system if inhaled over long periods. Work in a well ventilated area or use a vacuum attachment on your sander.
Check the wall fasteners every six months to ensure the rack has not shifted or loosened. The constant weight of the bottles can cause some materials to compress or settle into the wall. Tighten any screws that have become loose to maintain a secure connection.
Apply a fresh coat of beeswax or furniture polish once a year to keep the wood hydrated. This prevents the lumber from cracking or shrinking due to changes in indoor humidity. Proper hydration of the wood maintains the beauty and the strength of the unit.