
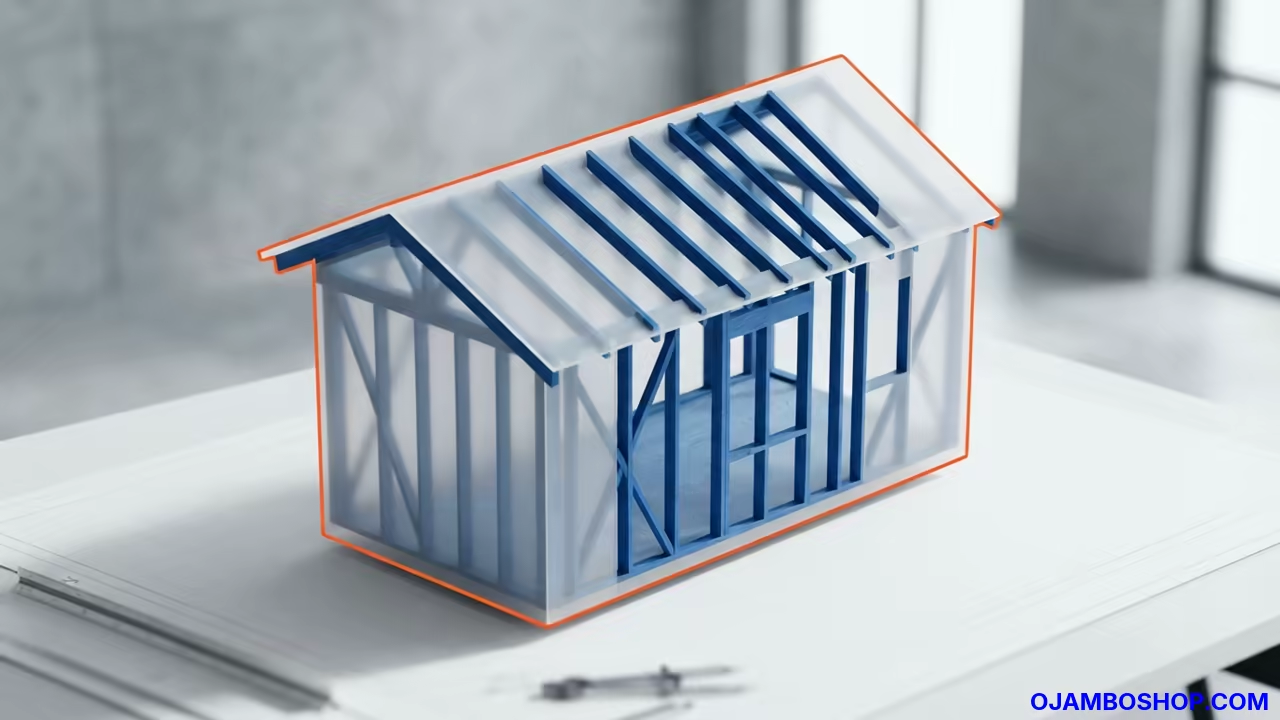
The mobile tiny house represents a shift toward financial freedom and minimalist design. This project focuses on a 280 square foot footprint for maximum utility.
A well planned residence on wheels adds immense value to a property as a guest house. It provides a sustainable alternative to traditional housing without sacrificing modern comfort.
The primary goal is to create a structure that is safe for highway travel. This requires a balance between lightweight materials and extreme structural rigidity.
Disclaimer: I may earn a commission from purchases made through these links at no extra cost to you.


Quick Specs
Total dimensions are 8.5 feet wide by 32 feet long. The interior living space totals approximately 280 square feet.
Estimated cost ranges between 35,000 and 60,000 dollars depending on finish quality. This includes the specialized tiny house trailer.
Difficulty is rated as advanced due to the integration of utilities and transport requirements. Professional guidance is recommended for electrical and plumbing systems.
Estimated build time is six to eight months for a single person. A small team can complete the structure in three months.
Materials and Tools
Lumber requirements include kiln dried 2×4 studs for wall framing and 2×6 joists for the floor. LVL beams are necessary for the main structural headers.
Hardware includes structural GRK screws and galvanized joist hangers. High quality flashing tape and a breathable house wrap are mandatory for moisture control.
Siding options include clear western red cedar or fiber cement boards. Plywood sheathing should be minimum 7/16 inch thickness for shear strength.
Insulation choices involve closed cell spray foam or rockwool batts. Closed cell foam provides the best R value and adds structural rigidity.
Required tools include a miter saw and a compound table saw. A cordless framing nailer and a high torque impact driver are essential.
Precision tools like a 4 foot level and a digital angle finder ensure accuracy. A heavy duty cordless drill is needed for boring through the trailer frame.
| Parameter | Description | Value |
|---|---|---|
| Stick Frame | Standard Weight | High Durability |
| SIP Panels | Low Weight | Moderate Durability |
| Steel Studs | Lowest Weight | Very High Durability |
| Log Cabin | High Weight | High Durability |
| Parameter | Description | Value |
Technical Layout
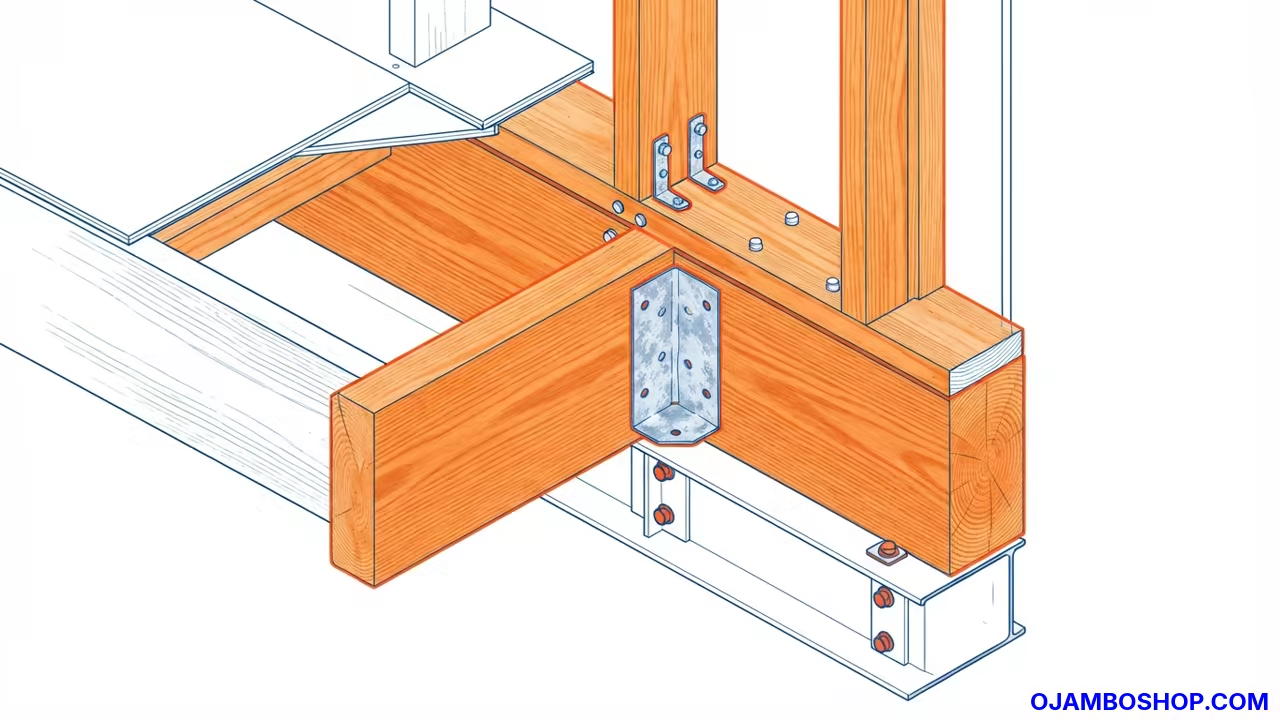
The structural foundation begins with a heavy duty dual axle trailer designed for static loads. The floor joists are spaced 16 inches on center to distribute the weight of the interior furniture.
Steel bolts anchor the wooden sill plates directly to the trailer frame for maximum stability. This connection prevents the house from shifting during high wind events or highway transport.
Wall framing utilizes a standard 16 inch on center spacing with double top plates. Every wall section incorporates engineered headers over window and door openings to prevent sagging.
Wind bracing is achieved through the use of structural plywood sheathing on all four exterior walls. This creates a rigid box that resists racking forces during movement.
The roof system employs a gable design with a 4 pitch slope for efficient water runoff. Rafters are tied into the wall plates using hurricane ties to secure the roof during storms.
A ridge beam supports the center of the roof and transfers the load to the exterior walls. This geometry ensures that snow loads do not compromise the ceiling height.
Weight distribution is the most critical aspect of the technical layout for any mobile home. Heavier appliances and water tanks are positioned over the axles to maintain a balanced center of gravity.
This prevents excessive tongue weight or trailer sway during transport. Precise calculations are required to keep the total weight under the trailer rating.
Step by Step Instructions
Phase one involves the selection and leveling of the tiny house trailer. The trailer must be placed on concrete pads to ensure a perfectly level building surface.
Use heavy duty jacks to stabilize the frame before any construction begins. Verify that the trailer is square by measuring the diagonals across the base.
Phase two focuses on the subfloor framing and the installation of insulation. Joists are installed and secured with joist hangers to the main trailer beams.
Rigid foam insulation is fitted tightly between the joists to prevent cold air infiltration. A pressure treated plywood subfloor is then glued and screwed into place.
This creates a solid and warm platform for the interior layout. Phase three is the vertical framing of the four exterior walls.
Walls are built flat on the floor and then raised into a vertical position. Ensure that every corner is perfectly square using a framing square.
Install window and door rough openings according to the architectural floor plan. Secure the walls to the subfloor using structural screws for a permanent bond.
Phase four involves the installation of the roof rafters and the ridge beam. Rafters are cut with precise birdsmouth notches to sit flush on the wall plates.
Install the ridge beam first and then connect the rafters using galvanized ties. Apply 7/16 inch plywood sheathing across the roof to create a structural diaphragm.
This phase transforms the open frame into a weatherproof shell. Phase five is the application of the exterior weather barrier and siding.
Wrap the entire structure in a high quality breathable house wrap to prevent rot. Install flashing around all windows and doors to divert water away from the frame.
Apply the chosen siding material starting from the bottom and working upward. Use stainless steel nails to prevent rust streaks on the exterior finish.
Phase six involves the rough in of electrical and plumbing systems. Run PEX piping for water and PVC for waste lines through the floor and walls.
Install electrical wiring in NM cable and pull them to a centralized breaker panel. Ensure all wiring is stapled securely to the studs to prevent movement during travel.
This is the best time to plan for future smart home integrations. Phase seven covers the installation of insulation and interior wall panels.
Rockwool or spray foam is filled into every wall cavity to maximize thermal efficiency. Install a vapor barrier to prevent condensation from forming inside the wall assembly.
Attach lightweight pine tongue and groove panels or drywall to the studs. Use a finish nailer to keep the surface clean and professional.
Phase eight is the final stage of finishing carpentry and built in cabinetry. Install the kitchen cabinets and bathroom vanity using structural adhesives and screws.
Build a custom loft bed area with safety railings and integrated storage drawers. Install the trim and baseboards to hide the gaps between the walls and floor.
Apply a final coat of protective sealant to all wooden surfaces. This ensures the interior remains durable for years of use.
Common Mistakes
Many builders fail to calculate the total weight of the house correctly. Overloading the trailer can lead to axle failure or dangerous highway swaying.
Always weigh the structure at a certified scale during the build process. Insufficient sealing around windows and doors often leads to hidden water damage.
Using only caulk without proper flashing tape allows moisture to seep into the walls. This results in mold growth and structural rot over a few short years.
Choosing the wrong fasteners can lead to catastrophic failure during transport. Using standard nails instead of structural screws allows joints to loosen over time.
Vibration from the road acts like a hammer that pulls nails out of the wood. Always prioritize mechanical fasteners over simple nails.
Maintenance and Safety
Apply a fresh coat of UV protective sealant to the exterior siding every two years. Check all window and door seals for cracks or peeling annually.
Ensure that the roof membrane remains intact to prevent interior leaks. Inspect the trailer tires and wheel bearings before every single move.
Lubricate the bearings and check tire pressure to prevent blowouts on the highway. Verify that all tie down points are secure and not rusted.
Always wear a dust mask and safety glasses when cutting treated lumber or insulation. Use a fire extinguisher in the kitchen and near the electrical panel.
Install a carbon monoxide detector if using a propane heating system. Safety gear is the most important part of any construction project.
Pro Tip for structural integrity involves the floor to trailer connection. Use GRK structural screws instead of nails to secure the sill plates to the steel frame.
These screws provide a much higher shear strength and resist loosening during highway vibration. This prevents the floor from shifting over time.