
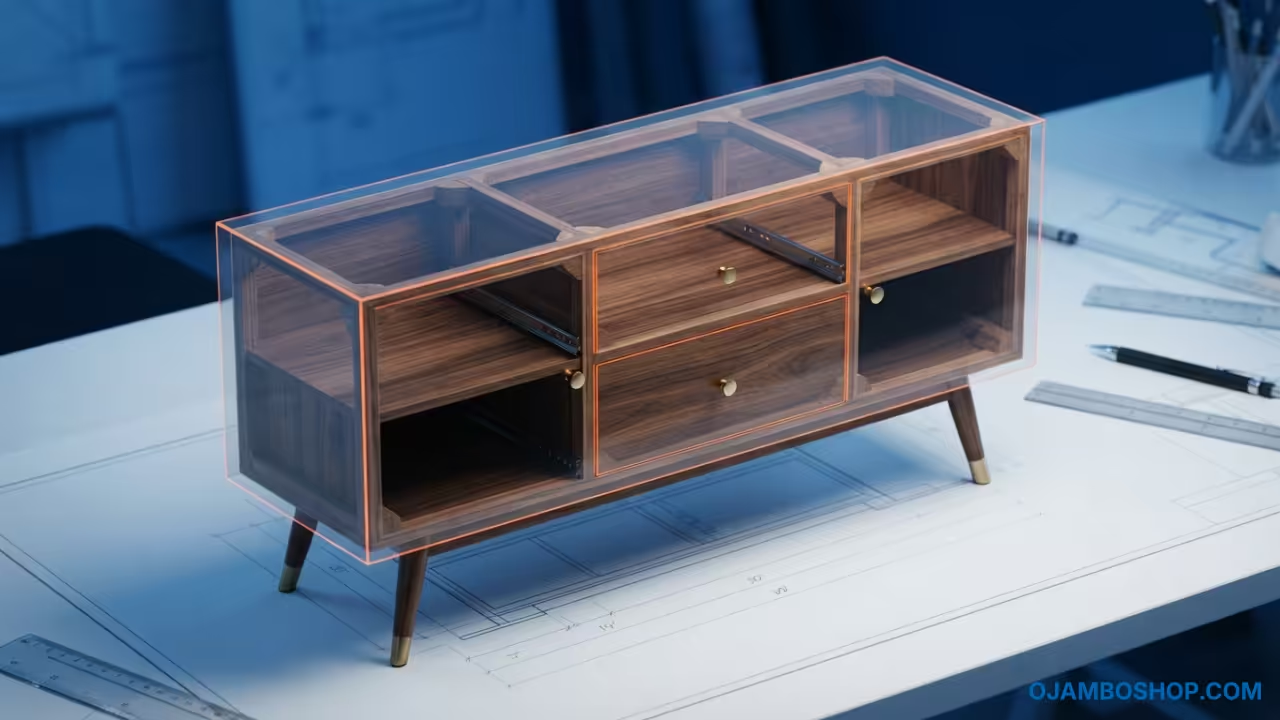
A masterfully crafted mid century modern sideboard is more than just a storage solution for a contemporary home. It is a statement of design that bridges the gap between functional utility and high end sculptural art.
Integrating a custom built sideboard into your interior design significantly increases the perceived luxury and market value of a property. A piece of this caliber creates a sophisticated focal point that elevates the entire room.
The timeless appeal of the mid century aesthetic lies in its commitment to organic lines and geometric simplicity. By building this piece yourself you ensure a level of structural integrity that exceeds retail alternatives.
Disclosure: article includes affiliate links.

Quick Specs
Dimensions are 48 inches wide by 18 inches deep by 30 inches high. Estimated cost ranges from 450 to 700 dollars depending on wood species.
The difficulty level is intermediate to advanced. Estimated build time is 35 to 40 hours.
Materials and Tools
For the primary carcass and top you will need 80 linear feet of 3/4 inch premium walnut or white oak. You will also need one 4 by 8 foot sheet of 1/4 inch matching hardwood plywood for the back panel and internal shelving.
Required hardware includes 40 pieces of 1 1/4 inch pocket hole screws and four 6 inch tapered hardwood furniture legs with mounting plates. You will also need 20 edge banding strips and four soft close concealed cabinet hinges.
Essential tools include a professional table saw, a compound miter saw, and a high precision pocket hole jig. You will also need a random orbital sander, a cordless impact driver, and a set of 24 inch parallel jaw clamps.
A combination square and a speed square are mandatory for ensuring the frame remains perfectly perpendicular. You will also need a variety of sandpaper grits from 80 to 220 and a high quality vacuum for dust extraction.
| Parameter | Description | Value |
|---|---|---|
| Wood Species | Entry Level | Pine with Stain |
| Wood Species | Professional Grade | Black Walnut |
| Wood Species | Recommended | White Oak |
| Joinery | Entry Level | Nails and Glue |
| Joinery | Professional Grade | Mortise and Tenon |
| Joinery | Recommended | Pocket Holes |
| Finish | Entry Level | Polyurethane |
| Finish | Professional Grade | Rubio Monocoat |
| Finish | Recommended | Hard Wax Oil |
| Legs | Entry Level | Block Legs |
| Legs | Professional Grade | Custom Tapered |
| Legs | Recommended | Tapered Hardwood |
| Parameter | Description | Value |
Technical Layout
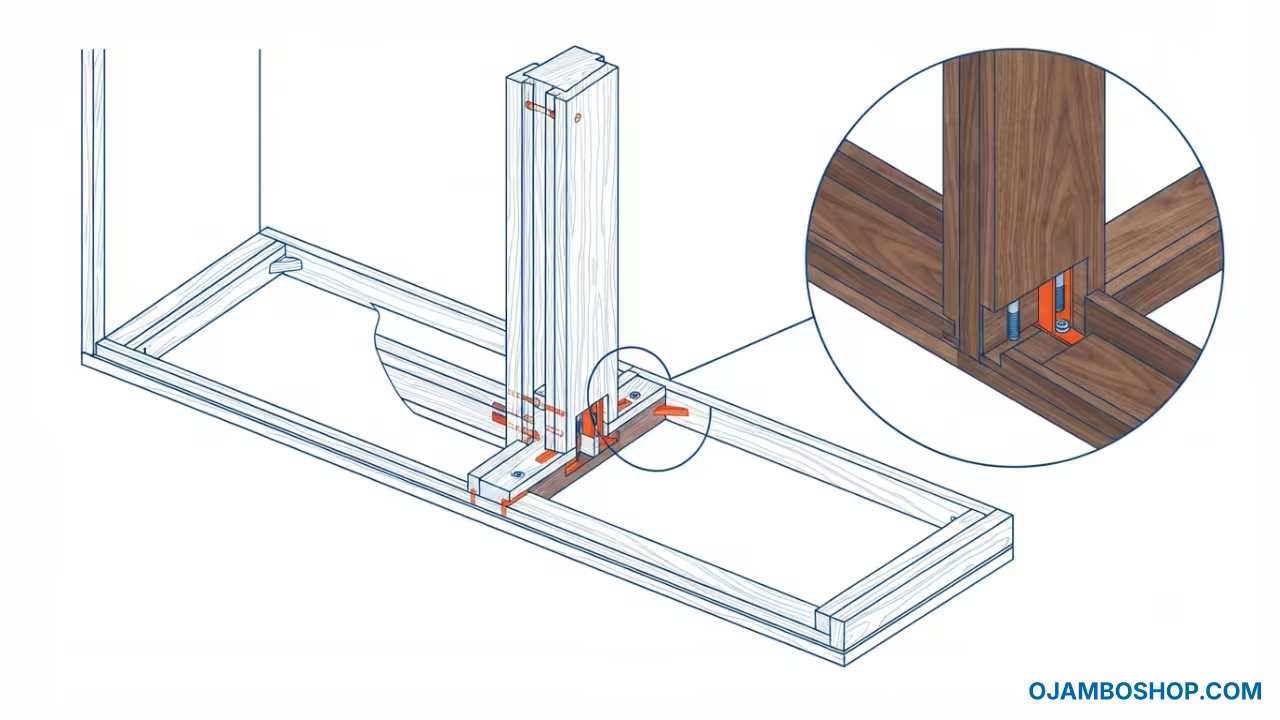
The structural engineering of this sideboard relies on a reinforced box frame architecture that prioritizes weight distribution and lateral stability. The primary load is carried by the bottom chassis and transferred through the tapered legs via heavy duty steel mounting plates.
To prevent the 48 inch span of the top panel from sagging under the weight of electronics or decor, a central vertical divider is integrated. This divider acts as a critical structural rib that bisects the internal volume and provides a direct load path from the top panel to the base.
The 18 inch depth is maintained by utilizing recessed back panels which act as a shear wall to prevent the unit from racking. All primary joints are reinforced using a combination of high strength PVA wood glue and mechanical fasteners to ensure long term durability.
The use of a 3/4 inch thickness for the outer shell provides the necessary rigidity to handle significant weight without warping. The tapered legs are angled at five degrees to create the iconic mid century silhouette while providing a wider base for enhanced stability.
Step by Step Instructions
Phase 1 Base Plate Assembly
Begin by cutting the bottom panel to exactly 48 inches by 18 inches using your table saw. Ensure the edges are perfectly square and free of any tear out from the blade.
Apply a thin bead of professional wood glue to the edges of the side panels. Secure the sides to the bottom panel using a pocket hole jig on the underside of the base.
Check the corners with a speed square to ensure a perfect 90 degree angle. Clamp the assembly firmly using parallel jaw clamps until the glue has set for at least two hours.
Verify that the bottom panel is flat against your workbench to avoid any twisting in the frame. This foundation is the most critical part of the build for overall stability.
Phase 2 Central Divider Installation
Measure and mark the center point of the bottom panel at exactly 24 inches. Cut the central vertical divider to the height of the internal cavity.
Position the divider exactly in the center to split the storage into two equal bays. Secure the divider using pocket screws from the bottom and the top.
Ensure the divider is perfectly plumb using your combination square. This component is critical for preventing the top panel from bowing under its own weight over time.
Check the spacing on both sides of the divider to ensure the internal bays are identical. This symmetry is essential for the final door installation to look professional.
Phase 3 Top Panel Integration
Prepare the top panel by cutting it to 48 inches by 18 inches with a slight overhang on the front and sides. Sand the edges to a soft radius to match the mid century modern aesthetic.
Align the top panel over the side walls and the central divider. Use pocket holes on the interior faces of the dividers to pull the top down tight.
Verify that the overall width remains 48 inches and the depth is 18 inches. Use a rubber mallet to seat the panel fully before driving the screws home.
Ensure there are no gaps between the top panel and the side walls. If gaps exist use a small amount of wood filler mixed with sawdust for a seamless repair.
Phase 4 Back Panel Installation
Cut the 1/4 inch plywood back panel to fit snugly within the rear perimeter of the frame. Use a utility knife for the final trim to avoid overshooting the edges.
Apply a small amount of wood glue to the rear edges of the side panels and divider. Press the back panel firmly against the glue and secure it with 1 inch brad nails.
This panel is what prevents the sideboard from swaying left to right. Ensure it is flush with the back edges to allow the unit to sit flat against a wall.
Check for squareness one last time by measuring the diagonals of the back panel. If the diagonals are equal the sideboard is perfectly square.
Phase 5 Door Frame Construction
Cut four pieces of hardwood for the door stiles and rails. Use a miter saw to create a clean rectangular frame for each of the two doors.
Assemble the door frames using pocket holes on the interior side of the rails. Ensure the gap between the doors is consistent and the frames are square.
Sand the interior edges of the door frames to remove any glue squeeze out. These doors will provide the iconic look of the mid century modern style.
Check the swing of the doors using a temporary hinge to ensure they do not rub against the frame. Adjust the rails if necessary to allow for a 1/8 inch clearance.
Phase 6 Leg Attachment
Position the sideboard upside down on a protected surface to access the bottom. Mark the four corners of the base where the tapered legs will be attached.
Install the mounting plates using short screws that do not penetrate the bottom panel. Twist the tapered legs into the plates until they are hand tight.
Flip the unit upright and check for any wobbling on your floor. Adjust the legs if necessary to ensure the sideboard sits perfectly level.
Ensure the legs are evenly spaced from the edges of the base. This creates the floating effect that is characteristic of high end mid century furniture.
Phase 7 Internal Shelf Placement
Determine the desired height for your internal shelving based on the items you plan to store. Drill shelf pin holes every 32 millimeters for maximum flexibility.
Insert the shelf pins and slide the 3/4 inch shelves into place. Ensure the shelves are cut slightly shorter than the bay width for easy installation.
Check that the shelves are level across the span of the unit. These shelves will add additional internal bracing to the overall structure.
Wipe down the interior of the bays before installing the shelves to remove any remaining dust. This prevents debris from scratching the finished wood.
Phase 8 Final Sanding and Finishing
Start with 80 grit sandpaper to remove any imperfections from the assembly process. Progress to 120 grit and finally 220 grit for a buttery smooth texture.
Wipe away all dust using a tack cloth or a vacuum with a brush attachment. Apply a high quality hard wax oil to highlight the natural wood grain.
Allow the first coat to penetrate for 24 hours before lightly sanding with 320 grit. Apply a final coat of finish to protect the wood from moisture and stains.
Ensure the finish is applied evenly across all surfaces to avoid lap marks. Use a lint free cloth to buff the surface for a professional satin sheen.
Common Mistakes
A frequent error is failing to square the frame before installing the back panel. This results in a sideboard that leans to one side or has doors that will not close properly.
Many builders overlook the importance of the central divider for a 48 inch span. Without this support the top panel will eventually sag in the middle under the weight of decor.
Using screws that are too long can cause the hardware to burst through the top surface of the wood. Always pre drill your holes and double check the thickness of your lumber.
Neglecting to sand with a progressive grit sequence often leaves swirl marks in the finish. Jumping from 80 grit straight to 220 grit will not remove the deep scratches from the coarse paper.
Maintenance and Safety
Pro Tip for structural integrity involves using a high quality PVA wood glue combined with stainless steel fasteners. This prevents the joints from loosening during seasonal humidity changes and stops moisture from causing rust streaks.
Always wear a dust mask and safety glasses when operating the table saw or orbital sander. Hardwood dust can be a respiratory irritant and small wood chips can cause eye injuries.
Treat the wood with a fresh coat of wax or oil every twelve months to maintain the luster. Avoid placing the sideboard in direct sunlight to prevent the wood from fading or cracking over time.
Use coasters for drinks and felt pads under heavy objects to protect the finished surface. If a scratch occurs use a matching wax filler stick to blend the repair into the grain.