
Introduction to The Analog Escape Library Cabin
Adding a dedicated library cabin to your property offers a unique sanctuary that transcends the standard backyard shed. This structure is designed specifically to foster deep focus and relaxation by removing digital distractions from the physical environment.
A well-constructed 450 square foot cabin provides significant value to your real estate while serving as a functional multi-generational space. Whether used for reading, writing, or quiet contemplation, the “Analog” Escape is an investment in both your home and your mental well-being.
Constructing this cabin requires a methodical approach to carpentry and a solid understanding of structural loads. By following these professional-grade blueprints, you will ensure that your new retreat is as durable as it is beautiful.
Quick Specs
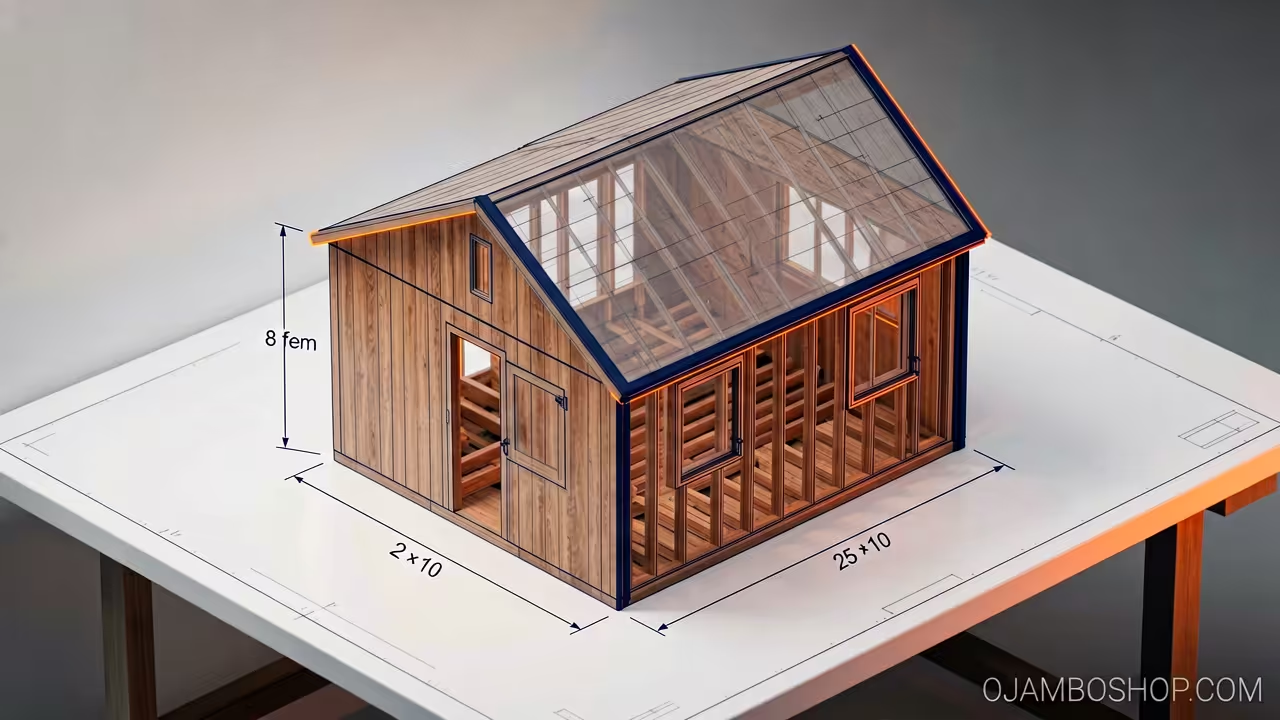
Dimensions: 18 Feet by 25 Feet (450 Square Feet)
Estimated Cost: $18,000 to $24,000 (Dependent on local lumber prices and finish grade)
Difficulty Level: Advanced DIY / Intermediate Professional
Estimated Build Time: 4 to 6 Weeks for a two-person crew
Materials and Tools List
The foundation of any lasting structure is the quality of the materials selected at the onset of the project. For this library cabin, we prioritize pressure-treated lumber for the ground-contact components and kiln-dried spruce-pine-fir for the wall framing.
Lumber Requirements:
* 6×6 Pressure-treated posts for the pier foundation
* 2×10 Pressure-treated joists for the floor system
* 3/4-inch Tongue and groove OSB or plywood subflooring
* 2×6 Spruce-pine-fir studs for exterior wall framing
* 2×8 Rafters for the 8/12 pitch gable roof
* 1×8 Cedar lap siding for the exterior finish
Hardware and Fasteners:
* 16d Hot-dipped galvanized nails for framing
* 3-inch Deck screws for subflooring and exterior trim
* Hurricane ties for rafter-to-top-plate connections
* Tyvek HomeWrap moisture barrier
* Asphalt architectural shingles or metal roofing panels
Required Tools:
* Sliding compound miter saw, Circular saw with a framing blade, Pneumatic framing nailer and finish nailer, 4-foot and 6-foot spirit levels, Impact driver and cordless drill set, Chalk line and speed square, Heavy-duty step ladders and scaffolding.
Hardware Performance Comparison
| Hardware Type | Coating | Best Use Case | Longevity |
|---|---|---|---|
| Bright Steel Nails | None | Interior non-load framing | Low |
| Electro-Galvanized | Thin Zinc | Interior trim and protected areas | Medium |
| Hot-Dipped Galvanized | Thick Zinc | Exterior framing and pressure-treated wood | High |
| Stainless Steel | Grade 304/316 | High-moisture or coastal environments | Maximum |
Technical Layout and Framing Logic
The structural integrity of the 450 square foot “Analog” Escape relies on a robust floor-to-wall load path. We utilize a 2×10 joist system spaced at 12 inches on center to prevent any floor bounce, which is essential for heavy bookshelves. The walls are framed with 2×6 studs at 16 inches on center, providing a deeper cavity for high-density insulation and superior soundproofing. By using a double top plate throughout the perimeter, we ensure that the roof loads are evenly distributed across the vertical members. The header spans for the windows and doors are oversized to prevent sagging over time, especially on the long 25-foot axis.
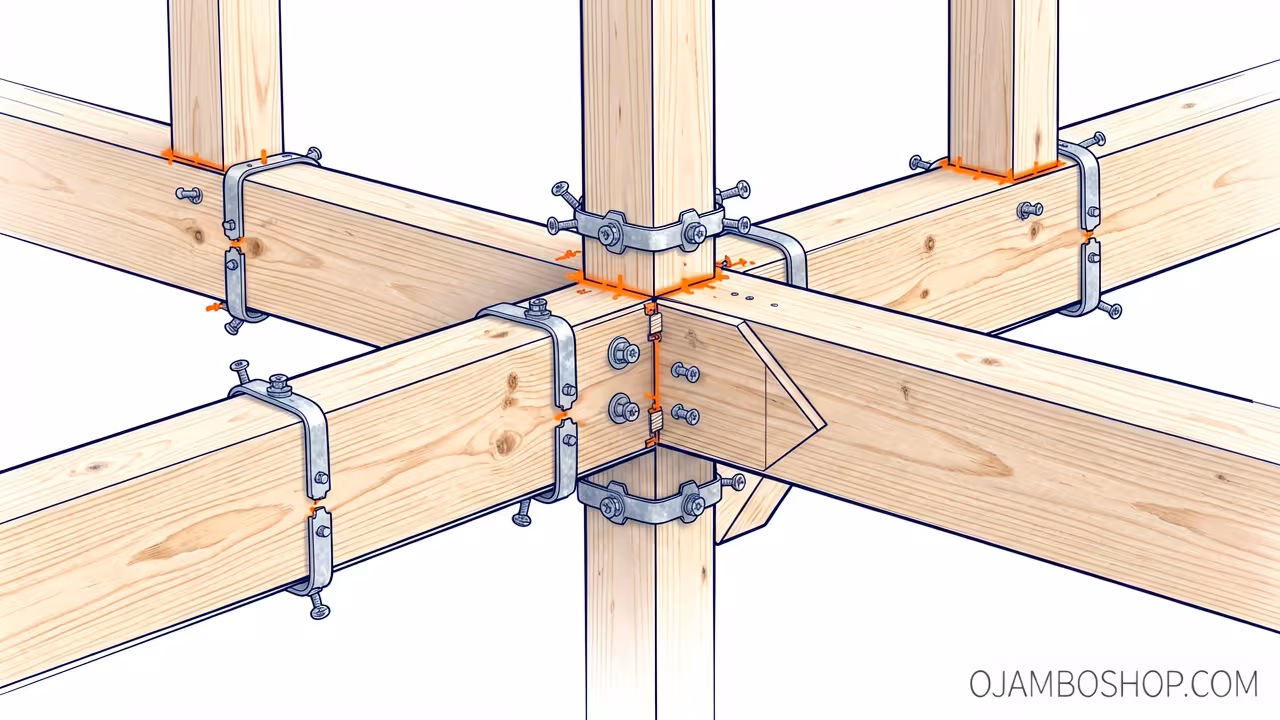
In this specific design, the roof utilizes a ridge board system with rafters rather than pre-fabricated trusses to allow for a vaulted interior ceiling. This increases the vertical volume of the library, making the 450 square foot footprint feel significantly more expansive. Cross-ties are installed at the bottom third of the rafters to prevent wall spreading under heavy snow loads or high winds. We also incorporate a continuous load path from the rafters down to the foundation piers using metal connectors at every junction. This attention to detail ensures the cabin can withstand lateral forces and remains plumb for decades of use.
Step-by-Step Instructions
Phase 1: Foundation and Site Preparation
Begin by clearing the site of all vegetation and leveling the ground where the 18×25 footprint will sit. For a cabin of this size, a pier and beam foundation is the most efficient and cost-effective method for DIY builders. Use a transit level to ensure all 6×6 pressure-treated posts are perfectly level with one another across the entire span. Once the posts are set in concrete, install the 2×10 perimeter beams and fill the interior with joists spaced at 12 inches.
Pro-Tip: When working with pressure-treated lumber for your foundation, always apply a brush-on copper naphthenate preservative to every end-cut you make. This seals the raw grain that was not fully reached by the factory pressure treatment, significantly extending the life of your floor system against rot. Use joist tape on top of every floor member before installing the subfloor to prevent future squeaks caused by wood-on-wood friction.
Phase 2: Subfloor Installation
Lay your 3/4-inch tongue and groove plywood sheets starting from the longest straight corner of the foundation. Apply a heavy bead of subfloor adhesive to the top of each joist before dropping the panels into place to create a monolithic bond. Stagger the seams of the panels by at least two joist bays to increase the overall shear strength of the floor. Drive screws every 6 inches along the perimeter and every 12 inches in the field for maximum security.
Phase 3: Wall Framing
Build your long 25-foot walls on the flat subfloor first, including the rough openings for your windows and the main entrance. Use a double top plate to tie the corners together and provide a solid bearing surface for the roof rafters. For the library cabin, we recommend 9-foot wall heights to accommodate tall built-in bookshelves later in the project. Once the walls are raised, use temporary bracing to hold them perfectly plumb while you nail the bottom plates into the floor joists.
Phase 4: Roof System and Rafters
The 8/12 pitch roof is the most technical part of the build, requiring precise birdsmouth cuts on each 2×8 rafter. Install the ridge board first, supported by temporary vertical posts until the first few pairs of rafters are secured in place. Use a speed square to verify the plumb cuts at the ridge and the tail cuts at the eaves are consistent throughout. Install hurricane ties at each rafter-to-top-plate connection to meet modern building codes for wind resistance.
Phase 5: Sheathing and Weatherproofing
Cover the exterior walls with 1/2-inch OSB sheathing, ensuring the panels are nailed every 6 inches along the edges. Immediately follow the sheathing with a high-quality house wrap, overlapping the seams by at least 6 inches to prevent water infiltration. Tape all seams with manufacturer-approved flashing tape, especially around the window and door rough openings. On the roof, install a synthetic underlayment starting from the bottom and working toward the ridge before laying your shingles.
Phase 6: Windows, Doors, and Siding
Install your windows and the main door, ensuring they are perfectly level and shimmed correctly for smooth operation. Use a high-grade exterior caulk around the flanges before installing the cedar lap siding to create a secondary water seal. Start the siding at the bottom of the wall with a starter strip and maintain a consistent 7-inch reveal for a professional appearance. Finish the corners with 1×4 cedar trim to hide the end grain of the siding boards and provide a clean look.
Phase 7: Interior Framing and Insulation
Inside the cabin, frame out any partition walls for a small storage closet or a dedicated reading nook. Since this is a tech-free library, focus on installing high-R-value mineral wool insulation to provide exceptional thermal performance and sound dampening. Install a vapor barrier over the insulation on the warm side of the wall before hanging your interior finish material. For a classic library feel, consider using tongue and groove pine planks on the walls instead of standard drywall.
Phase 8: Built-in Bookshelves and Flooring
The heart of the “Analog” Escape is the shelving, which should be anchored directly into the 2×6 wall studs for safety. Use 3/4-inch plywood for the carcasses and solid hardwood for the shelf faces to prevent sagging under the weight of heavy books. Install your finished flooring, such as engineered hardwood or cork, which provides a warm and quiet walking surface. Finally, install the baseboards and window casings to hide the expansion gaps and complete the interior aesthetic.
Common Mistakes to Avoid
The most frequent error in cabin construction is neglecting the site’s drainage, which can lead to foundation settling and moisture issues. Ensure the ground slopes away from the cabin on all four sides and consider installing a gravel skirt around the perimeter to prevent splash-back on the siding.
Another common mistake is failing to account for the weight of the library’s contents when designing the floor system. Standard 16-inch joist spacing may be sufficient for a bedroom, but a library requires 12-inch spacing to handle the dead load of thousands of books without sagging.
Finally, many DIYers skip the step of flashing the windows and doors correctly with specialized tape. Even a small leak behind the siding can lead to structural rot that remains hidden for years, eventually requiring expensive and difficult repairs.
Maintenance and Safety
To keep your library cabin in peak condition, inspect the exterior siding and roof every spring for signs of wear or damage. Re-stain or paint the cedar siding every 5 to 7 years to protect the wood from UV damage and moisture penetration. Ensure the gutters stay clear of debris to prevent water from backing up under the roof shingles during heavy rainstorms.
Safety is paramount during the construction process, so always wear eye protection when using power tools and a dust mask when cutting treated lumber. Use fall protection when working on the roof and never work alone when raising wall sections or setting the ridge board. Maintain a clean job site by removing scrap wood and nails daily to prevent tripping hazards and puncture wounds.
By following these professional protocols and respecting the technical requirements of the build, you will create a lasting retreat. The “Analog” Escape is more than just a cabin; it is a testament to quality craftsmanship and the value of a quiet, tech-free life.