
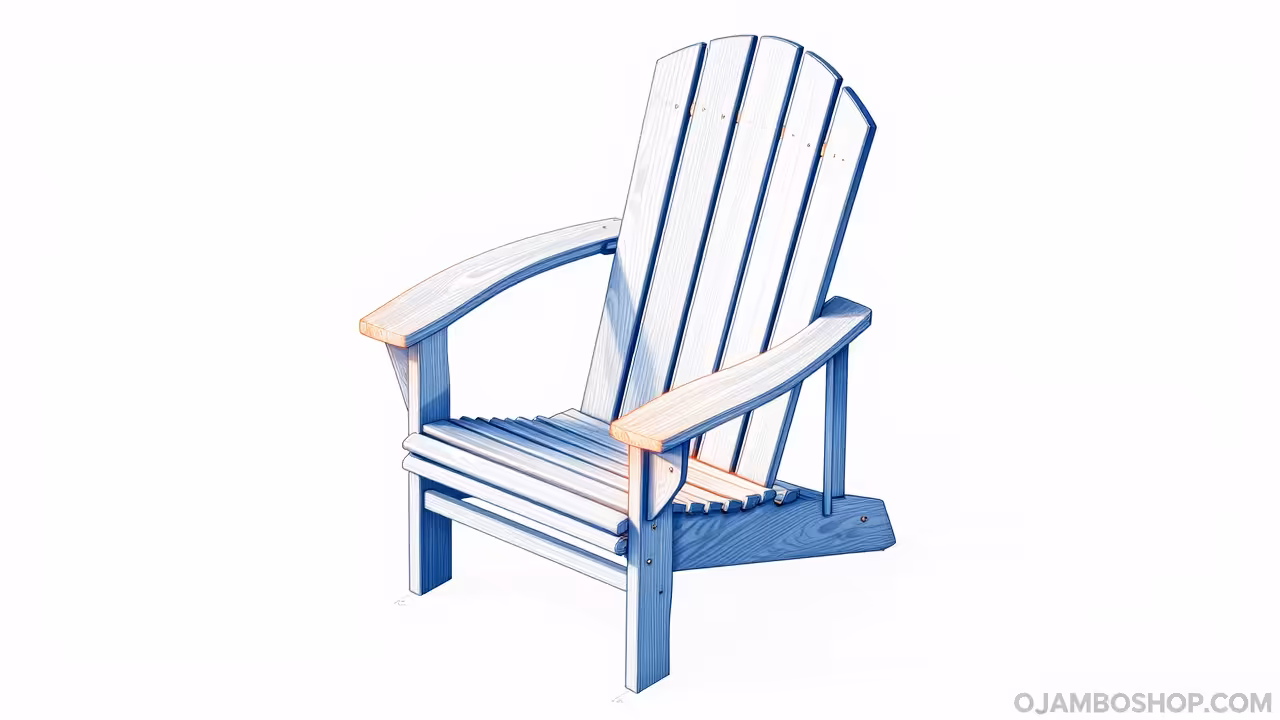
The Adirondack chair remains the undisputed king of outdoor furniture for homeowners seeking both aesthetic charm and functional comfort. This project represents more than just a place to sit; it is a structural investment that elevates the visual appeal of any patio or fire pit. By focusing on a curved-back design, we move beyond basic utility into the realm of high-end ergonomic craftsmanship.
Building your own furniture allows for a level of customization and material quality that store-bought options rarely match. A well-constructed chair using superior lumber and stainless fasteners will easily outlast mass-produced plastic or thin-set pine alternatives. This guide provides the technical foundation necessary to create a legacy piece that stands up to the elements while providing unparalleled lumbar support.
The value added to a property through high-quality, handmade exterior features is significant and immediate. Prospective buyers and guests alike recognize the weight and stability of a custom-built chair, which signals a commitment to quality throughout the home. As we move through this build, focus on the precision of your cuts to ensure the final product looks as professional as it feels.
Quick Specs
Overall Dimensions: 31 inches Wide x 38 inches Deep x 39 inches High.
Seat Height and Pitch: 14 inches front height with a 15-degree rear slope.
Estimated Cost: 85 to 130 USD depending on lumber market rates and species.
Difficulty Level: Intermediate; requires basic power tool proficiency and template routing.
Estimated Build Time: 6 to 8 hours for a single unit, including finishing.
Materials and Tools
For a project exposed to constant UV rays and moisture, material selection is the most critical decision you will make. Western Red Cedar is the preferred choice for its natural rot resistance and lightweight handling, though White Oak or Teak are excellent premium alternatives. Ensure all lumber is S4S (surfaced on four sides) to minimize the amount of initial sanding required before assembly.
The hardware must be corrosion-resistant to prevent “bleeding” or structural failure over time. Stainless steel screws are the industry standard for high-end outdoor builds because they do not react with the tannins in cedar or redwood. Avoid galvanized nails or interior-grade screws, as these will inevitably rust and weaken the joints within two seasons of outdoor exposure.
| Material Item | Quantity | Purpose |
|---|---|---|
| 1×6 x 8ft Cedar | 4 Boards | Back slats, seat slats, and armrests |
| 2×4 x 8ft Cedar | 1 Board | Main legs and structural spreaders |
| 2×6 x 8ft Cedar | 1 Board | Side rails (stringers) and arm brackets |
| 2.5 inch Stainless Screws | 50 Count | Main structural framing |
| 1.5 inch Stainless Screws | 75 Count | Slats and decorative trim |
| Waterproof Wood Glue | 1 Bottle | All joining surfaces |
Required tools include a miter saw for crosscuts, a jigsaw for the curved profiles, and a cordless drill with countersink bits. A random orbital sander with 80, 120, and 180 grit sandpaper is essential for a professional finish. You will also need a set of clamps, a framing square, and a flexible curve or template for marking the back slat arcs.
Technical Layout
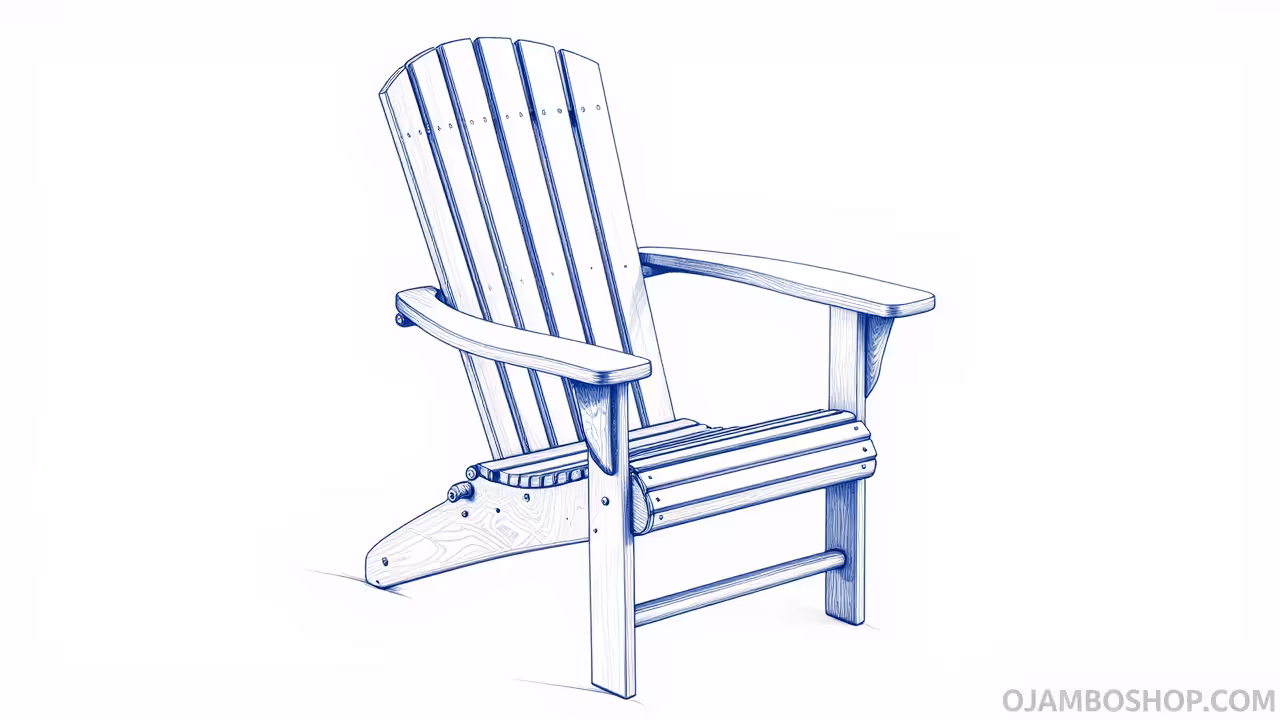
The structural integrity of an Adirondack chair relies entirely on the geometry of the side rails, also known as the stringers. These components act as the bridge between the front legs and the rear support, carrying the full weight of the occupant while maintaining the seat pitch. We utilize 2×6 stock for these rails to ensure there is no flexing or “spring” when a person sits down. The load-bearing path travels from the seat slats into the stringers, which then distribute the force across the vertical front legs and the angled back assembly.
By incorporating a 15-degree pitch into the seat, we optimize the center of gravity for relaxation without making the chair difficult to exit. The curved back is achieved through a set of radiating slats that are fastened to a contoured upper and lower back cradle. This cradle system ensures that the pressure is evenly distributed across the user’s spine rather than hitting a flat surface. Precision in the radius of these cradles is what separates a master-built chair from a basic DIY effort. We recommend using a waterproof polyurethane glue in conjunction with mechanical fasteners to create a rigid, vibration-resistant frame that can survive decades of seasonal expansion and contraction.
Step-by-Step Instructions
Phase 1: Cutting the Side Rails
The side rails are the most complex parts of the build and dictate the entire shape of the chair. Trace your pattern onto 2×6 cedar boards, ensuring the grain runs parallel to the long edge for maximum strength. Use a jigsaw to cut the bottom swoop and the angled top edge where the seat slats will eventually sit. Sand these two pieces together as a pair to ensure they are perfectly symmetrical before moving to assembly.
Phase 2: Preparing the Legs
The front legs are cut from 2×4 stock at a height of 21 inches to allow for the armrest height. Ensure the top of each leg is cut perfectly square, as this will support the armrest brackets later. The back legs are integrated into the rear support structure and must be angled to match the pitch of the side rails. Mark your bolt holes clearly to ensure the legs sit flush against the inside of the side rails during the dry-fit phase.
Phase 3: Main Frame Assembly
Position the side rails 22 inches apart and clamp them to the front legs at the 14-inch mark. Use waterproof wood glue and two 2.5-inch stainless screws per joint to secure the legs to the exterior of the rails. Check for squareness across the frame by measuring the diagonals; they must be identical. Install the front spreader board between the two side rails to lock the width and provide a mounting surface for the first seat slat.
Phase 4: Constructing the Back Cradles
The curved back requires an upper and lower support cradle cut from 2×4 material with a gentle 20-inch radius. Use a compass or a flexible piece of trim to draw the arc on the wide face of the board before cutting with a jigsaw. The lower cradle is mounted between the side rails behind the seat area. The upper cradle is attached to the back supports at a height of approximately 32 inches from the floor.
Phase 5: Routing and Sanding Slats
Cut your seven back slats to a length of 34 inches from 1×6 material, then rip them to a width of 3.25 inches. Use a template to round the tops of the slats into the classic “tombstone” or “fan” shape common to Adirondack furniture. Sand all edges with a 1/8-inch round-over bit or by hand to remove any sharp corners. This step is vital for comfort and prevents the wood from splintering at the edges where it is most vulnerable.
Phase 6: Installing Seat Slats
Begin at the front of the chair and work your way toward the back using 1×6 slats. Leave a 1/4-inch gap between each slat to allow for water drainage and wood expansion. Pre-drill every hole with a countersink bit to prevent the cedar from splitting near the ends. Drive the 1.5-inch stainless screws so the heads sit slightly below the surface of the wood for a clean look.
Phase 7: Mounting the Curved Back
Find the center point of the upper and lower cradles and install the middle back slat first. Use a spacer block to maintain even gaps between the remaining slats as you move toward the outside edges. The outer slats will need to be angled slightly to follow the curve of the cradles perfectly. Ensure the bottom of the slats sit approximately one inch below the seat line for a seamless visual transition.
Phase 8: Armrest and Brackets
The armrests are the “crown jewels” of the chair and should be wide enough to hold a beverage or a book. Cut two 1×6 boards to 28 inches long and profile the front ends with a decorative curve. Install supporting brackets on the front legs to provide a wide mounting surface for the arms. Screw the armrests into the front legs and the rear back support, ensuring they are level and parallel to the ground.
Phase 9: Final Sanding and Detail
Once the assembly is complete, go over the entire chair with 180-grit sandpaper to remove any pencil marks or rough spots. Pay close attention to the armrests and the top of the back slats, as these are the primary touchpoints. Use a damp cloth to remove all dust before applying any finish. If you used stainless steel hardware, you do not need to plug the holes, but it adds a premium touch.
Phase 10: Finishing and Sealing
Apply a high-quality UV-rated exterior stain or clear sealer to protect the wood from graying. Cedar holds oil-based stains exceptionally well, which helps maintain the natural reddish-brown hues of the timber. Be sure to coat the bottom of the legs heavily, as this is where moisture wicking is most likely to occur. Allow the chair to dry in a dust-free environment for at least 24 hours before its first use.
Common Mistakes
One frequent error is failing to pre-drill holes in the cedar slats, which leads to immediate splitting during assembly. Cedar is a brittle softwood, and the pressure of a screw head will act like a wedge if a pilot hole is not present. Always use a countersink bit that matches the diameter of your screw shank for the best results.
Another mistake is using the wrong hardware, such as zinc-plated or interior screws, which will corrode within months. These fasteners will not only fail structurally but will also leave black streaks down the wood that are impossible to remove. Investing the extra ten dollars in stainless steel screws is the single best decision you can make for the longevity of the project.
Finally, builders often neglect to sand the underside of the armrests and the back of the slats. While these areas are not always visible, they are frequently touched when moving the chair or adjusting seating positions. A true Master Carpenter ensures that every surface is smooth to the touch, regardless of whether it is in the direct line of sight.
Maintenance and Safety
Pro-Tip: To significantly increase the lifespan of your Adirondack chair, apply a coat of epoxy or a heavy-duty “feet” protector to the bottom of the legs. The end grain of the wood acts like a bundle of straws, sucking up ground moisture which leads to rot. By sealing the bottom grain or adding plastic glides, you break the path of moisture and can double the life of the chair.
Safety is paramount when working with power tools and treated or naturally resistant woods. Always wear a N95 respirator when sanding cedar, as the dust can be a significant respiratory irritant for many people. Use ear protection when operating the miter saw and jigsaw, and never reach across a moving blade. Keep your workspace clean and free of off-cuts to prevent tripping hazards during the assembly phase.
Annually inspect your chairs for any loose fasteners or signs of finish degradation. Wood is a living material that moves with the seasons, so a quick tightening of the screws every spring is good practice. Re-apply a thin coat of UV sealer every two years to keep the wood fibers hydrated and resistant to the bleaching effects of the sun.