
Why This Modern 12×24 Tiny House on Skids is the Ultimate DIY Game Changer for Landowners
Building a 12×24 tiny house on skids represents a perfect intersection of mobility and permanent structural integrity. This specific footprint offers 288 square feet of highly usable space that avoids the cramped nature of smaller towable units.
By utilizing a skid-based foundation, you create a structure that is technically portable while maintaining the solid feel of a traditional home. This project adds significant value to any property by serving as a guest suite, a high-end home office, or a profitable short-term rental unit.
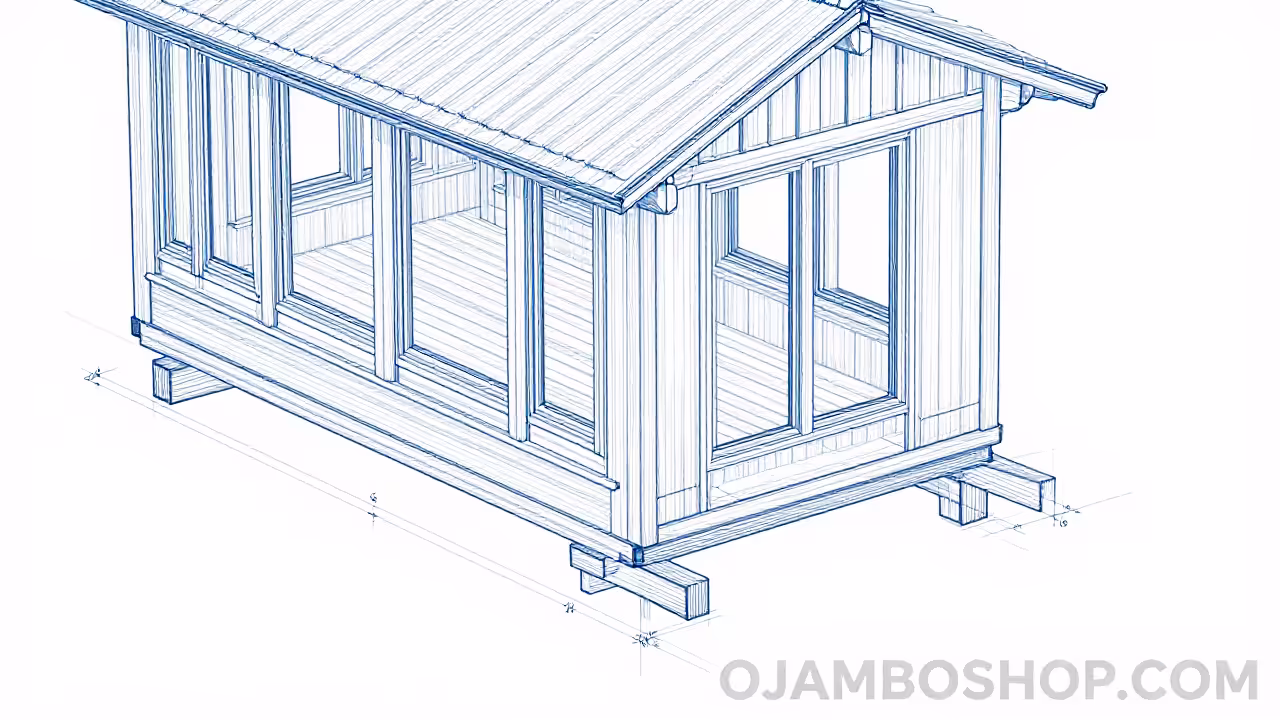
The modern aesthetic of this build relies on clean lines and a functional shed-style roof. This approach simplifies the framing process for the DIY builder while providing a contemporary silhouette that fits into any landscape.
Quick Specs
The Modern 12×24 Tiny House is designed for durability and efficiency. Below are the primary specifications for the baseline build.
- Dimensions: 12 feet wide by 24 feet long.
- Estimated Cost: $12,000 to $18,000 depending on interior finishes.
- Difficulty Level: Intermediate to Advanced.
- Estimated Build Time: 4 to 6 weeks for a dedicated two-person team.
Materials and Tools
Success in a build of this magnitude starts with having the right inventory on site before the first cut. Using high-quality lumber is non-negotiable for a structure meant to last decades.
Lumber and Sheathing: (3) 4x6x24 Pressure-Treated Skids; (22) 2x6x12 Pressure-Treated Floor Joists; (60) 2x4x8 Studs for exterior walls; (15) 2x8x14 Rafters for the shed roof; (24) 4×8 Sheets of 3/4 inch Tongue and Groove Subflooring; (30) 4×8 Sheets of 1/2 inch CDX Plywood for wall sheathing.
Hardware and Windows: 3-inch and 3.5-inch framing nails; Hurricane ties for rafter-to-wall connections; (4) 36×48 double-pane vinyl windows; (1) 36-inch insulated steel entry door; Standing seam metal roofing kit.
Required Tools: Miter saw and circular saw; Pneumatic framing nailer and air compressor; 4-foot and 8-foot levels; Laser level for foundation grading; Impact driver and drill set.
| Material Type | Standard Grade | Premium/Pro Grade | Benefit of Upgrade |
|---|---|---|---|
| Framing Lumber | Hem-Fir | Douglas Fir | Higher structural load capacity |
| Fasteners | Bright Nails | Hot-Dipped Galvanized | Superior corrosion resistance |
| Subfloor | OSB | Plywood/Advantech | Better moisture resistance and rigidity |
| Sheathing | 7/16 OSB | 1/2 CDX Plywood | Enhanced shear strength and nail holding |
Technical Layout
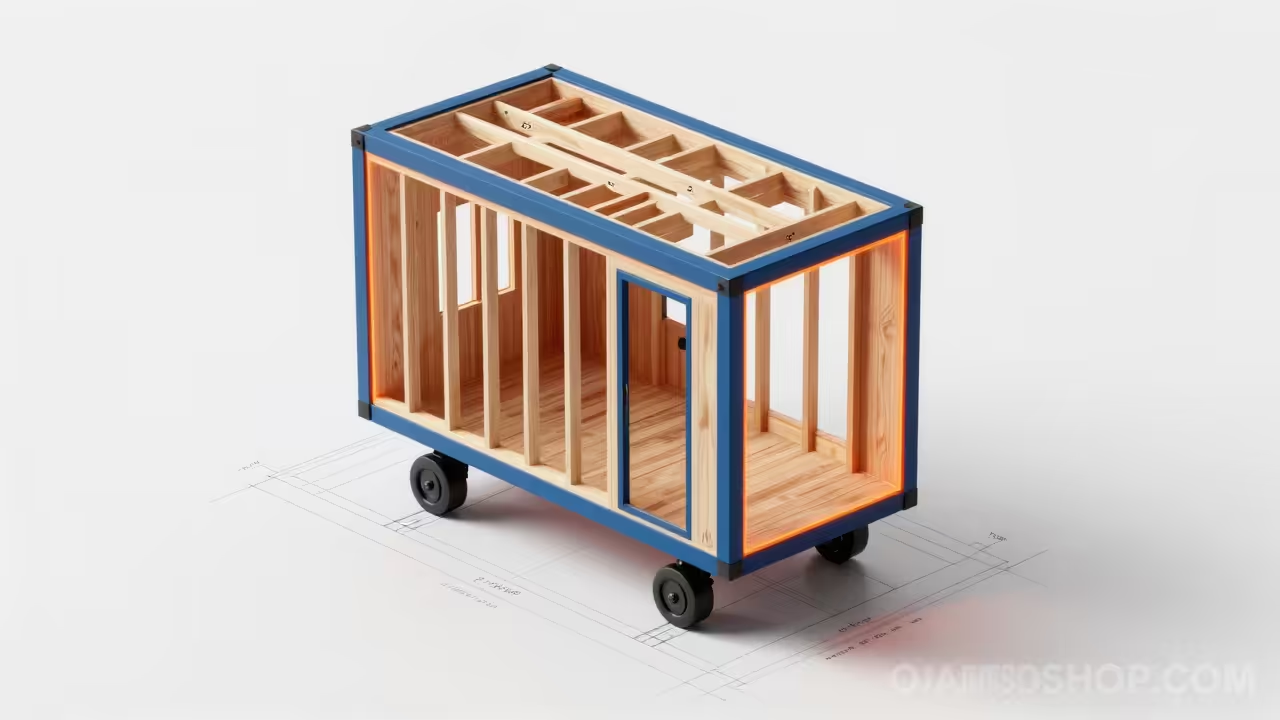
The structural integrity of a 12×24 tiny house on skids relies entirely on the transfer of loads from the roof down to the triple-skid foundation. We utilize a 16-inch on-center spacing for both the floor joists and the wall studs to ensure the building meets standard residential codes for deflection and shear. The 2×6 floor system is reinforced with solid blocking every eight feet to prevent joist twisting and to provide a rock-solid walking surface.
Because this unit sits on skids, the floor joists must be fastened to the 4×6 runners using heavy-duty structural screws or galvanized hurricane straps to prevent shifting during potential future transport. The shed roof design employs 2×8 rafters that provide ample space for high-R-value insulation, which is critical for small-space climate control. We have engineered a 2/12 pitch which allows for efficient water shedding while keeping the overall height within legal transport limits.
Lateral stability is achieved through the use of 1/2 inch plywood sheathing, which acts as a structural skin, effectively turning the wall segments into rigid diaphragms. This prevents the “racking” effect that often plagues DIY structures during high wind events or during the vibration of a move. This engineering ensures that the tiny house remains square and true regardless of the terrain it is placed upon or moved across.
Step-by-Step Instructions
Step 1: Site Preparation and Skid Placement
Clear a 16×28 area of all topsoil and organic matter to prevent rot and settling over time. Lay down a 4-inch base of compacted 3/4-inch crushed stone to provide a level, well-draining pad for the structure. Place the three 4×6 pressure-treated skids onto the gravel, ensuring they are perfectly parallel and spaced exactly 5 feet apart from center to center. Use a laser level to verify the skids are level across their entire 24-foot length, using concrete deck blocks as shims if the grade varies significantly.
Step 2: Floor Joist Installation
Layout your 2×6 pressure-treated floor joists starting from one end of the skids. Space the joists at 16 inches on center, ensuring that the crowns of the boards are all facing upward. Fasten the joists to the skids using 3-inch exterior structural screws, driving two screws per junction point. Install solid 2×6 blocking between the joists at the 8-foot and 16-foot marks to provide lateral support and prevent the floor from feeling “springy” when walked upon.
Step 3: Subfloor Application
Before laying the subfloor, apply a generous bead of subfloor adhesive to the top of every floor joist. Position your 3/4-inch tongue and groove plywood sheets perpendicular to the joists, starting from one corner. Leave a 1/8-inch gap between the ends of the sheets to allow for natural expansion and contraction of the wood. Secure the sheets using 2.5-inch ring-shank nails or screws every 6 inches along the edges and every 12 inches in the field of the board.
Step 4: Wall Framing
Build your long 24-foot walls flat on the subfloor first, utilizing a double top plate for extra rigidity. Use 2×4 studs spaced 16 inches on center, ensuring all window and door headers are properly sized for the intended openings. For the shed roof design, the front wall should be framed at 10 feet while the rear wall is framed at 8 feet to create the necessary slope. Raise the walls into position, brace them temporarily with 2x4s, and nail the bottom plates through the subfloor and into the floor joists.
Step 5: Rafter Installation and Roof Sheathing
Cut your 2×8 rafters with a birdsmouth notch so they sit flush on the top plates of the high and low walls. Space the rafters at 24 inches on center, though 16 inches is preferred if you live in an area with high snow loads. Secure each rafter to the top plates using H2.5 hurricane ties to ensure the roof remains attached during high winds. Once the rafters are set, nail down your 1/2-inch CDX plywood roof sheathing, staggering the seams for maximum structural strength across the roof plane.
Step 6: Exterior Sheathing and House Wrap
Apply the 1/2-inch plywood sheathing to the exterior walls, ensuring the sheets overlap the floor rim joist to tie the walls to the floor system. Use a 6-inch nail spacing on the edges of the sheets to provide the necessary shear strength for the building. Once the sheathing is complete, wrap the entire structure in a high-quality breathable house wrap, overlapping the seams by at least 6 inches. Tape all seams and around window openings with flashing tape to create a continuous moisture barrier.
Step 7: Windows and Door Installation
Apply flexible flashing tape to the window sills to create a “pan” that directs water away from the framing. Set the windows into the openings, checking for level and plumb before driving screws through the mounting flanges. Install the pre-hung entry door, ensuring the threshold is properly supported and the frame is shimmed so the door swings freely. Pro-Tip: Always use a high-grade silicone caulk behind the window flanges before fastening to prevent wind-driven rain from entering the wall cavity.
Step 8: Roofing and Siding
Install a metal drip edge along the perimeter of the roof, then lay down a synthetic underlayment over the plywood sheathing. Fasten the standing seam metal roof panels according to the manufacturer’s instructions, ensuring all fasteners are hidden or utilize gaskets. For the siding, install 1×3 furring strips over the house wrap to create a rain screen before attaching your vertical cedar siding. This air gap allows moisture to escape and significantly extends the life of your wood siding and the structural sheathing.
Step 9: Exterior Finishing and Trim
Install corner boards and window trim using rot-resistant materials like PVC or treated cedar. Ensure all gaps are filled with a paintable exterior caulk to prevent insect intrusion and water damage. Apply a high-quality UV-resistant stain or paint to the siding to protect the wood from the elements. This final step not only defines the aesthetic of your modern tiny house but serves as the primary defense against the harsh outdoor environment.
Common Mistakes to Avoid
The most frequent error in skid-built structures is failing to properly level the ground before placement. Even a slight pitch in the gravel pad can lead to doors sticking and drywall cracking as the building settles over the first year. Always spend extra time on the foundation, as it is the most difficult part to correct once the framing is complete.
Another common mistake is neglecting the use of a rain screen behind the siding. In small structures, moisture buildup is accelerated, and trapping water against the house wrap can lead to premature rot. By adding simple furring strips, you ensure the longevity of the exterior envelope and improve the thermal performance of the building.
Finally, many DIYers undersize their headers for windows and doors. Even though a 12×24 building is small, the roof loads can be significant, especially with snow. Always use double 2×8 or 2×10 headers for any opening wider than 36 inches to prevent the framing from sagging over time and crushing the window units.
Maintenance and Safety
Maintaining a tiny house on skids requires an annual inspection of the foundation to ensure the building hasn’t shifted or sunk into the gravel. Check the underside of the floor system for signs of pests or moisture accumulation, especially in the corners. Re-apply stain or paint every 3 to 5 years depending on your local climate to keep the cedar siding from silvering or cracking.
Safety during the build is paramount, particularly when handling heavy 4×6 skids and 24-foot rafters. Always wear impact-rated eye protection and steel-toed boots when framing the floor and walls. When working on the roof, use a properly anchored fall-arrest system, as the 10-foot height of the front wall is enough to cause serious injury in the event of a slip.
Keep your job site clean and organized to prevent tripping hazards, which are the leading cause of accidents on small-scale construction sites. Ensure all power tools are plugged into GFC-protected outlets, especially when working outside on potentially damp ground. Taking these precautions ensures the build is as enjoyable as the finished product.