
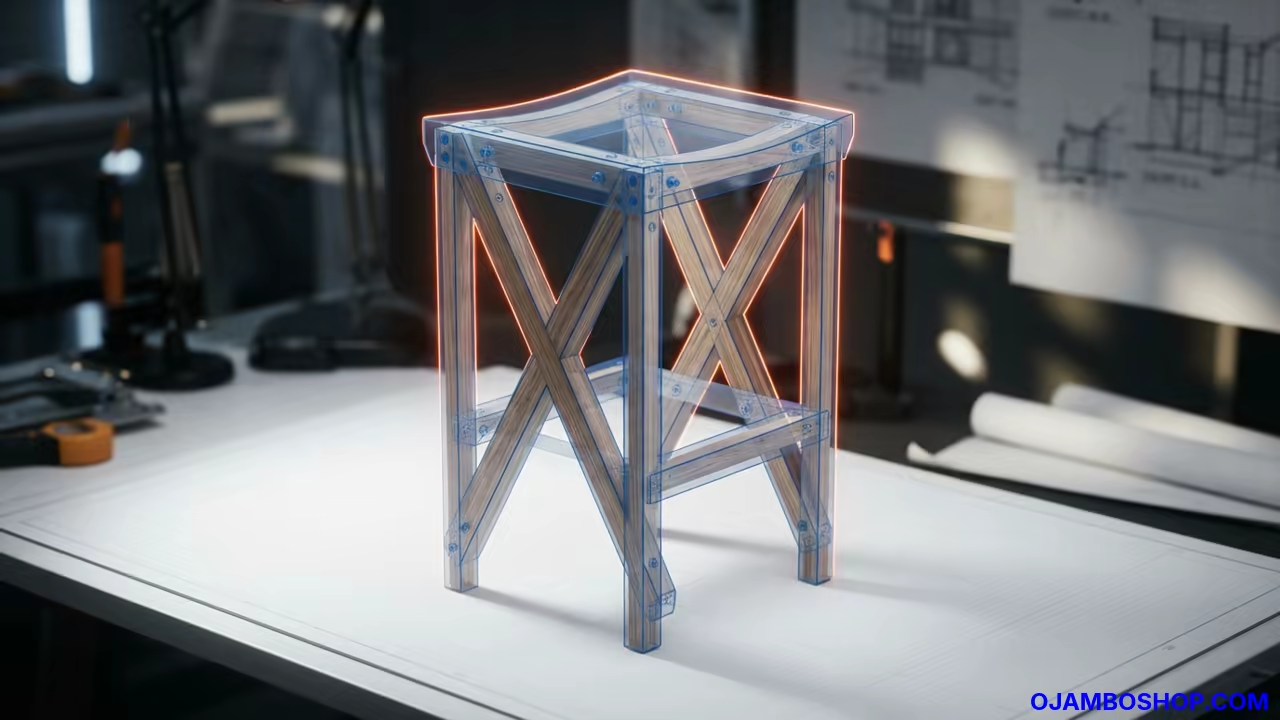
Adding custom seating to a home bar transforms a simple room into a luxury destination. These stools provide an immediate increase in perceived property value through handcrafted quality.
The x frame design is not just about style but also about lateral stability. It ensures that the stool remains rigid even under significant weight.
A professionally built set of stools offers a level of comfort that store bought options rarely provide. Customizing the height allows the user to match any counter perfectly.
Quick Specs
Seat Height: 30 inches. Estimated Cost: 120 to 180 dollars per set.
Difficulty Level: Medium. Estimated Build Time: 16 to 20 hours.
Materials and Tools
For the lumber requirements you will need six 8 foot 2×2 select hardwood boards. You will also need two 8 foot 1×4 boards for the seat tops.
The hardware list includes one box of 2.5 inch pocket hole screws and 1.25 inch screws for the seat. High quality wood glue is mandatory for every single joint in this build.
Required tools include a miter saw for precise cross cuts and a drill driver set. A pocket hole jig is essential for the hidden joinery used in the x frames.
You will also need a random orbital sander with 80, 120, and 220 grit sandpaper. A combination square and a tape measure ensure the project remains perfectly aligned.
Disclaimer: I may earn a commission from purchases made through these links at no extra cost to you.


Technical Layout
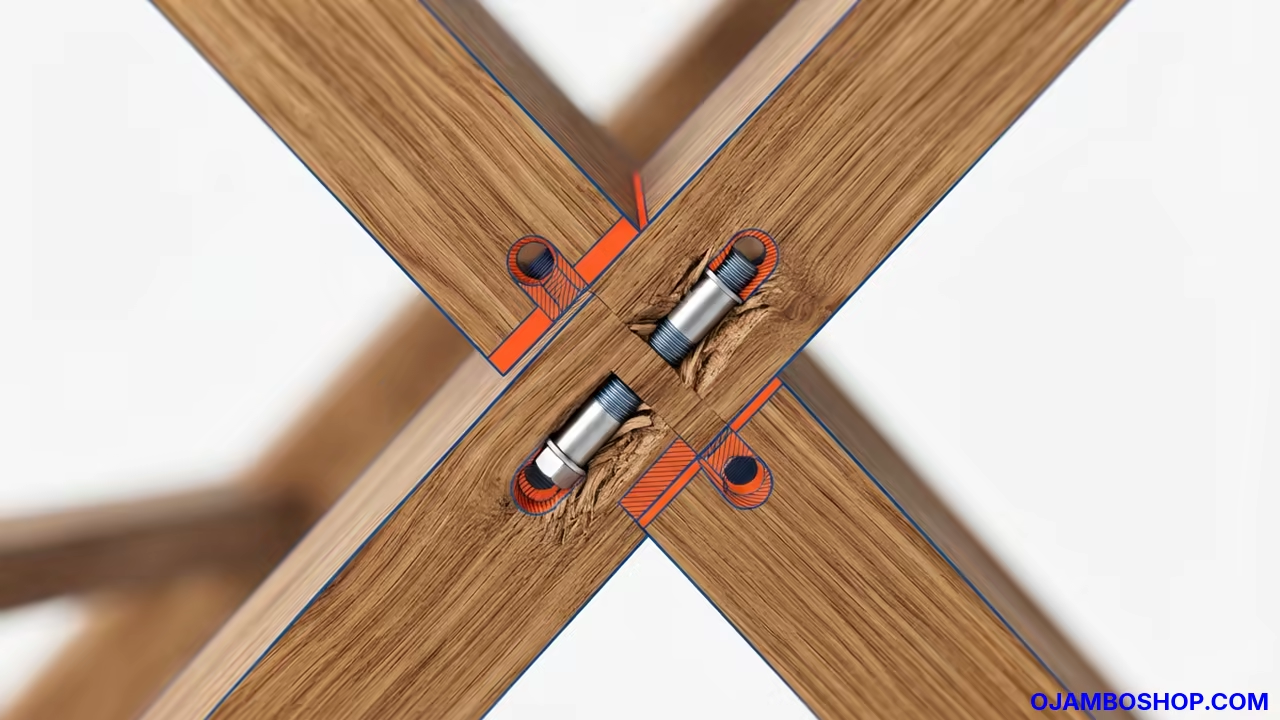
The structural integrity of the classic x frame bar stool relies on the intersection of the cross members. These members distribute the weight of the user across four distinct points of contact.
This geometry prevents the legs from splaying outward during use. The load path travels from the seat through the vertical legs and is stabilized by the diagonal braces.
When the x frame is properly seated it creates a rigid triangle within the rectangular leg profile. Triangles are the strongest shape in woodworking and prevent racking.
The use of pocket joinery at the brace ends ensures that the wood fibers are compressed tightly. This compression creates a mechanical bond that resists movement over time.
The seat apron acts as the primary tie between the two side frames. It distributes the weight evenly across the top of the legs.
By using hardwood for the frame you ensure that the stool can withstand daily use. This configuration is the gold standard for professional bar furniture construction.
Step by Step Instructions
Phase 1 Milling and Cut List
Begin by selecting your hardwood boards and inspecting them for bows or twists. Use your miter saw to cut the legs into four equal lengths of 29 inches.
Ensure that every cut is perfectly square to avoid a wobbly stool. Cut your x brace members to 15 inches with 45 degree angles on both ends.
You will need four of these per stool to create the signature look. Double check your angles using a speed square before making the final cuts.
Prepare the seat top boards by cutting two 1×4 boards to 14 inches in length. Cut the seat support rails to 12 inches to fit between the side frames.
Organize all your pieces into labeled piles to avoid confusion during assembly.
Phase 2 Leg Assembly
Lay out two legs on your workbench and mark the positions for the top and bottom rails. Drill pocket holes into the ends of the rails to hide the fasteners.
Apply a thin bead of wood glue to every contact surface for maximum strength. Clamp the rails between the legs and drive in the 2.5 inch pocket screws.
Verify that the assembly forms a perfect rectangle with no gaps in the joints. Repeat this process for the second side frame of the first stool.
Ensure that both side frames are identical in height and width. This symmetry is critical for the stool to sit level on the floor.
Use your combination square to check every corner for a 90 degree angle.
Phase 3 Creating the X Braces
Position the first diagonal brace across the center of the leg frame. Mark the exact center point where the second brace will intersect the first.
Cut a small notch in the center of the boards if using a half lap joint. If using the overlap method simply place the first brace and screw it into the legs.
Apply glue to the contact points where the braces meet the vertical legs. Use the pocket hole jig to secure the braces from the inside of the frame.
Measure the distance from the floor to the brace to ensure consistent height. The x frame should be centered vertically between the top and bottom rails.
Tighten all fasteners until the wood fibers begin to compress slightly.
Phase 4 Connecting the Leg Frames
Stand the two side frames upright and position the cross stretchers between them. These stretchers provide the necessary width and prevent the stool from tipping.
Apply glue to the ends of the stretchers and clamp them tightly. Drill pocket holes into the stretchers to connect them to the side frames.
Drive the screws in slowly to avoid splitting the hardwood fibers. Ensure the stretchers are perfectly parallel to the floor and to each other.
Check the overall squareness of the stool by measuring the diagonals from corner to corner. The measurements must be identical for the stool to be square.
Adjust the frames slightly before the glue sets to correct any deviations.
Phase 5 Installing the Seat Support
Construct the seat apron by connecting the top rails of the side frames. This apron creates the foundation that will support the weight of the seat.
Use pocket holes to attach the apron rails to the legs. Apply glue to the top edges of the apron before installing the support slats.
These slats provide additional surface area for the seat top to grip. Ensure the slats are centered and spaced evenly across the width.
Verify that the seat support is level across the entire top of the stool. Use a bubble level to check for any tilt in the assembly.
This phase ensures the user does not feel an incline while sitting.
Phase 6 Crafting the Seat Top
Lay your two 1×4 seat boards side by side on a flat surface. Apply wood glue to the edges and use bar clamps to pull them together.
Ensure the grain patterns are oriented in a way that looks aesthetically pleasing. Once the glue has dried trim the edges of the seat to a perfect 14 inch width.
Use a sander to slightly round over the front and back edges for comfort. This prevents the sharp edges of the wood from digging into the user.
Dry fit the seat top onto the support rails to ensure a perfect overhang. The seat should extend about one inch beyond the frame on all sides.
Mark the screw locations from the underside of the support rails.
Phase 7 Sanding and Surface Prep
Start the sanding process with 80 grit sandpaper to remove any glue residue. Sand with the direction of the wood grain to avoid creating permanent scratches.
Move to 120 grit to smooth out the rough marks from the first pass. Finish the sanding with 220 grit for a professional buttery smooth feel.
Pay special attention to the corners of the x frame and the seat edges. This prevents splinters and makes the final finish look much more uniform.
Wipe the entire stool down with a tack cloth to remove all remaining dust. Ensure that the joints are clean and free of any dried glue drips.
This preparation is the difference between a hobbyist look and a professional result.
Phase 8 Applying the Finish
Apply a high quality wood stain to enhance the natural grain of the hardwood. Use a lint free rag to apply the stain in long even strokes.
Allow the stain to penetrate the wood for the recommended time before wiping. Apply a clear polyurethane topcoat to protect the wood from spills and wear.
Use a natural bristle brush to apply the first coat in a thin layer. Let the finish dry completely for 24 hours before sanding lightly with 320 grit.
Apply a second and third coat of polyurethane for maximum durability. This is especially important for bar stools which face frequent contact and moisture.
Ensure the finish is smooth and free of bubbles or dust nibs.
Phase 9 Final Assembly and Leveling
Attach the seat top to the support rails using 1.25 inch screws from below. Ensure the screws are countersunk so they do not touch the seat surface.
Tighten them firmly but avoid over driving them into the wood. Place the stool on a flat floor and check for any rocking or wobble.
If the stool is uneven sand down the longest leg very slightly. This ensures the stool sits flat without needing plastic pads.
Perform a final inspection of all joints to ensure no screws are backing out. Give the stool a final polish with a soft cloth and wax.
Your professional x frame bar stools are now ready for use.
Common Mistakes
One frequent error is failing to use enough wood glue on the joints. Relying solely on screws often leads to joints that loosen and wobble over time.
Glue provides the primary structural bond while screws act as clamps. Another mistake is ignoring the squareness of the frame during the initial assembly.
If the legs are not perfectly square the stool will never sit flat. Always measure the diagonals before the glue dries.
Some builders use screws that are too long which can burst through the surface. Always check the thickness of your lumber before selecting your fastener length.
Use a scrap piece of wood to test the screw depth.
Maintenance and Safety
Apply a fresh coat of wax every six months to keep the finish glowing. Check the tightness of the pocket screws once a year to maintain rigidity.
Tighten any loose fasteners immediately to prevent structural failure. Always wear a dust mask and safety glasses during the sanding and cutting phases.
Work in a well ventilated area when applying stains and polyurethane finishes. Use clamps to secure your wood before using any power tools.
If the stool is used outdoors apply a marine grade sealant to prevent rot. Store the stools away from direct sunlight to prevent the wood from cracking.
Keep the finish updated to protect the lumber from moisture.
Pro Tip for Structural Integrity: Use a high quality cross linking PVA glue and pre drill all your holes. This prevents the hardwood from splitting under the pressure of the fasteners.
For ultimate longevity consider adding small L brackets to the interior corners of the seat apron.
| Parameter | Description | Value |
|---|---|---|
| Standard Wood Screw | Strength | Medium |
| Pocket Hole Screw | Strength | High |
| Structural Bolt | Strength | Very High |
| Standard Wood Screw | Ease of Use | High |
| Pocket Hole Screw | Ease of Use | Medium |
| Structural Bolt | Ease of Use | Low |
| Standard Wood Screw | Joint Visibility | High |
| Pocket Hole Screw | Joint Visibility | Low |
| Structural Bolt | Joint Visibility | High |
| Standard Wood Screw | Installation Speed | Fast |
| Pocket Hole Screw | Installation Speed | Medium |
| Structural Bolt | Installation Speed | Slow |
| Parameter | Description | Value |