

The T-Loft Tiny House represents a significant evolution in the world of mobile architecture and independent living. This project combines the mobility of a standard trailer with the spatial advantages of expandable wing sections for maximum comfort.
Building your own T-Loft provides an incredible sense of autonomy and a high-value asset for your property or lifestyle. It offers a sophisticated balance between a compact road-legal footprint and a spacious, multi-functional interior once parked.
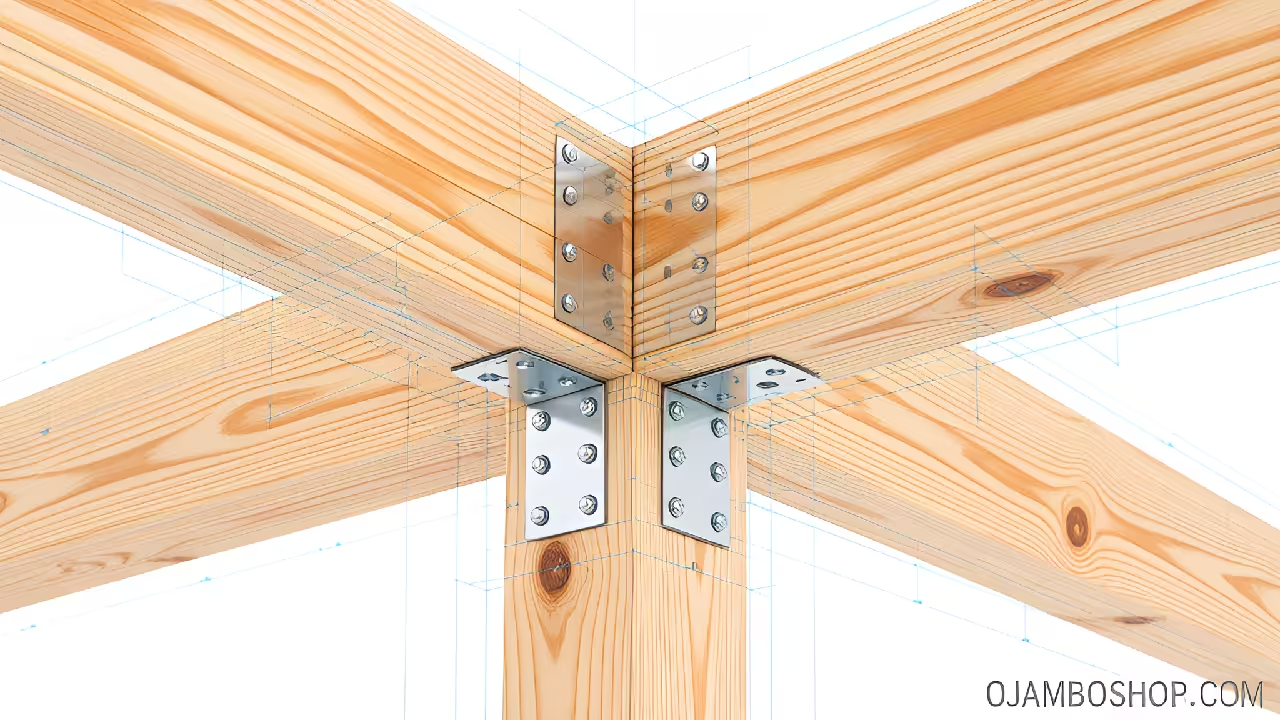
By following this master carpenter guide, you will master the complexities of steel-to-wood fastening and moisture management. This build is not just a house; it is a precision-engineered living machine designed for longevity and resilience.
Quick Specs
Overall Dimensions: 28ft Length x 8.5ft Width (Transport) x 13.5ft Height
Expansion Capability: Dual 6ft Slide-out or Fold-down Wing Sections
Estimated Cost: $45,000 to $65,000 USD depending on finish materials
Difficulty Level: Advanced DIY / Professional Carpentry Skills Required
Estimated Build Time: 600 to 800 Man-Hours
Materials and Tools
For the chassis, you must utilize a custom-built, triple-axle trailer rated for at least 21,000 pounds. The framing requires kiln-dried 2×4 and 2×6 Spruce-Pine-Fir lumber for the main walls and roof rafters. For the exterior envelope, use 7/16-inch OSB sheathing paired with a high-quality synthetic house wrap for moisture protection.
The hardware list includes thousands of 3-inch structural screws, hurricane ties, and heavy-duty flashing for the expansion joints. You will also need R-15 mineral wool insulation for the walls and R-23 for the floor and ceiling cavities. Interior finishes should prioritize lightweight materials like 1/4-inch cedar tongue-and-groove or thin birch plywood panels.
Required tools include a sliding compound miter saw, a 15-amp circular saw, and a high-torque impact driver. A framing nailer and a finish nailer will significantly speed up the assembly process during the structural phase. You must also have a laser level to ensure the long 28-foot spans remain perfectly true during the initial framing.
| Component | Material Option A | Material Option B | Primary Benefit |
|---|---|---|---|
| Framing | SPF Lumber | Light-Gauge Steel | Steel is lighter but SPF is easier to modify |
| Sheathing | OSB | CDX Plywood | Plywood offers better moisture resistance |
| Roofing | Standing Seam Metal | Corrugated Steel | Standing seam has no exposed fasteners |
| Insulation | Mineral Wool | Spray Foam | Spray foam adds significant structural rigidity |
| Siding | Cedar Siding | Aluminum Composite | Aluminum is maintenance-free and lightweight |
Technical Layout
The structural integrity of the T-Loft relies on a specialized header system that supports the expandable wing sections. Because the 28-foot span is interrupted by large openings for the expansions, we utilize LVL (Laminated Veneer Lumber) beams to distribute roof loads to the corner posts. These beams prevent sagging over time, which is critical for the smooth operation of the expansion seals and mechanical hinges.
The floor system is bolted directly to the steel trailer frame using 1/2-inch galvanized carriage bolts every 24 inches on center. This creates a monolithic structure where the trailer acts as the primary tension member for the entire building. We use advanced shear wall techniques, including structural strapping and adhesive-bonded sheathing, to resist the high wind loads encountered during highway transport at sixty miles per hour.
Pro-Tip: When fastening your bottom plate to the trailer, always use a thermal break such as a closed-cell foam sill sealer. This prevents the steel trailer from acting as a giant heat sink, which can lead to condensation and eventual rot at the base of your wooden wall studs.
Step-by-Step Instructions
Phase 1: Subfloor and Thermal Envelope
Start by cleaning the trailer bed and applying a high-quality metal primer to any areas where the factory coating is thin. Install a galvanized flashing or “belly pan” across the bottom of the trailer to protect the insulation from road debris and moisture. Lay your 2×6 floor joists 16 inches on center, ensuring they are perfectly square with the trailer frame. Fill the cavities with rigid foam or mineral wool before installing 3/4-inch tongue-and-groove subflooring with both construction adhesive and screws.
Phase 2: Main Wall Framing
Mark your wall plates according to the blueprint, paying close attention to the large rough openings for the expandable sections. Construct the two long side walls first, incorporating the LVL headers mentioned in the technical layout section. Raise the walls and brace them temporarily, ensuring they are perfectly plumb and aligned with the edge of the trailer. Fasten the corner studs together using a staggered screw pattern to create a rigid box structure that resists racking.
Phase 3: Roof Rafters and Pitch
The T-Loft utilizes a 4/12 roof pitch to balance interior head height with the strict 13.5-foot legal transport limit. Cut your rafters with a precise birdsmouth notch so they sit securely on the top plates of the side walls. Install a ridge board to tie the rafters together and provide a straight line for the roof peak. Sheath the roof immediately with 5/8-inch plywood to provide a safe working surface and to lock the entire frame into a rigid unit.
Phase 4: Expansion Wing Fabrication
The expandable wings are built as separate sub-assemblies that must be perfectly square to fit into the main wall openings. Use lightweight 2×3 framing for these sections to reduce the strain on the heavy-duty hinges or slide-out tracks. Ensure the flooring of the expansion is slightly tapered to allow for water runoff when the unit is deployed in rainy conditions. Test the fit of each wing multiple times before applying exterior sheathing or interior finishes to avoid binding issues.
Phase 5: Windows and Doors
Install high-quality, tempered glass windows designed to withstand the vibrations and pressure changes of road travel. Use a flashing tape system around all four sides of each rough opening to create a redundant seal against wind-driven rain. Set the windows in a thick bead of exterior-grade silicone and secure them with stainless steel screws. For the main entry door, choose a lightweight fiberglass model that will not swell or warp with changing humidity levels.
Phase 6: Exterior Sheathing and Siding
Apply the synthetic house wrap over the OSB sheathing, overlapping all seams by at least six inches and sealing them with specialized seam tape. Install your chosen siding, starting from the bottom and working upward to ensure proper water shedding. If using wood siding, ensure every cut end is primed or sealed to prevent moisture wicking. Pay special attention to the trim around the expandable joints, as these areas are the most vulnerable to leaks during transport.
Phase 7: Electrical and Plumbing Rough-In
Run your electrical wiring through the center of the studs using plastic grommets to prevent the metal trailer vibrations from chafing the wires. All plumbing should be kept to the interior walls where possible to prevent pipes from freezing during winter months. Use PEX piping for all water lines because its flexibility allows it to expand without bursting if temperatures drop. Install a standard RV-style power inlet and a pressurized water hookup on the driver’s side of the trailer for easy site connection.
Phase 8: Insulation and Vapor Barrier
Install your mineral wool batts tightly between the studs, making sure there are no gaps or compressed areas that would create thermal bridges. Apply a 6-mil polyethylene vapor barrier over the interior side of the studs in cold climates to prevent interior moisture from reaching the wood. Seal all penetrations in the vapor barrier, such as electrical boxes and pipe exits, using acoustical sealant or specialized tape. This airtight seal is the most important factor in maintaining the long-term health of your T-Loft’s structural components.
Phase 9: Interior Finishes and Cabinetry
Start by installing the ceiling panels first, then work your way down the walls to create a clean, professional look. Use lightweight materials for all built-in furniture and cabinetry to keep the total weight of the house within the trailer’s rated capacity. Secure all heavy items, like the refrigerator and stove, directly to the wall studs or floor joists to prevent movement during travel. Choose multi-functional furniture, such as a bench that doubles as storage, to maximize the utility of the small footprint.
Phase 10: Final Exterior Sealing and Testing
Apply a final round of high-performance sealant to all exterior joints, transitions, and fastener penetrations. Conduct a “hose test” by spraying the house with water from multiple angles to identify any potential leaks before they cause damage. Test the expansion wings several times to ensure the gaskets compress correctly and provide a weather-tight seal. Once everything is verified, give the entire structure a final coat of UV-resistant paint or stain to protect your investment for years to come.
Common Mistakes
One frequent error is failing to account for the weight distribution over the trailer axles, which can lead to dangerous swaying during transport. Builders often place too much heavy cabinetry at the very rear of the unit, reducing the necessary tongue weight. You should aim for approximately ten to fifteen percent of the total weight to rest on the hitch for safe towing.
Another mistake is using standard drywall for the interior walls, which is almost guaranteed to crack during the first mile of travel. The constant vibration and flexing of the trailer frame require flexible or modular interior finishes like wood planks or plywood. Drywall is too brittle and heavy for a 28-foot tiny house that is intended to be mobile.
Finally, many DIYers overlook the importance of mechanical ventilation in such a small, airtight space. Without a heat recovery ventilator or a high-quality exhaust fan, moisture from cooking and breathing will quickly lead to mold growth. You must ensure constant airflow to maintain indoor air quality and protect the wood structure from rot.
Maintenance and Safety
Maintaining your T-Loft requires an annual inspection of the roof seals and the mechanical components of the expansion wings. Lubricate all hinges and slide tracks every six months to prevent rust and ensure smooth operation during deployment. Check the tire pressure and lug nut torque on the trailer axles before every move to ensure road safety. Re-apply exterior stain or paint every three to five years depending on your local climate and sun exposure.
Safety should be your primary concern throughout the build process and during the life of the home. Always wear eye protection and a dust mask when cutting pressure-treated lumber or handling mineral wool insulation. Ensure you have a working fire extinguisher, smoke detector, and carbon monoxide alarm installed before your first night in the T-Loft. When expanding the wing sections, always ensure the trailer is perfectly level and stabilized with heavy-duty jacks to prevent tipping.