Tag: woodworking plans
-
The Ultimate Heirloom DIY Adjustable Standing Desk with Solid Black Walnut Top
Master the art of fine woodworking and modern ergonomics with this comprehensive guide to building a professional-grade, solid walnut adjustable standing desk for your high-end home office.
Written by

-
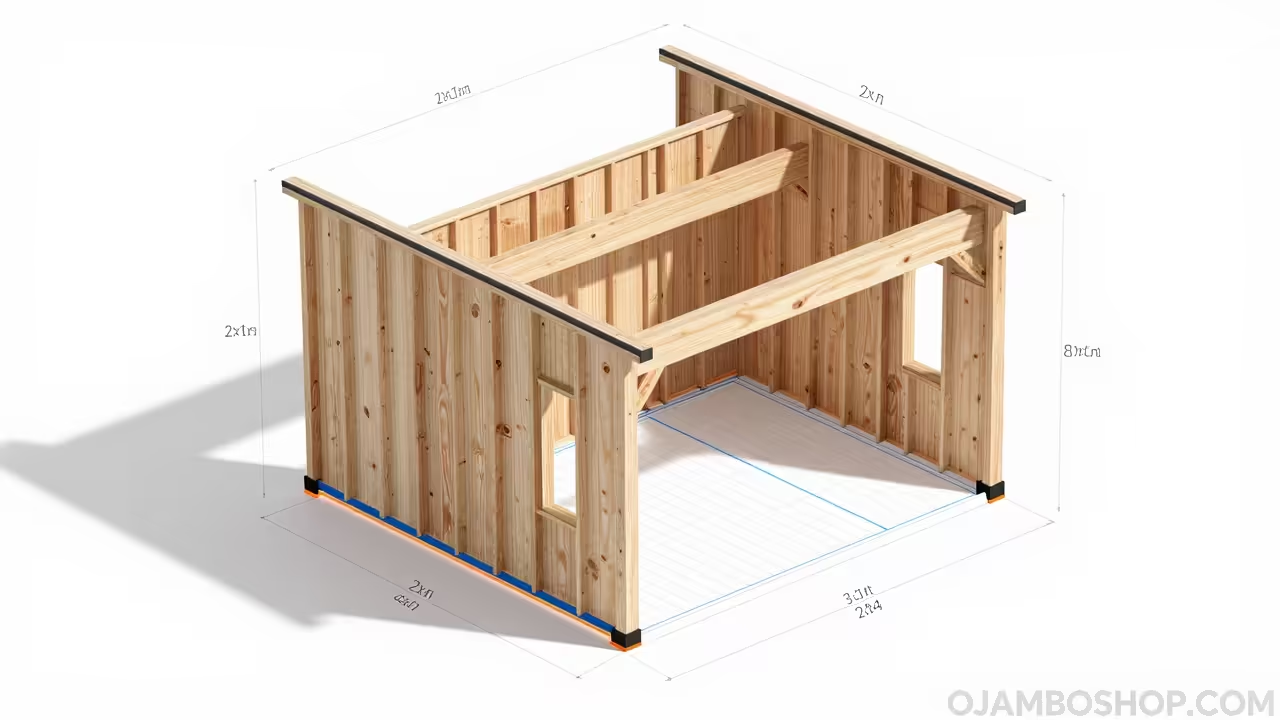
15 Stunning DIY Japanese Japandi Zen Studio Plans for a 300 Square Foot Backyard Retreat
Build your own 300 square foot Japandi Zen Studio with our comprehensive DIY guide featuring professional framing techniques, sustainable material choices, and minimalist aesthetic principles for modern backyard living.
Written by
-
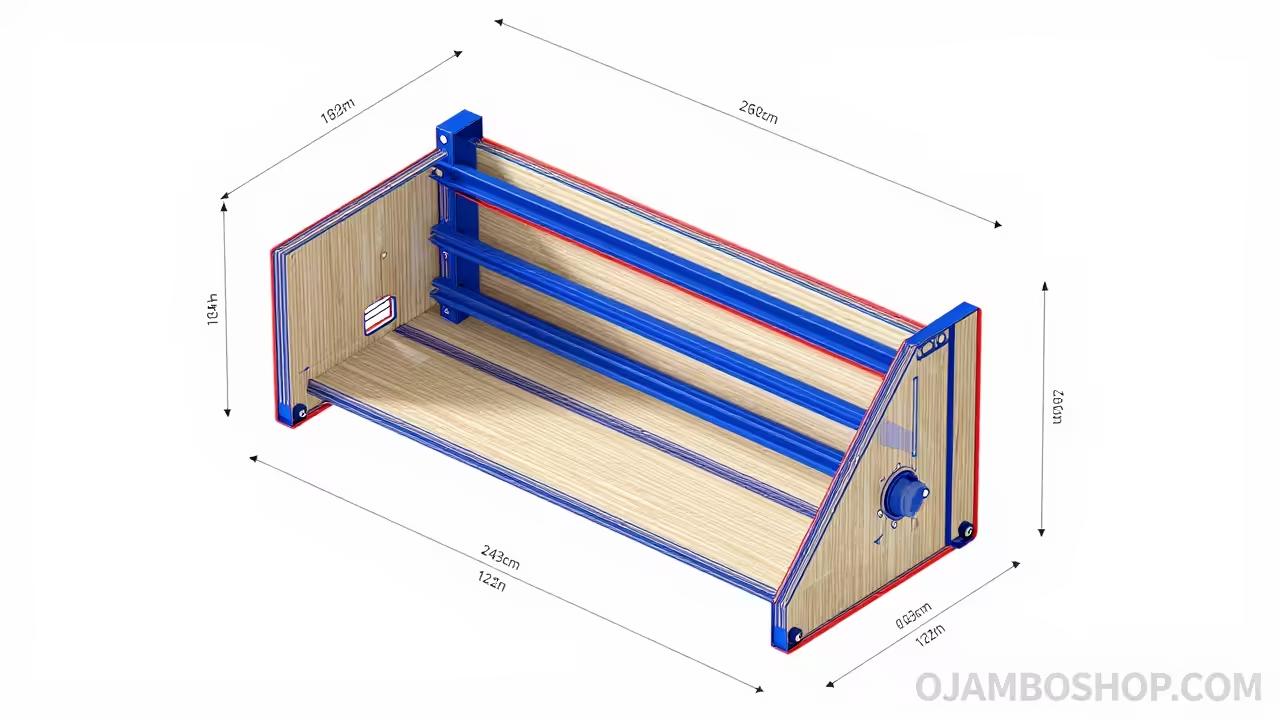
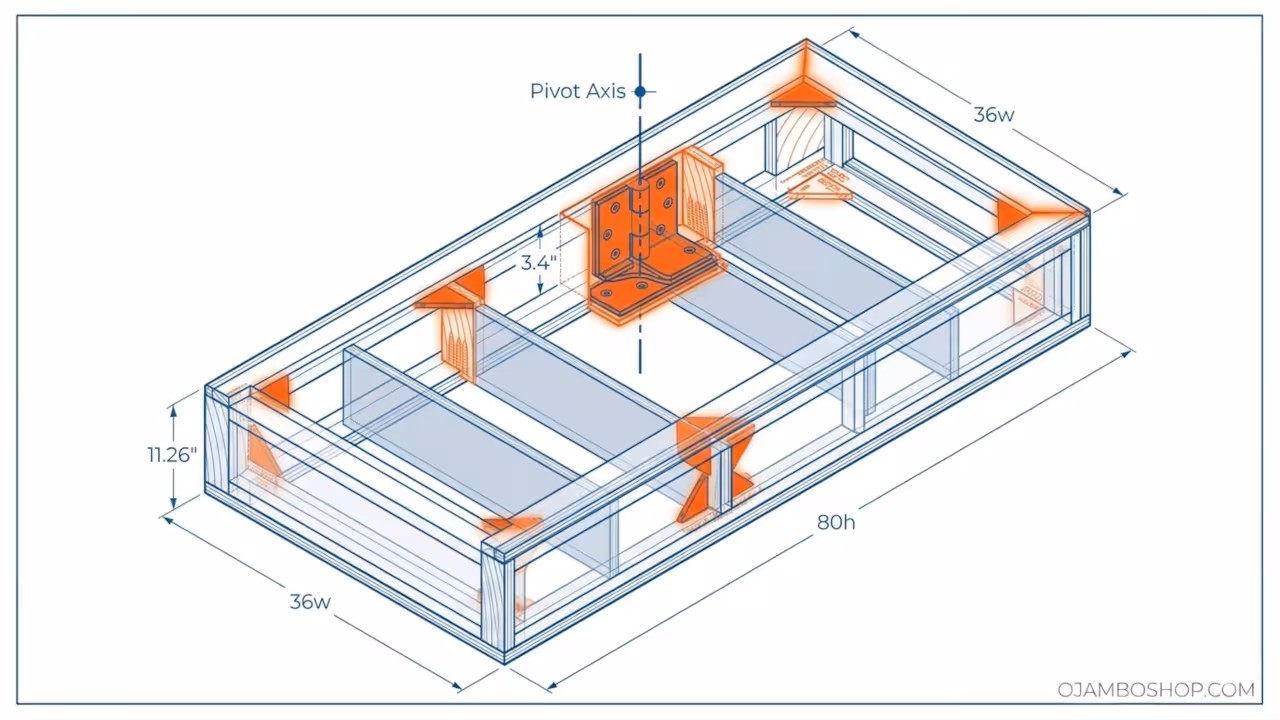
The Ultimate Space Saving Convertible Picnic Table To Garden Bench Woodworking Guide
Master your backyard space with this comprehensive guide to building a professional convertible picnic table that flips into a garden bench using simple materials and basic power tools.
Written by

-
The Ultimate Modular French Cleat Storage System The DIY Guide to a Forever Organized Workshop
Transform your garage into a professional workspace with our comprehensive modular French cleat storage system guide.
Written by
-
How to Build a Modern Slatted 8×8 Privacy Screen with Planter Box for Total Backyard Privacy
Transform your outdoor space with this professional DIY guide for building a modern 8×8 slatted privacy screen and integrated planter box to enhance property value and secluded comfort.
Written by

-
How to Build a Professional Hidden Door Bookcase with a Magnetic Latch System
Learn how to construct a high-quality hidden door bookcase featuring a professional magnetic latch system to enhance your home security and add significant functional value to your property.
Written by
-
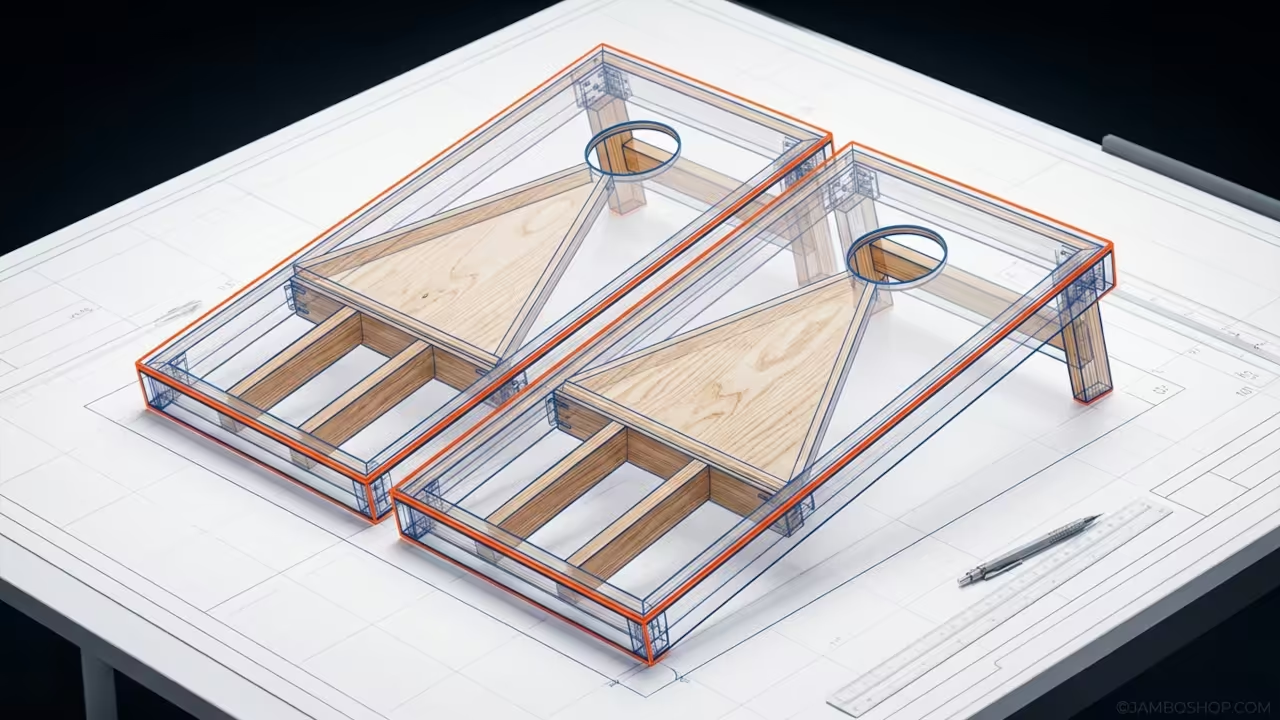
Ultimate Cornhole Board Set (ACA Regulation)
Build the perfect tournament-grade cornhole set with our master carpenter guide.
Written by
-
7 Secrets to Building a Professional Heirloom Quality Mitered Jewelry Box
Learn how to master precision mitered corners and create a stunning heirloom quality jewelry box with our detailed, step-by-step woodworking guide for intermediate and advanced makers alike.
Written by

-
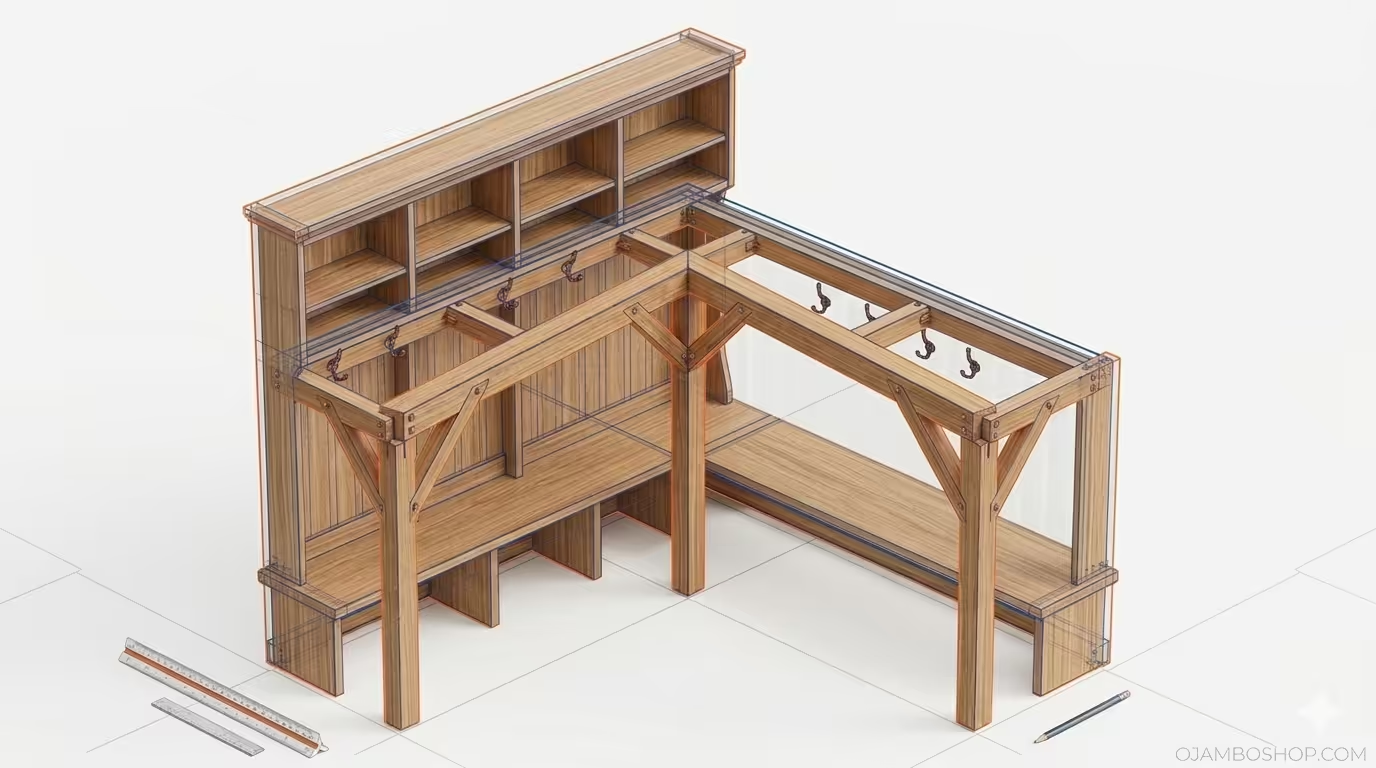
Viral Entryway Transformation: How to Build a Professional Grade Hall Tree with Bench and Cubbies
Transform your home with this professional DIY hall tree project.
Written by
-
This 5-Tier Space-Saving Planter Is The Ultimate Weekend Project For Small Backyards
Transform your limited outdoor space with our professional-grade tiered vertical garden planter.
Written by