
Tag: DIY Shed Plans
-
The Ultimate Space-Saving 8×8 Corner Garden Shed: Professional DIY Plans for Small Backyards
Master the art of backyard organization with our comprehensive 8×8 corner garden shed plans, featuring professional framing techniques, material lists, and step-by-step instructions for a durable, space-saving structure.
Written by
-
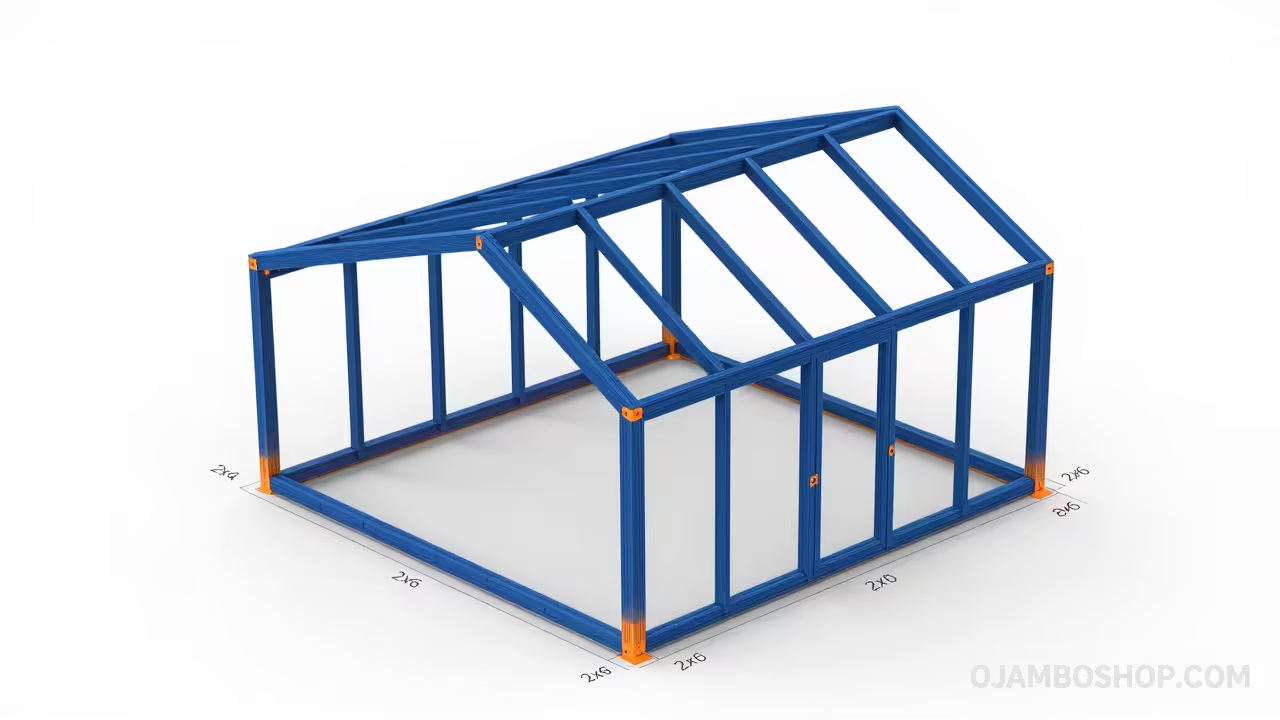
Stop Paying For Storage: Build This Modern 8×10 Lean-To Shed In One Weekend
Master your backyard organization with our comprehensive 8×10 modern lean-to shed plans featuring professional framing techniques, material lists, and step-by-step instructions for a durable, high-end DIY finish.
Written by
