
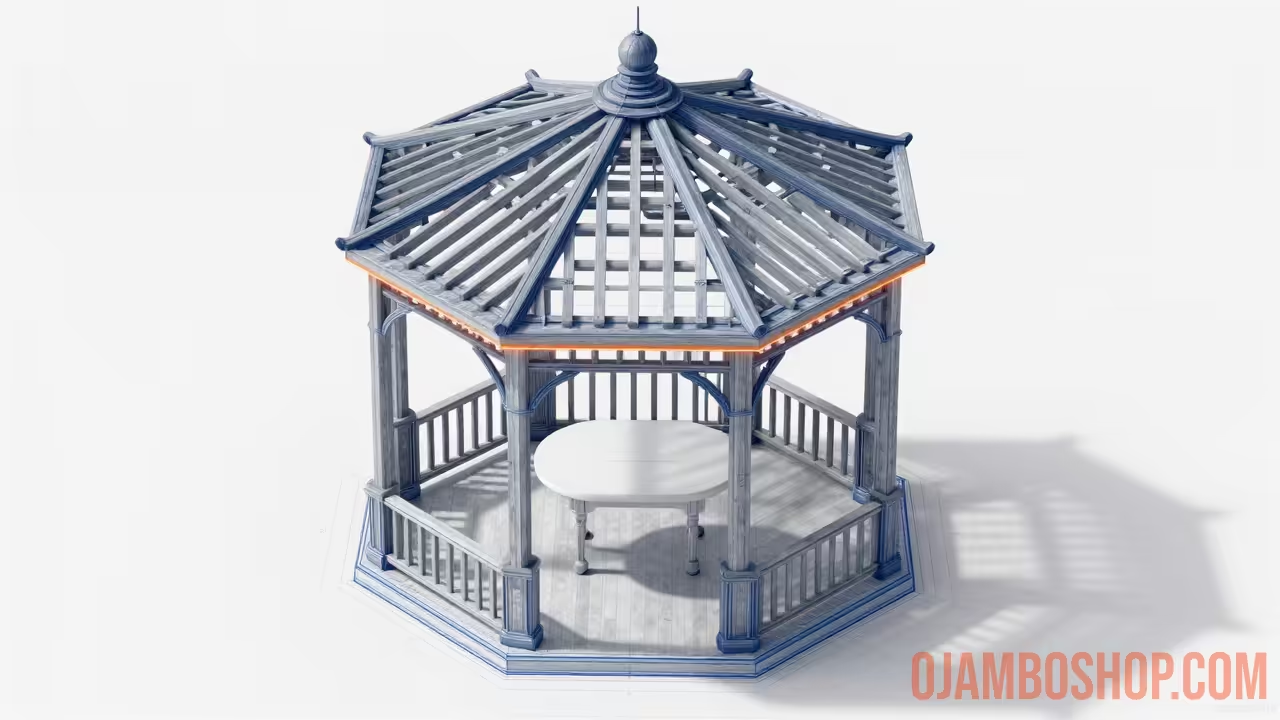
A hexagonal cedar gazebo is more than just a simple backyard ornament; it is a profound architectural statement that elevates the utility and value of your entire property. By choosing the classic six-sided design, you provide a sophisticated focal point that balances geometric beauty with functional outdoor shelter.
Building with Western Red Cedar ensures that your structure remains naturally resistant to rot, decay, and insect infestation for decades. This specific project focuses on a 12ft diameter footprint, which offers the ideal amount of space for entertaining guests or enjoying a quiet morning coffee in the shade.
As a Master Carpenter, I can tell you that the secret to a successful gazebo build lies in the precision of your angles and the stability of your foundation. Over the next several thousand words, we will break down every measurement and joint to ensure your finished product looks like a professional installation.
Quick Specs
Dimensions: 12ft Diameter (Point-to-Point) with 10ft Peak Height
Estimated Cost: $2,500 – $3,500 (Depending on local lumber market and hardware grades)
Difficulty Level: Advanced (Requires knowledge of compound miter cuts and structural load-bearing)
Estimated Build Time: 4 to 5 Days (Two-person crew recommended for roofing and heavy lifting)
Materials and Tools
Your material list is the backbone of the project, and using high-quality cedar is non-negotiable for a premium finish. You will need twelve 4×4 cedar posts at 8ft lengths for the main supports and six 2×6 cedar boards at 12ft for the primary floor joists.
The decking surface requires approximately 450 linear feet of 5/4×6 cedar decking boards to cover the hexagonal area without excessive waste. For the roof, procure twenty-four 2×4 cedar boards for the rafters and 150 square feet of cedar shakes or high-quality asphalt shingles to match your home.
Hardware requirements include 1/2-inch galvanized carriage bolts for post-to-beam connections and several boxes of 2.5-inch 305-grade stainless steel deck screws. Do not use standard interior screws, as the tannins in the cedar will react with the metal and cause unsightly black streaking over time.
Required tools include a sliding compound miter saw, a circular saw, a cordless impact driver, and a heavy-duty hammer drill for the foundation anchors. You will also need a laser level or a 4ft spirit level, a framing square, a chalk line, and a set of heavy-duty sawhorses.
| Hardware Type | Material Grade | Best Use Case |
|---|---|---|
| Deck Screws | 305 Stainless Steel | Fastening cedar decking and trim without staining |
| Carriage Bolts | Hot-Dipped Galvanized | Structural post-to-beam and header connections |
| Joist Hangers | Z-Max Coated Steel | High-moisture areas where beams meet the rim |
| Rafter Ties | Powder Coated Black | Decorative and structural roof-to-plate security |
Technical Layout
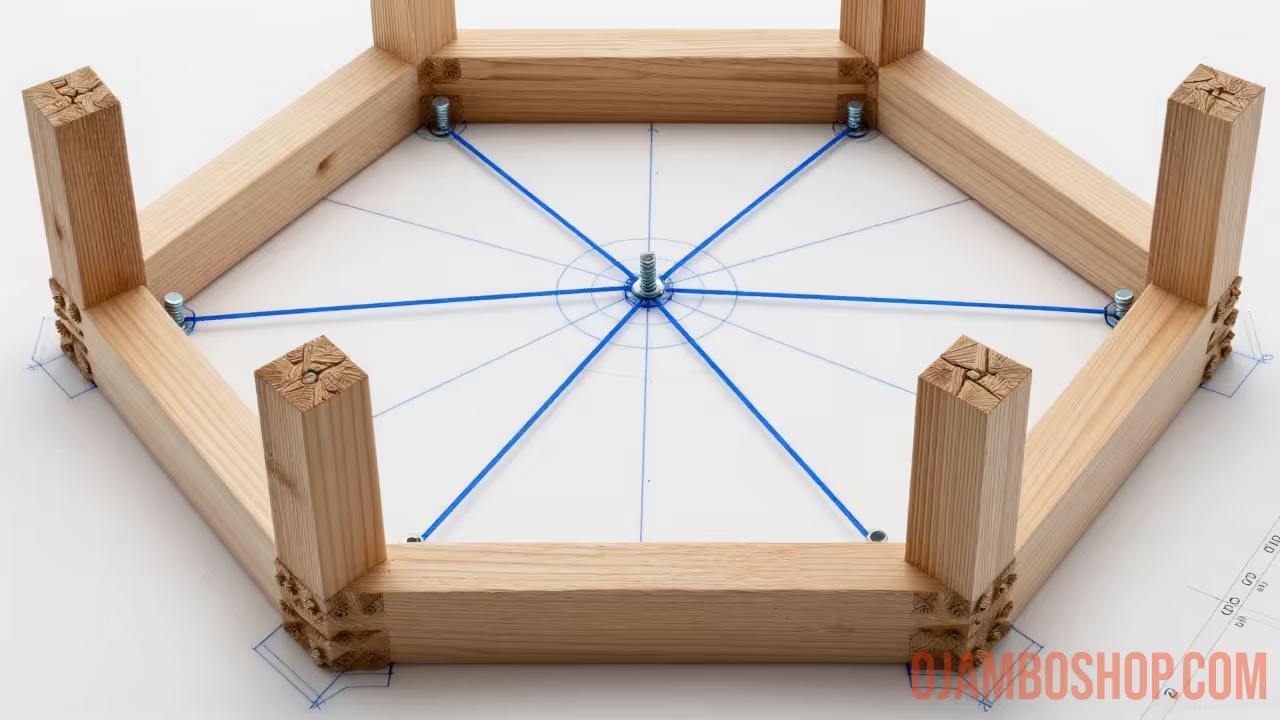
The technical layout of a hexagonal structure relies entirely on the geometry of equilateral triangles and the internal radius of the footprint. In a 12ft hexagonal gazebo, the distance from the center point to any corner is exactly 6ft, which simplifies the layout significantly compared to other polygons. The perimeter is comprised of six equal wall sections, each measuring 6ft across, requiring miter cuts of exactly 30 degrees at every junction to form the 60-degree internal angles.
Load distribution is managed through a central kingpost system where the six primary rafters meet at a singular hub in the roof peak. The floor framing utilizes a “spider” configuration where the 2×6 joists radiate from a central blocking point out to the six 4×4 support posts. This layout ensures that the weight of the roof and any snow load is transferred directly down the vertical axes of the posts into the concrete footings. Proper structural integrity is achieved by ensuring the rim joists are double-layered and through-bolted to the posts to prevent lateral racking or swaying during high winds.
Step-By-Step Instructions
Phase 1: Site Preparation and Foundation
Begin by clearing the designated area of all debris and leveling the ground to within one inch across the 12ft span. Stake out the center point of the gazebo and use a 6ft string line to mark the six corners of the hexagon at 60-degree intervals. Dig six holes for the footings, ensuring they are at least 12 inches in diameter and deep enough to reach below your local frost line. Pour concrete and set 4×4 galvanized post bases into the wet mix, checking for perfect alignment with your string lines.
Phase 2: Post Installation and Leveling
Once the concrete has cured for 24 hours, cut your 4×4 cedar posts to a uniform height of 90 inches to allow for the header system. Secure the posts into the bases using 2.5-inch connector screws, ensuring each post is perfectly plumb in both directions using a spirit level. Brace the posts temporarily with scrap 2×4 lumber to keep them from shifting during the header installation. Check the distance between each post at both the top and the bottom to ensure the hexagonal symmetry is maintained before proceeding.
Phase 3: Floor Framing and Joists
Install the 2×6 rim joists around the perimeter of the posts, using a 30-degree miter on each end to create a seamless outer ring. Inside this ring, install the primary joists running from the center point to each post corner, followed by intermediate blocking for additional support. Use joist hangers at all connections to ensure the floor can support a live load of at least 50 pounds per square foot. Verify that the entire frame is level, as any slope in the floor will be amplified when you begin the roofing phase.
Phase 4: Decking Installation
Lay the 5/4×6 cedar decking boards across the joist system, starting from the outer perimeter and working toward the center. Use 1/4-inch spacers between boards to allow for water drainage and the natural expansion and contraction of the wood. You will need to make complex miter cuts where the boards meet the joists that radiate from the center to ensure a professional “starburst” pattern. Fasten each board with two stainless steel screws at every joist intersection, pre-drilling the ends to prevent the cedar from splitting.
Phase 5: Header and Plate System
Install the 2×6 headers across the top of the posts, mirroring the layout of the floor rim joists for structural consistency. These headers should be through-bolted to the posts using 1/2-inch carriage bolts for maximum shear strength. This top ring acts as the tension plate for the roof system, preventing the rafters from pushing the walls outward under heavy weight. Double-check that the top of the structure is perfectly square and level before attempting to build the roof rafters.
Phase 6: Rafter Fabrication and Hub
The roof is the most technical part of the build, requiring six primary rafters cut at a specific pitch, typically 6/12 for this size gazebo. Construct a central hexagonal hub from a 6×6 cedar block to serve as the mounting point for the upper ends of the rafters. Cut the birdsmouth notches in each rafter so they sit securely on the top plate, ensuring a 12-inch overhang for aesthetic appeal and water runoff. Secure the rafters to the hub first, then lower the entire assembly onto the top plates with the help of an assistant.
Phase 7: Roof Sheathing and Shingles
Install 1×6 cedar tongue-and-groove boards over the rafters to serve as the ceiling and the structural base for your roofing material. This method is preferred over plywood because it provides a beautiful finished look from the inside of the gazebo. Cover the wood sheathing with a breathable synthetic underlayment to provide a secondary moisture barrier. Install your cedar shakes or shingles according to the manufacturer’s instructions, taking care to use specialized hip shingles at the six corners to prevent leaks.
Phase 8: Railing and Trim Work
Install the 2×4 top and bottom rails between the posts at a standard height of 36 inches for safety and comfort. You can use 2×2 cedar balusters spaced no more than 4 inches apart to meet most local building codes and provide a traditional look. Add decorative trim boards around the base of the posts and the underside of the headers to hide any visible hardware or gaps. Sand all visible surfaces with 80-grit then 120-grit sandpaper to remove any mill marks or splinters before the finishing process.
Phase 9: Finishing and Sealing
Clean the entire structure with a soft brush and water to remove any sawdust or dirt that could interfere with the stain. Apply a high-quality UV-resistant oil-based sealer or semi-transparent stain to the cedar to preserve its natural color and protect it from graying. Pay extra attention to the end grain of the lumber, as this is where moisture is most likely to penetrate and cause rot. Allow the sealer to dry for at least 48 hours before placing furniture or using the space for entertaining.
Common Mistakes
One of the most frequent errors is failing to account for the thickness of the lumber when calculating the miter cuts, which leads to gaps in the hexagonal joints. Always measure from the long point of the miter and double-check your saw calibration before making your final cuts on expensive cedar.
Another common mistake is neglecting the foundation depth, especially in colder climates where frost heave can shift the footings. If one post moves even half an inch, it can cause the roof geometry to fail, resulting in leaks or structural instability.
Lastly, many builders use the wrong fasteners, such as standard galvanized nails that can react with cedar’s natural acids. This leads to “bleeding” where black streaks run down the wood, ruining the aesthetic of your high-end project within the first year.
Maintenance and Safety
Pro-Tip: To significantly extend the life of your gazebo, apply a coat of end-grain sealer to every coat end during the assembly process. This creates a moisture barrier that prevents the wood from sucking up water like a straw, which is the primary cause of internal rot in outdoor structures.
Always wear OSHA-approved safety glasses and ear protection when operating power saws, especially when making the repetitive cuts required for a hexagonal roof. Use a sturdy ladder and, if possible, a fall protection harness when working on the roof sheathing to prevent serious injury.
Regular maintenance involves checking the tightness of the carriage bolts every two years, as wood naturally shrinks and expands with the seasons. A fresh coat of UV-protective sealer every three to five years will keep your 12ft cedar gazebo looking like the day it was built.