
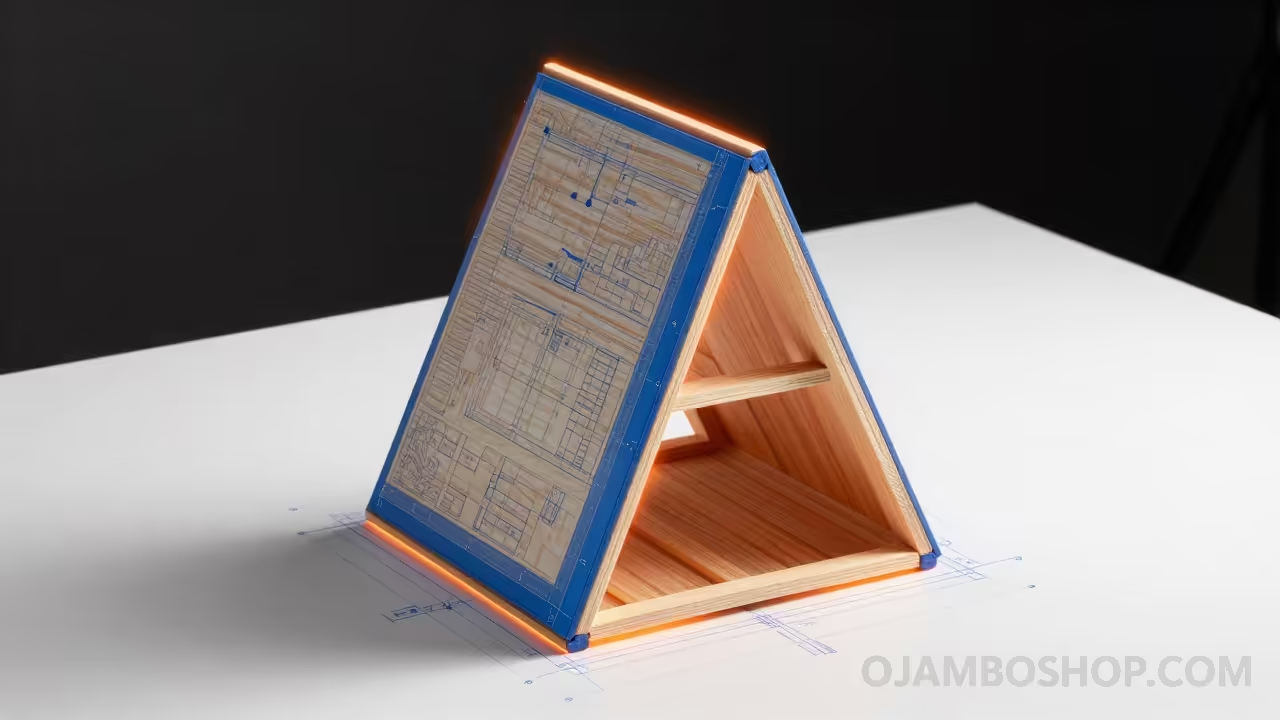
As a Master Carpenter, I’ve seen countless “kit” coops fall apart after a single season. A professional chicken coop is specialized agricultural architecture. This 8×10 A-Frame design provides the perfect balance of ventilation, predator protection, and structural shedding of the elements.
Quick Specs
- Dimensions: 8’ (W) x 10’ (L) x 8.5’ (H)
- Structure: 60-Degree Equilateral A-Frame
- Capacity: 12–15 Chickens
Technical Layout & Structural Analysis
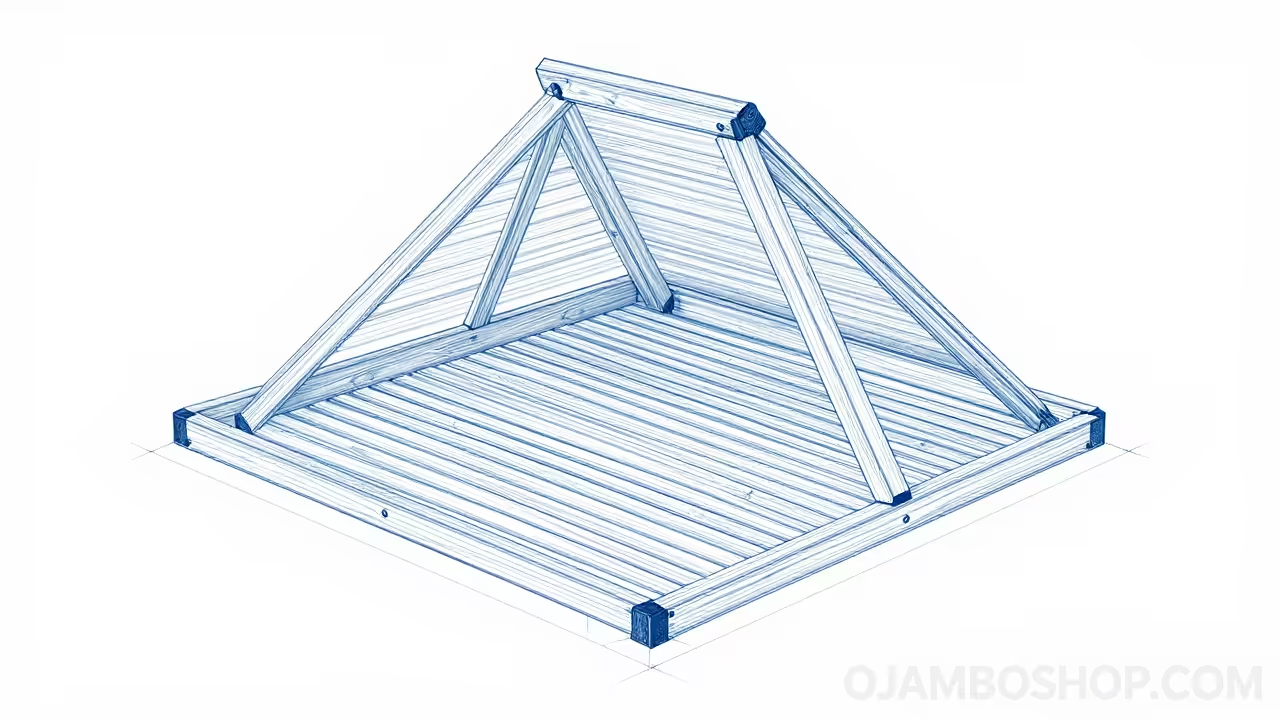
The structural integrity of this A-frame coop relies on the triangulation of the rafters. By connecting the rafters directly to the 8×10 floor perimeter at a 60-degree angle, we create a rigid geometric shape that requires zero internal vertical studs. This maximizes interior “living” volume for your flock.
From a carpentry perspective, the critical detail is the mitered heel cut. Instead of a traditional bird’s mouth, the rafters are mitered at the base to sit flush against the floor joists, secured with structural screws. To prevent predators from burrowing, we implement a “hardware cloth apron” that extends 12 inches out from the 4×4 skids and is buried 6 inches deep. This prevents foxes or raccoons from prying under the base frame.
Step-by-Step Instructions
Phase 1: The Foundation Skids
Clear a 10×12 area and level it with pea gravel. Lay two 4×4 x 10’ PT skids exactly 8 feet apart (outer edge to outer edge). These act as the “rails” for the entire structure, keeping the wood off the ground and away from moisture.
Phase 2: The Floor Platform
Build an 8×10 rectangular frame using 2×4 PT joists. Lay this frame directly onto the 4×4 skids and secure with 3″ galvanized lag screws. Install 3/4″ PT plywood subfloor. Pro-Tip: Use exterior-grade construction adhesive on the joists before screwing down the plywood to eliminate gaps where mites could nest.
Phase 3: The A-Frame Rafter Assembly
Cut twelve 2×4 rafters at a 60-degree angle at the peak and a matching 30-degree miter at the heel. Use a 10-foot 2×4 ridge board to align the peaks. Each rafter heel must be flush with the outer edge of the floor platform. Secure each pair with a collar tie 24 inches down from the peak for lateral wind-load resistance.
Phase 4: Gable Ends and Run Area
Install T1-11 siding on the front and back “Gable Triangles” only. On the main slopes of the “A,” leave the bottom 4 feet of one side open for the hardware cloth “run” area. This allows for maximum cross-ventilation while keeping the sleeping area sheltered.
Phase 5: The External Nesting Boxes
Build a “bump-out” box on the rear gable end. Position it 18 inches off the floor to keep eggs clean. Use a piano hinge on the lid for weather-tight egg collection access.
Phase 6: Predator Proofing (Hardware Cloth)
Wrap the lower “run” sections and gable vents in 1/2″ hardware cloth. Secure with 1.5″ galvanized staples every 3 inches. Safety Note: Never use standard chicken wire; it can be shredded by a determined raccoon.
Phase 7: Interior Roosts and Cleated Ramp
Install 2×4 roosting bars (wide side up) at tiered heights. Construct a 10-inch wide ramp with 1×2 cleats spaced every 4 inches to provide traction for the birds entering the upper coop area.
Phase 8: Roofing and Flashing
Install corrugated metal panels directly over the rafters. Overlap by two ribs and use roofing screws with rubber washers. Install 1×4 trim on the gable peaks to seal the ridge line.
Phase 9: Finishing and Sealing
Apply a low-VOC exterior paint to the gable ends. For the interior floor, apply a remnant piece of linoleum or a “Deck Shield” coating to make the deep-litter cleaning process effortless.
Maintenance & Safety Professional Advice
Wood Treatment and Longevity
Chickens produce a high-ammonia environment. To protect the structure, inspect the floor annually for moisture penetration. If you notice “soft spots,” address them immediately with a wood hardener or section replacement. Check the hardware cloth apron for signs of prying or rust every spring.
The “Arsenic” Myth & Modern Safety
Modern Pressure-Treated (PT) lumber is safer than the old CCA-treated wood, but as a Master Carpenter, I still advise caution. Never use PT lumber for the roosting bars or nesting boxes where the birds’ skin will have direct contact for 8+ hours a night. Use Kiln-Dried (KD) whitewood or cedar for these interior components to ensure a respiratory-safe environment.
Hardware Safety
Ensure all fasteners are hot-dipped galvanized. Chickens are naturally curious and will peck at anything shiny; non-galvanized hardware can lead to “Zinc poisoning” over time. Countersink your screws in the roosting area to prevent “Bumblefoot” (foot infections caused by sharp metal edges).
Leave a Reply