
Introduction to the Utility Hub Off-Grid Cabin
The concept of the Utility Hub represents a shift in modern small-scale architecture toward total functional independence. By condensing high-efficiency systems into a 500 square foot footprint, this cabin serves as a primary residence or a high-value secondary structure. This design prioritizes thermal mass and spatial optimization to ensure every inch of the interior provides maximum utility for the occupant.
Building an off-grid structure of this magnitude adds significant equity to any rural or semi-rural property. It provides a sanctuary that operates independently of municipal power grids and water systems. As a master carpenter, I have designed this blueprint to balance structural over-engineering with cost-effective material selection. This ensures your investment stands the test of time against harsh environmental elements.
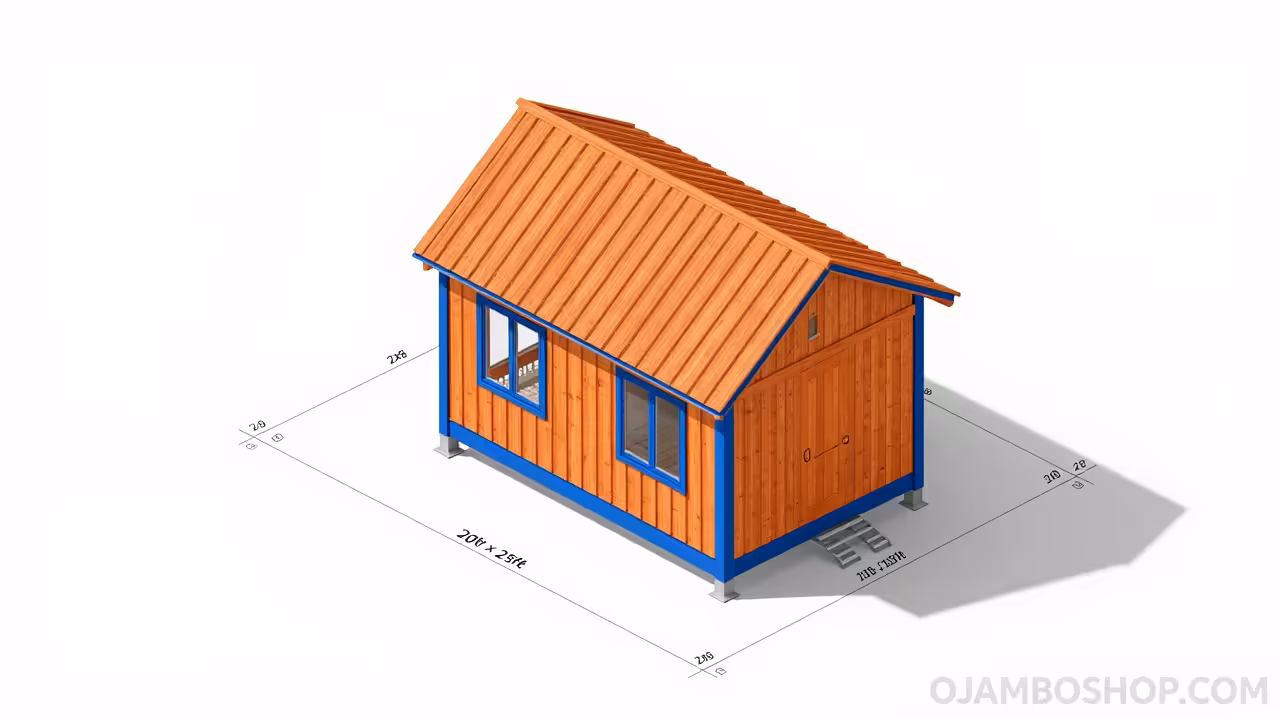
The 500 square foot layout is the “sweet spot” for small living, offering enough room for a full kitchen, bath, and sleeping quarters without the cramped feel of smaller tiny homes. We focus on a 20-foot by 25-foot rectangular footprint to simplify the framing process while maintaining a sleek, modern aesthetic. This guide will walk you through the professional standards required to turn raw lumber into a high-performance living space.
Quick Specs
The Utility Hub features a total footprint of 500 square feet with a standard 20-foot width and 25-foot length. The roof is designed with a 6:12 pitch to facilitate both snow shed and optimal solar panel mounting angles. We utilize a 2×6 exterior wall framing system to allow for R-21 mineral wool insulation, significantly exceeding standard efficiency requirements.
The estimated cost for materials, excluding land and septic, ranges between 35,000 and 45,000 dollars depending on local lumber prices. This project is rated at an advanced difficulty level, requiring proficiency with power tools and a fundamental understanding of load-bearing structures. A dedicated team of two builders can expect to reach the “dried-in” phase within approximately 20 to 25 working days.
Safety is the paramount concern throughout this build process. You must wear ANSI-rated eye protection and steel-toed boots during all phases of heavy lifting and cutting. Ensure all ladders are rated for your weight plus your tool belt and are positioned on stable, level ground before ascending to the top plates.
Comprehensive Materials and Tools
For the foundation and floor system, you will need 2×10 pressure-treated joists, 3/4-inch tongue-and-groove subflooring, and 12-inch concrete sonotubes. The wall assembly requires 2×6 kiln-dried studs, 1/2-inch CDX plywood sheathing, and 2×10 headers for window and door openings. Your roofing package should include 2×8 rafters, 5/8-inch OSB radiant barrier decking, and 26-gauge standing seam metal roofing panels.
Interior finishes call for moisture-resistant gypsum board or pine tongue-and-groove planking, depending on your aesthetic preference. For the envelope, prioritize a high-performance house wrap and integrated window flashing tapes to prevent air infiltration. You will also require a bulk supply of 3-inch and 3.5-inch framing nails, along with 2-inch exterior wood screws for the siding and trim.
The essential tool kit for this project starts with a high-quality miter saw and a worm-drive circular saw for heavy-duty ripping. A pneumatic framing nailer and a finish nailer will significantly speed up the assembly process. You will also need a laser level for foundation accuracy, a 4-foot carpenter’s level, a speed square, and a heavy-duty impact driver for structural fasteners.
Technical Layout and Framing Geometry
The structural integrity of the Utility Hub relies on a platform-framed system that transfers loads directly from the roof rafters through the wall studs to the foundation piers. In a 500 square foot rectangular design, the 25-foot span is interrupted by a central load-bearing interior wall or a structural glulam beam to prevent floor joist deflection. We utilize 2×6 exterior studs spaced at 24 inches on center, which aligns with advanced framing techniques to minimize thermal bridging while maintaining vertical strength. This spacing allows for thicker insulation batts, creating a superior thermal envelope compared to traditional 2×4 construction.
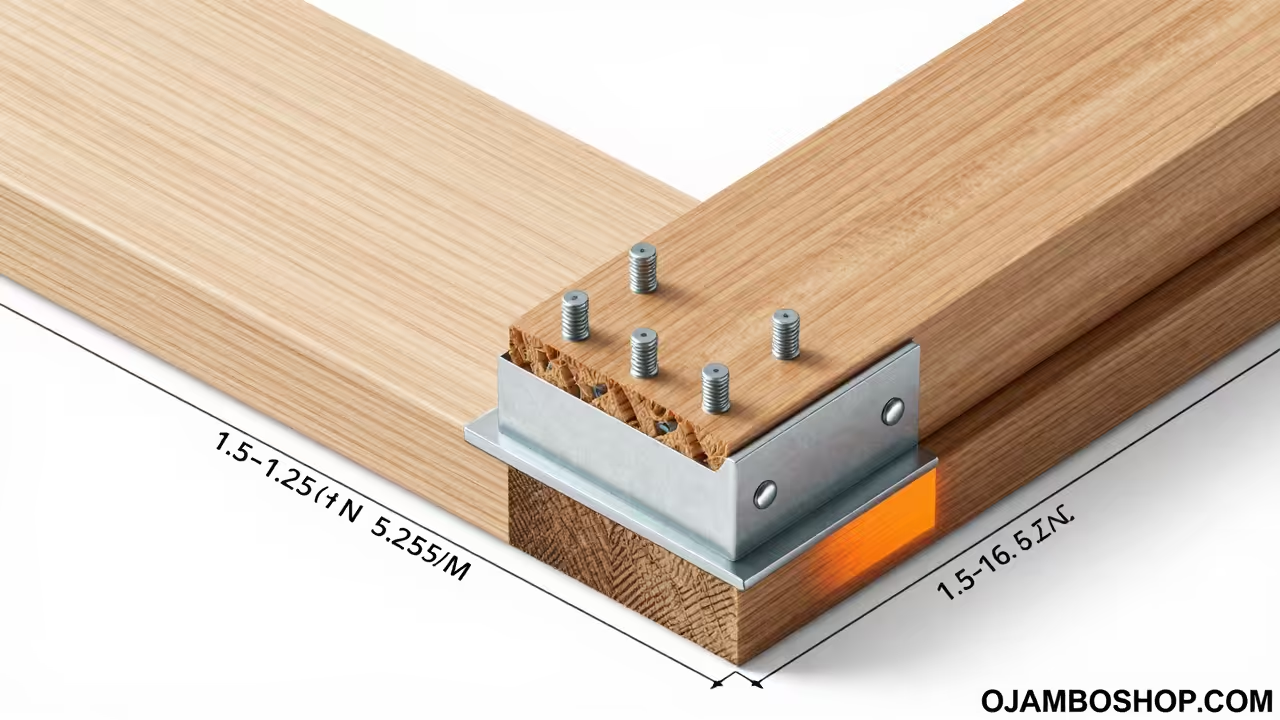
The roof system is a classic gable design with a 6:12 pitch, which provides an excellent balance between interior loft space and exterior wind resistance. Rafters are bird-mouthed onto the double top plates and secured with hurricane ties to meet high-wind uplift codes. The floor system sits on 2×10 pressure-treated joists spaced 16 inches on center, supported by a triple-ply 2×10 girder beam running the length of the 25-foot axis. This ensures a stiff, bounce-free floor that can support the weight of heavy off-grid appliances and wood-burning stoves.
Material Comparison Table
| Component | Standard Option | High-Efficiency Choice | Benefit |
|---|---|---|---|
| Wall Studs | 2×4 Douglas Fir | 2×6 Kiln-Dried Pine | Deeper cavity for R-21 insulation |
| Sheathing | 7/16-inch OSB | 1/2-inch CDX Plywood | Superior moisture resistance |
| Insulation | Fiberglass Batts | Mineral Wool (Roxul) | Fire resistant and sound dampening |
| Roofing | Asphalt Shingles | Standing Seam Metal | 50-year life and solar ready |
| House Wrap | Standard Poly | Vapor-Permeable Membrane | Prevents rot while allowing drying |
Step-by-Step Instructions
Step 1: Site Preparation and Foundation
Begin by clearing the building site of all organic material and leveling the grade within a 30-foot by 35-foot perimeter. Use a transit or laser level to establish your high point and set batter boards at the four corners of the 20×25 footprint. This phase is critical because an out-of-square foundation will cause compounding errors throughout the entire framing and finishing process.
Dig pier holes to a depth below the local frost line, typically 36 to 48 inches, and pour 12-inch concrete footings. Insert sonotubes and level them perfectly before filling with 3,500 PSI concrete and setting 5/8-inch galvanized anchor bolts. Once the concrete has cured for 72 hours, install your pressure-treated 6×6 posts and the main carrying girders to create a level building platform.
Step 2: Floor Joists and Subflooring
Install your 2×10 pressure-treated rim joists around the perimeter of the foundation posts, ensuring the assembly is perfectly square by measuring the diagonals. Lay out your floor joists at 16 inches on center, securing them with joist hangers to the main girders for maximum structural stability. Install solid blocking every 8 feet to prevent joist twisting and to provide a solid nailing surface for the subfloor edges.
Apply a generous bead of subfloor adhesive to the top of each joist before laying your 3/4-inch tongue-and-groove plywood sheets. Stagger the seams of the plywood to increase the lateral rigidity of the floor diaphragm and use 2.5-inch ring-shank nails or screws every 6 inches along the edges. This creates a rock-solid base that serves as the “work table” for the remainder of your wall and roof framing.
Step 3: Wall Framing and Sheathing
Lay out your wall plates on the subfloor, marking the locations of all studs, windows, and door openings according to the technical blueprint. Build the 25-foot long walls first in sections, using 2×6 studs and double top plates to ensure the structure can handle the weight of the roof. Pro-Tip: Use a “California Corner” or a three-stud corner to provide a solid nailing surface for interior drywall while allowing for maximum insulation in the corners.
Once the walls are framed, apply the CDX plywood sheathing while the walls are still lying flat on the deck, ensuring the sheathing is square to the plates. Raise the walls using a team of builders or wall jacks, and temporarily brace them with 2x4s to the floor joists until all walls are interconnected. Plumb and straighten the top plates before nailing the second top plate in place to tie the corners together securely.
Step 4: Roof Rafters and Decking
Cut a master rafter pattern for the 6:12 pitch, including the bird’s mouth cut for the top plate and the tail cut for the eave. Install a 2×10 ridge board supported by temporary vertical posts at the gable ends to establish the peak of the cabin. Begin installing rafter pairs, starting from the gable ends and working toward the center, ensuring they are perfectly aligned with the wall studs below.
Install 5/8-inch OSB or plywood roof decking, starting from the eaves and working up toward the ridge. Leave a 1/8-inch gap between sheets to allow for natural expansion and contraction of the wood as temperatures fluctuate. Immediately cover the decking with a synthetic underlayment or ice and water shield to protect the interior of the cabin from sudden rain during the build.
Step 5: Windows, Doors, and House Wrap
Wrap the entire structure in a high-quality vapor-permeable house wrap, overlapping the seams by at least 6 inches and sealing them with specialized seam tape. Cut “X” patterns in the window openings and fold the wrap inward, securing it to the interior framing to create a continuous weather barrier. This step is essential for off-grid efficiency, as air leakage is the primary cause of heat loss in small structures.
Install high-performance, double or triple-pane windows into the rough openings using shims to ensure they are level and plumb. Apply flashing tape to the sills and sides of the windows in a “shingle-fashion” manner to ensure any water that gets behind the siding is directed outward. Install the main entry door, ensuring the threshold is properly flashed and sealed against the subfloor to prevent rot.
Step 6: Exterior Siding and Trim
Choose a siding material that suits your climate, such as fiber cement lap siding or charred cedar (Shou Sugi Ban) for maximum longevity. Install a 1×4 or 1×6 trim around the windows and doors first, which provides a clean edge for the siding to butt against. Ensure you maintain a 1/4-inch gap between the siding and the trim, which should be filled with a high-quality exterior grade caulk.
If you are using wood siding, ensure you back-prime every board before installation to prevent moisture from soaking into the rear of the wood. Use stainless steel siding nails to prevent “bleeding” or rust streaks over time, especially in coastal or humid environments. Finish the eaves with soffit vents and install fascia boards to prepare for the final gutter and metal roofing installation.
Step 7: Interior Mechanicals and Insulation
Rough-in your electrical wiring, plumbing lines, and any HVAC ducting while the wall cavities are still open and accessible. For an off-grid cabin, this includes the wiring for your solar inverter, battery bank, and DC-powered lighting circuits. Ensure all penetrations through the top and bottom plates are sealed with fire-rated expanding foam to maintain the integrity of your air barrier.
Install mineral wool insulation batts into the 2×6 wall cavities, ensuring there are no gaps or compressions that would reduce the R-value. Unlike fiberglass, mineral wool is friction-fit and will not sag over time, providing superior long-term thermal performance. Install a 6-mil poly vapor barrier over the insulation if you are in a cold climate to prevent interior moisture from condensing inside the wall assembly.
Step 8: Finishing Touches and Interior Linings
Install your interior wall finish, whether it is traditional drywall or rustic tongue-and-groove pine planks. If using drywall, tape and mud the joints to a Level 4 finish for a smooth appearance, then prime and paint with a low-VOC paint. For wood interiors, apply a clear water-based polyurethane to protect the wood while maintaining its natural color and grain.
Install the interior doors, baseboards, and window casings to cover the gaps between the wall finish and the structural framing. Lay your final flooring, such as luxury vinyl plank or reclaimed hardwood, ensuring you leave the manufacturer’s recommended expansion gap around the perimeter. Finally, install your kitchen cabinets, bathroom fixtures, and off-grid appliances to complete the transformation of your Utility Hub into a livable home.
Common Mistakes to Avoid
One of the most frequent errors in small cabin construction is neglecting the “building envelope” by skipping high-quality flashing tapes or house wrap. This leads to hidden rot and mold within the walls that can destroy a structure in less than a decade. Always treat the weather barrier as the most important layer of your home, as it protects all the expensive framing and finishes beneath it.
Another common pitfall is failing to account for the weight of off-grid systems like battery banks or large water storage tanks. Ensure your floor joists are reinforced under these heavy loads by doubling the joists or adding extra support piers. If the floor sags, it can cause interior doors to stick and drywall to crack, creating a maintenance nightmare that is difficult to fix after the cabin is finished.
Lastly, many DIY builders ignore the importance of “dryer-in” speed, leaving raw plywood exposed to the sun and rain for months. Plywood and OSB can delaminate and lose structural integrity if they undergo too many wet-dry cycles. Plan your build so that you can get the roof and house wrap on as quickly as possible to protect your material investment from the elements.
Maintenance and Safety Protocols
To ensure the longevity of your Utility Hub, inspect the exterior siding and roof every six months for signs of wear or damage. Recaulk any gaps around windows and doors as needed, and clean the gutters to prevent water from backing up under the roofing panels. If you used wood siding, plan to re-stain or seal it every three to five years to prevent UV degradation and moisture absorption.
Safety during the build and maintenance phases is non-negotiable for a professional-grade result. Always use a GFCI-protected power source for your tools, especially when working in damp conditions during the foundation and framing phases. When working on the roof, utilize a safety harness and roof anchors to prevent falls, as even a 10-foot drop can result in life-altering injuries.
Keep a clean job site by removing scrap wood and sawdust daily, which reduces tripping hazards and the risk of fire. Store your lumber off the ground and covered to prevent warping, which makes the framing process much smoother and more accurate. By following these professional protocols, you will build a Utility Hub that provides comfort and security for generations to come.