
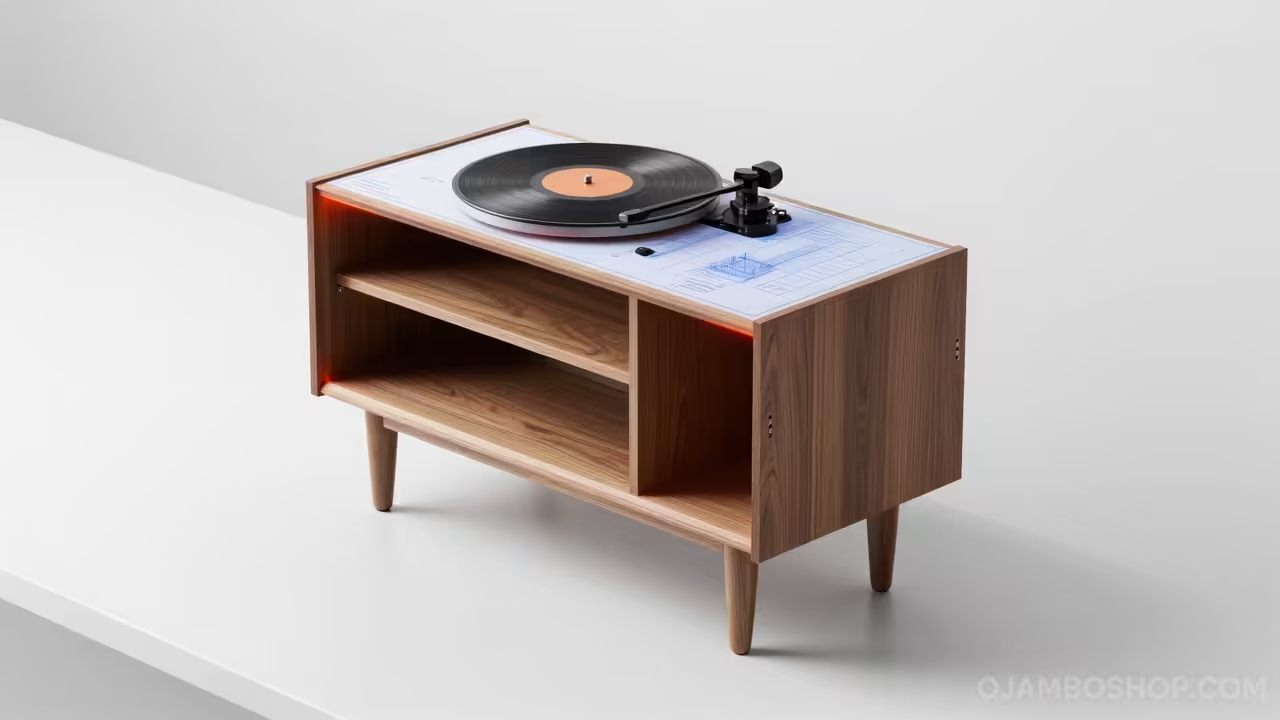
The resurgence of analog audio has brought the record player back to the center of the modern living room. A dedicated console does more than just hold a turntable; it serves as a functional piece of art that anchors a space. By building your own Mid-Century Modern record player console, you create a piece that perfectly fits your specific collection and equipment.
This project focuses on the clean lines, tapered legs, and functional minimalism that defined the 1950s and 60s. High-quality hardwood plywood and solid wood accents ensure that your investment in time results in an heirloom-quality furniture piece. Beyond aesthetics, the structural design addresses the specific weight requirements of vinyl records, which can quickly strain poorly constructed shelving.
Adding a custom furniture piece to your home provides a level of satisfaction that retail options simply cannot match. You have total control over the finish, the cable management, and the exact dimensions of your storage cubbies. This guide provides every measurement and technical detail needed to move from a raw sheet of plywood to a professional-grade finished console.
Quick Specs
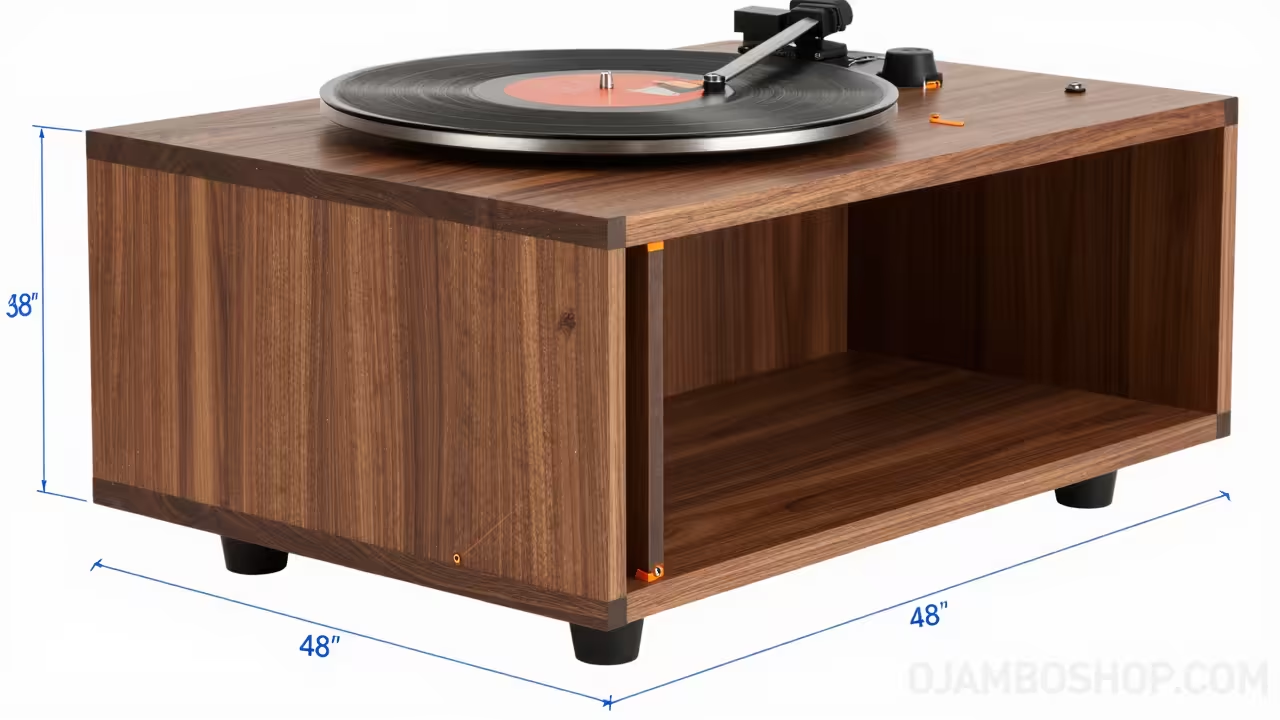
The overall dimensions for this console are 48 inches wide, 18 inches deep, and 30 inches high including the legs. This height provides an ergonomic surface for operating a turntable while standing comfortably.
The estimated cost for materials ranges from 250 to 400 dollars depending on the wood species selected for the project. Using walnut or white oak will sit at the higher end of that price spectrum.
This is a moderate difficulty project requiring intermediate woodworking skills and familiarity with power tools like table saws and pocket hole jigs. A patient beginner can succeed by following the layout strictly.
Expect a total build time of approximately 15 to 20 hours over a few weekends. This timeline includes the assembly phases and the necessary drying time for the wood finish and adhesives.
Materials and Tools
Lumber Requirements:
* One 4×8 sheet of 3/4-inch A1 Grade Hardwood Plywood (Walnut, Oak, or Birch)
* One 2×4 sheet of 1/4-inch Matching Plywood for the back panel
* 8 linear feet of 3/4-inch Solid Hardwood Edging or Edge Banding
* Four 8-inch Mid-Century Modern Tapered Wood Legs with angled mounting plates
Hardware and Supplies:
* 50 count 1-1/4 inch Fine Thread Pocket Hole Screws
* High-strength Wood Glue (PVA)
* 1-inch Brad Nails
* 120, 180, and 220 Grit Sandpaper
* Wood Filler matching your wood species
* Hardwax Oil or Polyurethane Finish
* Cable Management Grommets
Required Tools:
* Table Saw or Circular Saw with a 60-tooth finishing blade
* Miter Saw for crosscuts and leg adjustments
* Pocket Hole Jig
* Power Drill and Driver set
* Random Orbital Sander
* Clamps (at least four 24-inch bar clamps)
* Measuring Tape and Speed Square
* Woodworking Compass or Protractor
Technical Layout
The structural integrity of a record player console depends entirely on its ability to resist shearing forces and sagging under the weight of vinyl. A standard 12-inch vinyl record weighs approximately 0.5 pounds, meaning a full cubby can easily exert 50 to 75 pounds of static pressure on the bottom shelf. To combat this, the center vertical dividers are designed as primary load-bearing members that transfer weight directly from the top surface to the baseplate. These dividers must be perfectly square and glued into dados or secured with reinforced joinery to prevent the cabinet from racking over time.
The base of the unit features a reinforced sub-frame or thickened bottom panel to prevent the 3/4-inch plywood from bowing between the leg mounting points. By positioning the legs slightly inset from the corners, we distribute the downward force through the vertical gables rather than relying on the sheer strength of the fasteners alone. We also incorporate a 1/4-inch plywood back panel recessed into a rabbet. This back panel is not merely decorative; it acts as a structural diaphragm that squares the entire carcass and prevents side-to-side movement. This combination of vertical support and rear bracing creates a rigid box capable of supporting a high-end turntable and hundreds of records without vibration or structural failure.
Step-by-Step Instructions
Phase 1: Material Preparation and Rough Cutting
Begin by breaking down your 4×8 sheet of plywood into the primary components using a table saw or a circular saw with a straight edge guide. Cut the top and bottom panels to 48 inches by 18 inches, ensuring the grain runs lengthwise for the best visual appeal. Cut the two side gables to 14 inches by 18 inches. Finally, cut your internal vertical dividers to 13-1/4 inches by 17-3/4 inches to allow for the rear inset. Label each piece clearly on the edge with painter’s tape to avoid confusion during the assembly process.
Phase 2: Joinery and Pocket Holes
Set your pocket hole jig for 3/4-inch material and drill three holes on each end of the side gables on the interior faces. Drill matching holes on the vertical dividers where they will meet the bottom and top panels. If you prefer a cleaner look without visible holes, you can use a biscuit joiner or dowel jig instead. Ensure all holes are spaced at least 2 inches from the edges to prevent splitting. Vacuum all sawdust out of the holes to ensure the screws seat properly during the final assembly.
Phase 3: Edge Banding and Sanding
Apply wood edge banding to all exposed plywood edges before assembly to give the boards the appearance of solid wood. Use a household iron to activate the adhesive and a dedicated edge banding trimmer to remove the excess. Once the banding is secure, sand all panels starting with 120 grit and moving up to 180 grit. It is much easier to sand the internal faces now than it will be once the cabinet is fully assembled. Be careful not to sand through the thin veneer layer of the hardwood plywood.
Phase 4: Base Assembly
Layout the bottom panel and mark the locations for the vertical dividers. For a balanced look, place two dividers 14 inches from each outer edge, creating a large center cavity and two smaller side storage areas. Apply a thin bead of wood glue to the bottom of the dividers and screw them into place from the underside of the bottom panel. Check for squareness constantly using a speed square. Wipe away any glue squeeze-out immediately with a damp cloth to prevent finishing issues later.
Phase 5: Attaching Side Gables and Top
Attach the outer side gables to the bottom panel using glue and pocket screws. Position the top panel over the entire assembly and align the edges so they are perfectly flush with the sides. Secure the top panel by driving screws through the pocket holes in the gables and internal dividers into the underside of the top. Using clamps during this phase is essential to keep the carcass tight and square while the fasteners are driven. The structure should now be a rigid box.
Phase 6: Back Panel Installation
Measure the rear opening of the cabinet to confirm the dimensions for the 1/4-inch back panel. Cut the thin plywood to size and use a drill to create 2-inch cable management holes in the sections where electronics will be housed. Apply a small bead of glue to the rear edges of the carcass and secure the back panel using 1-inch brad nails spaced every 6 inches. This panel will instantly pull the cabinet into a perfectly square orientation. Allow the glue to cure for at least four hours before moving the unit.
Phase 7: Leg Brackets and Mounting
Flip the cabinet upside down on a soft surface like a moving blanket to protect the top finish. Position the angled leg mounting plates approximately 2 inches in from the front and side edges at each corner. Pre-drill the holes for the mounting screws to prevent the plywood from delaminating or cracking. Screw the plates firmly into the bottom panel and then thread the tapered wooden legs into the plates. Ensure all four legs are tightened evenly so the console sits level on the floor.
Phase 8: Face Framing or Finishing Edges
If you did not use edge banding in Phase 3, you may now apply 1/4-inch solid wood lath to the front faces using glue and pin nails. This provides a more durable edge that can withstand the frequent movement of record sleeves. Use a flush-trim router bit or a sharp chisel to make the solid wood trim perfectly even with the plywood surfaces. Fill any nail holes with a high-quality wood filler that matches your wood species. Sand the entire front face with 220 grit sandpaper until the transition is seamless.
Phase 9: Final Sanding and Cleaning
Perform a final inspection of the entire piece for any scratches, glue spots, or rough edges. Sand the entire exterior with 220 grit paper, following the direction of the wood grain. Remove all dust using a vacuum followed by a tack cloth or a microfiber rag dampened with mineral spirits. Ensuring the surface is pristine at this stage is the difference between a DIY look and a professional finish. Avoid using water to clean the wood as it can raise the grain and require more sanding.
Phase 10: Applying the Finish
Choose a finish that highlights the natural beauty of the wood, such as a hand-rubbed Danish oil or a modern hardwax oil like Rubio Monocoat. Apply the finish in a well-ventilated area using a lint-free cloth or a high-quality foam brush. Follow the manufacturer’s instructions for dry times and apply a second coat if a higher sheen or more protection is desired. Once fully cured, usually after 24 to 48 hours, move the console into its final position and begin loading your audio equipment and vinyl records.
Hardware and Material Comparison
| Material Type | Pros | Cons | Best Use |
|---|---|---|---|
| Walnut Plywood | Stunning grain, high value | Expensive, thin veneer | High-end living rooms |
| Birch Plywood | Affordable, very strong | Plain grain, needs stain | Painted or budget builds |
| Solid Wood Edging | High durability, seamless | Harder to install | Heavy-use front faces |
| Iron-on Banding | Very easy to apply | Can peel over time | Low-impact side edges |
| Hardwax Oil | Easy to repair, matte | Less moisture protection | Record consoles |
| Polyurethane | Maximum protection | Plastic look, hard to fix | Table tops and desks |
Common Mistakes
One frequent error is failing to account for the thickness of the plywood when calculating internal dimensions. A 3/4-inch sheet is often actually 23/32 of an inch, which can lead to gaps if you rely solely on theoretical measurements. Always measure your actual material thickness before cutting your joinery.
Another mistake is ignoring the weight distribution of the vinyl records. If you place the legs too far toward the center, the outer edges of the cabinet may sag or the unit may become unstable. Ensure the legs are positioned to support the vertical gables directly to maintain long-term structural integrity.
Builders often skip the sanding steps between finish coats. For a professional-grade feel, you must lightly sand with 320 or 400 grit paper after the first coat of finish has dried. This removes any dust nibs or raised grain and results in a glass-smooth surface that feels expensive to the touch.
Maintenance and Safety
Pro-Tip: When building furniture meant to hold heavy loads, always use a combination of mechanical fasteners and PVA wood glue. While screws hold the pieces together during the drying process, the chemical bond of the glue is actually stronger than the wood fibers themselves. For ultimate longevity, use a fine-thread screw for hardwoods to prevent splitting the internal plies of the plywood.
Always wear a high-quality N95 respirator or a P100 mask when sanding hardwood plywood. The glues used in plywood manufacturing often contain formaldehydes or other chemicals that should not be inhaled. Additionally, ensure your workspace is clear of tripping hazards when moving large 4×8 sheets of material.
To maintain your console, avoid placing it in direct sunlight which can cause the wood to fade or the veneer to crack over time. Use a damp microfiber cloth for dusting and avoid harsh chemical cleaners. If you used an oil finish, you can easily refresh the look every few years by applying a light maintenance coat to the top surface.